Posts in DIY
Sarah Hearts: 12 Bloggers of Christmas

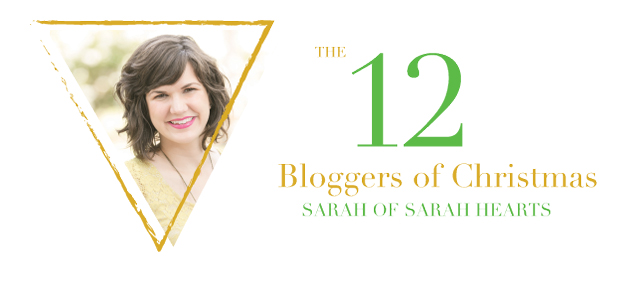
On the fifth day of Blogger Christmas, my true love gave to me: Sarah Hearts! Welcome to the annual tradition on Pars Caeli where we cherish twelve bloggers right up to Christmas. Sit back and enjoy their stories, favorite Christmas traditions, and holiday projects, too. Let's spread the love around in big heaps. As a new twist to the tradition, each blogger will be throwing out some love to one of their favorite makers/creators/writers!

Join me every day to see if (you or) your favorites are featured!

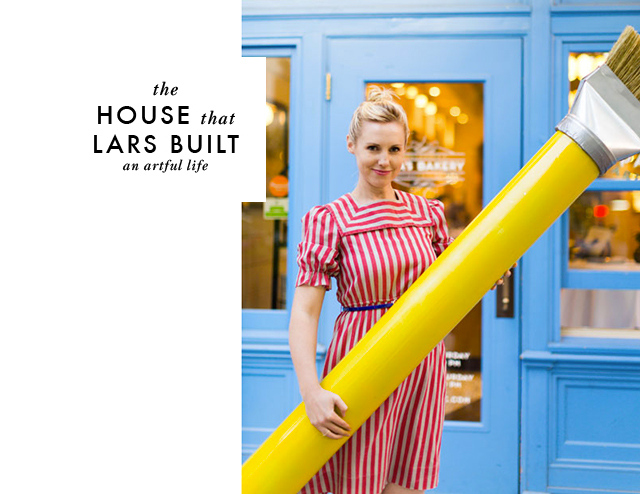
Today meet Sarah who crafts, cooks, designs, and invites all of us to join along. Her Meet & Make evenings through West Elm always look divine. Sarah Hearts is filled with desktop wallpapers and free printables that you'll want to check out as well.

PC_2015_12bloggers_sarah.jpg
PC_2015_12bloggers_Q1.jpg

My favorite holiday tradition is baking tons and tons of Christmas cookies for friends. I love surprising them with an assortment of freshly baked treats!

PC_2015_12bloggers_Lulu_4.jpg

So much! I’ll be starting the new year with a creative assistant so I’m so excited to have more hands on deck and to be able to share more great DIY projects. Look for a few new mini series in 2015 as well as big plans for Meet + Make, the local creative workshops that I host at West Elm.

PC_2015_12bloggers_Q2.jpg

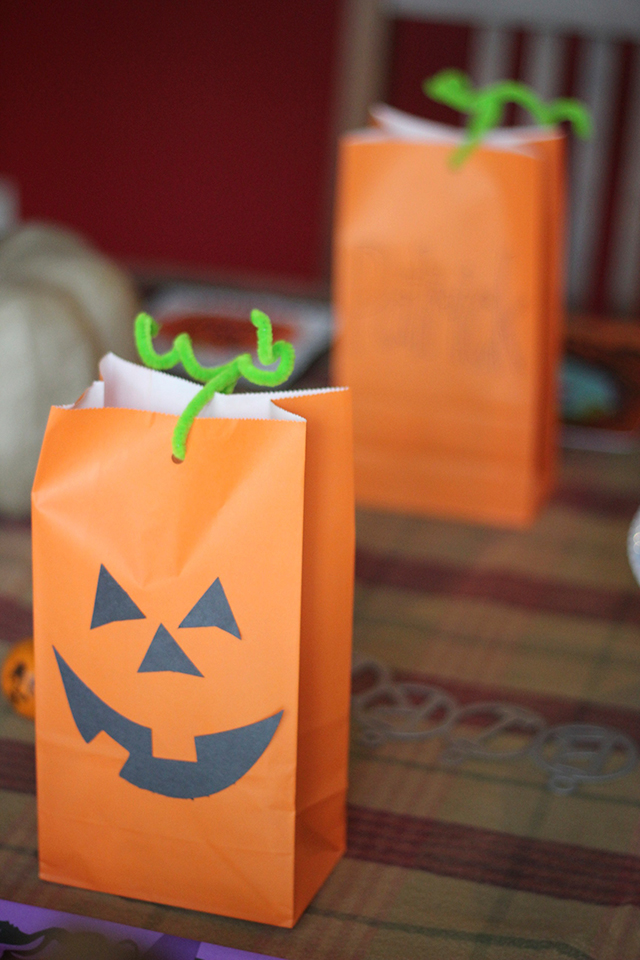
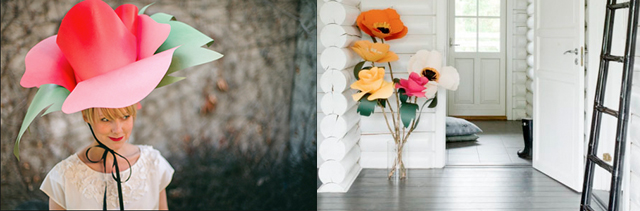
One my favorite Christmas posts is my printable wine bottle tags. They are an easy way to dress up a bottle of wine and make an instant (and festive) host/hostess gift.

PC_2015_12bloggers_Q3jpg

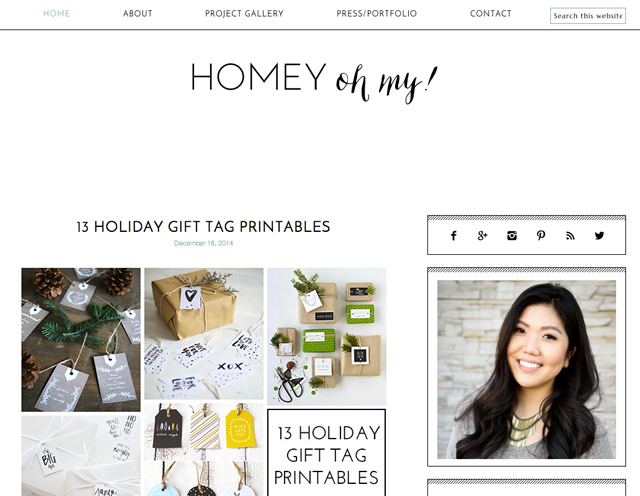
Amy from Homey Oh My! is just killing it! She puts out fresh, creative projects every week and just when you think she couldn’t possibly make anything more creative—she does! Love her!

Thanks so much, Sarah, for introducing me to another great blogger and site! I'm always on the hunt for talent to follow and to learn from. And thanks for all of your inspiration!

Join me tomorrow to celebrate the coolest mom on the interwebs!

xoxo, MJ

Frock Files: 12 Bloggers of Christmas

Four swans a swimming! On the fourth day of Blogger Christmas, we move to Frock Files and visit with the creator of the masterful photography and recipes, Joy. During this annual tradition on Pars Caeli, I'll be celebrating twelve incredible bloggers and sharing some of their beautiful projects. I know you'll enjoy their stories and their favorite Christmas traditions. And-this year-we're spreading the love around in big heaps by throwing out some love to more of our favorite makers and writers! Keep coming back every day to see if (you or) your favorites are mentioned!

Joy and I have collaborated on quite a few fun series like Turn It and Pennies for Love. I've been so blessed by her support, creative sensibility, and advice.

PC_2015_12bloggers_Joy.jpg
PC_2015_12bloggers_Q1.jpg

On New Year's Day, my family gathers together first thing in the morning to celebrate with a traditional meal of mochi soup, which consists of gooey mochi rolled in roasted soybean flour called kinako (it tastes like peanut butter!) and dropped into a mild broth. I'm a fan of having all kinds of mochi for New Year's, as evidenced by the very first post I published in 2014.

PC_2015_12bloggers_Lulu_4.jpg

What's up on your blog/website/brand for the new year? I have something big brewing with Melissa of Lulu the Baker. Suffice it to say that it will involve our favorite city, a lot of love, time, effort, and celebration.

PC_2015_12bloggers_Q2.jpg

Last New Year's Eve, I posted a roundup of moments from 2013. I love that I'll be able to look back on that post and remember what that year held for us. http://frockfiles.com/2013/12/31/this-was-2013/

PC_2015_12bloggers_Q3jpg

Kim of DLK has demonstrated such grace, heart, and strength this year. She's showing me what it means to move forward with determination and that's a lesson I'll carry with me always.

I'd echo that sentiment completely, Joy. Big hugs to Kim! I think I have to make some mochi with the kids over break - look at those photos!

Join me again tomorrow night for a peek into the traditions of another designer who's had a spectacular 2014.

xoxo, MJ

Lulu the Baker: 12 Bloggers of Christmas

On the third day of Blogger Christmas, my true love sent to me all of Lulu's sweet and savory goodies! Welcome to the annual tradition on Pars Caeli where we celebrate twelve incredible bloggers and show off snippets of their creations. Unflappable in their tenacity, determination, and imagination, these artists return again and again with posts that amaze all around.

Grab your coffee and get your Pin It button ready. Melissa of Lulu the Baker has dozens and dozens of incredible recipes for every occasion. She also has a plethora of holiday projects. I've been so lucky to collaborate with her on a number of projects, and I'm so excited for some of the big happenings for her in 2015 - not to mention the new baby she delivered and new house she built in 2014!

PC_2015_12bloggers_Lulu_5.jpg
PC_2015_12bloggers_Q1.jpg

I love making cookies for Santa. I feel like at this point in my life, I should pick something more mature than that, but I just love Christmas cookies. My family always makes the same 4 or 5 kinds of cookies, and it just wouldn't be Christmas without them!

PC_2015_12bloggers_Lulu_4.jpg

I have some big projects I want to blog about in 2015, mostly stuff around the new house (the basement! the garden! the mudroom! my office!). And I've been working and working and working on a book proposal, and even though I've said this in past years, 2015 is the year I'm gonna make it happen! I've actually made lots of progress on it, and I'm right on the brink of making big things happen--hooray!

PC_2015_12bloggers_Q2.jpg
PC_2015_12bloggers_lulu_3.jpg

Chewy Gingerbread Cookies with Double Chocolate Chunks--I took everyone in my family's favorite Christmas cookie, the Molasses Crinkle, and added two kinds of chocolate chunks. And wow!! It's almost sacrilegious to say this, but they're even better than before!

PC_2015_12bloggers_Q3jpg

There are so very many bloggers that I admire. Everybody is so hardworking and generous and just lovely. Right now, I'm particularly enamored of Melanie Blodgett from You Are My Fave because she decided to take time away from blogging.

I think every blogger considers stepping away from blogging when life gets overwhelming, but it is so hard to actually do it! We all worry about losing readers and losing opportunities and back-sliding, and we think that if we take a break, even if it's for a great reason like moving or having a baby or to maintain your sanity, that we'll miss out. So I'm always crazy impressed when a successful blogger takes a big, legitimate break. And Melanie is just so talented, you can't help but love her!

Congratulations Melissa! Can't wait to follow along with all of the house updates over on Better Homes and Gardens, too.

Tomorrow's blogger is my mochi hero. Can you guess?

xoxo, MJ

This Heart of Mine: 12 Bloggers of Christmas

It is now an annual tradition on Pars Caeli to celebrate twelve incredible bloggers and show off just some of their creations. Unflappable in their tenacity, determination, and imagination, these artists return again and again with posts that amaze all around. Sit back and enjoy as we talk about Christmas traditions and projects and send out love to another creative!

Today I'm delighted to shine a light over to Amy of This Heart of Mine. Amy has top notch photography to highlight the most delightful recipes and crafts. She's behind so many of the amazing DIYs you've seen on Design Mom, and I want her to shout from the rooftops all the great projects she makes because... she's just that good.

PC_2015_12bloggers_AMy.jpg
PC_2015_12bloggers_Q1.jpg

I love to sit in the dark with just the tree illuminated, listening to my favorite Christmas songs (quietly) and drinking something warm. It's so peaceful. Also, I love to bake and give the baked goodies to friends.

PC_2015_12bloggers_Q2.jpg

I liked this car tree ornament because I waited almost a whole year to post it. It was right after Christmas the year before when I noticed the perfect car in my son's collection and snagged it for use the following Christmas. I love it because it's so old-school, feel-good-Christmas looking.

PC_2015_12bloggers_Q3jpg

To MJ. MJ is so kind and thoughtful and excited about whatever the project. She works hard and manages to be super supportive of others. Working with her is pleasure and a treat. Plus, her Illustrator skills are enviable. So thankful for her and her friendship.

Awh. Thanks, Amy. I promise I didn't pay her to say that one. Amy is making ornaments and bread and all kinds of amazing this holiday season. Pop on over to see all that This Heart of Mine creates.

xoxo, MJ

P.S. Tomorrow's special guest makes the season, and every day, a tasty treat!

Create Your Own Christmas Tree with Painted Glass Balls
PC_glassornaments.jpg

It is the season. Frenzy has set in around here. Not full-on panic, but excitement, merriment, forgetfulness, and binge eating at weird hours of the day. Deep breaths. I am excited to say that we have whipped up a handmade tree that I am all sorts of in love with.

It's like Pars Caeli reincarnated in tree form. My oldest daughter and I went shopping for the supplies together and selected the palette which ended up looking a whole lot like this one here. It's the first time I've gone non-traditional, and the colors pop with the festivity of the season.

If you're looking to create a themed tree or something unique, try this easy method that is friendly to ages 3-133 as long as everyone is careful with the glass ornaments!

PC_glassornaments_1.jpg
PC_glassornaments_2.jpg
PC_glassornaments_3.jpg
PC_glassornaments_4.jpg
PC_glassornaments_5.jpg

These are magical in their final form, even better than I had hoped. And I can't wait to show them all to you on the tree, but, first, I have a few more additions to show you to our that include a few super easy projects!

Check in tomorrow to see the best ever pink and orange ornaments for our fanciful tree.

Also, starting later this week, a return of one of my favorite times of year! The 12 Bloggers of Christmas will be sharing with you their favorite holiday traditions and projects/recipes that have kept them excited about the holidays in the midst of frenzy! I'm delighted to have their personalities here to share with you.

xoxo, MJ

DIY Photo Bow
PC_photobow_1_1.jpg

Whether you're an early shopper, almost done with your Christmas lists, or a timely purchaser (see how positively I spun that for folks like myself?) waiting until the big sales hit the shelves, now is the perfect time to get your creative wrapping ideas together.

A present wrapped with extra attention and fine details speaks to the recipient and says that they are different and special. Such a lovely gesture, right?

How about making a bow that is completely personalized with photographs of the giver or the receiver or even special places visited together? Photo bows are easy, and they can make you look like a super thoughtful crafting whiz in no time.

PC_photobow_2.jpg

I created these bows for grandparent presents! For the first, I created a montage of photos of my son from this last year. The finished bow is colorful and a scrapbook unto itself.

For the second, I used all of the same family photograph. This finished bow lent itself to a more sophisticated color palette, and it allows you to coordinate bow to paper a little bit easier.

Typically I'm a fine ribbon kind of gal, but these bows inspired me to learn how to make a paper bow. I was a little shocked by how quickly they come together.

First, in a photo program, align strips of photographs. I printed all of mine on one sheet of paper so I made each strip .75 inches wide to fit on the page.

You'll need three long strips, three medium strips, two short strips, and one mini strip.

PC_photobow_3.jpg

Cut these out. If you have a great stapler, grab that to create your bow. If not, strong craft glue or hot glue work really well to create a neat, compact look for your bow.

To form each row of the bow, simply create a loop that crosses on itself. You can find a great photo guide over on Milomade that explains this step clearly.

PC_photobow_4.jpg

Make loops out of all of your strips except the min strip which will become a circle that goes on the top to cover staples or glue.

The largest three are set equidistant from one another on the bottom. Then the same star shape is created with the medium loops. The small strips will create a cross once attached. And finish off with the mini loop in the middle.

PC_photobow_6.jpg
PC_photobow_5.jpg

I can imagine these used on anniversary presents with special wedding photos on them. Or used to show an ultrasound photo to announce a new baby to relatives and friends!

Create a wrapping that means something to you and your loved one - make a photo bow!

xoxo, MJ

Paper Christmas Trees
PC_papertrees_4.jpg

For this month's project, I created these fun message Christmas trees that shout out the joy and revelry of the season! I've been using my drawing tablet a ton (for a new, very special project yet to be revealed), and I want to experiment with creating my own text. So using my tablet, I wrote out the text and made an image of it. I wanted the words to hang on the tree like an ornament or garland might.

Within Illustrator, I created an altered a three-dimensional tree (from the Cricut Design Space offering) to have more of a hook end to each branch. These little trees make great stands for mini garlands, uber tiny ornaments, or in this case, happy phrases that have you hanging on every word. :)

PC_papertrees.jpg

Silver and gold and white fit in every room, every decor. Using metallic and glittery paper in cardstock weight, you have trees that can stand on their own and make super additions to the mantle and the sofa table.

PC_papertrees_3.jpg

The Merry Christmas sign can be hung on the branches from the curves of the letters. They could also be used as table confetti around the trees or adapted to read "Merry, Merry."

PC_papertrees_2.jpg
PC_papertrees_5.jpg

I am a Cricut affiliate, and I did receive a machine to make these projects. And, it's been fun. Thanks to all who have thrown their support and help along the way. I hope that you'll enter our giveaway and make along with me using the Cricut Explore. If you're a crafter, it's incredibly handy to bring dreams to reality in a really easy, efficient way.

xoxo,

MJ


A free printable joke calendar

We took a quick trip to Michael's today, and we were greeted by the countdown sign: 43 Days until Christmas. I always have mixed feelings about getting into the Christmas spirit too early, but I do admit that the decorating, the shopping and making, and the glimmer in my children's eyes... well.

So we turned our anticipation into a fun project. You know I love a good corny joke, and we made up a whole batch to put into an Advent calendar.

I'm delighted to partner with Steph from Modern Parents Messy Kids to offer a great free printable countdown with jokes for every day! Yes, holiday-themed sillies to uncover for a quick laugh, for school lunches, for bedtime giggles.

I might be a little excited about it!!

We made ours into the shape of a tree to serve a dual purpose of holiday decor and joke teller. The printable comes in two parts: pages of colorful, numbered ornaments paired with 24 jokes to attach to the back of each. Run on over to MPMK to download, pin, and share yours!

Are you ready to break out the holiday spirits?

xoxo, MJ


Snowflake toppers
PC_snowflaketopper_2.jpg

Even though we're in the throws of October and fall, I wanted to show you a super cute gift topper that can transition us right to the winter holidays. As a part of this month's Cricut Design Space Star challenge, along with my Lucky 13 Team Members, I set out to create some Holiday decor and gifts that show off sparkle.

Lucky13_Sparkle.jpg

You need to click around to their posts and see some of the great creations this month, from window clings to pallet creations to Advent calendars and party hats.

1. The Sweet Escape Glitter Cut Out Card

2. Pretty Providence Nativity Board

3. Petit a Petit + Family Winter Wonderland

4. Andrea's Notebook Advent Countdown

5. Simply Sadie Jane Corn Tassel Banner

6. Pars Caeli Snowflake Toppers

7. East Coast Creative Geometric Christmas Ornament

8. Suburban Bitches Let It Snow

9. That Girl Katie Party Hats

10. Sew Creative Let It Snow Recycled Pallet

PC_snowflaketoppers_1.jpg

Since I love the art and process of paper snowflakes (remember these snowflakes that adorned the tree last year?), I wanted to create a project that utilized some of the amazing images that Cricut has in their design space. You don't need to recreate the wheel when there's beauty before you. These ornate snowflakes are even made to be three dimensional.

I used glitter paper, some wood beads that I'd painted gold, pinecones, and twine to blend Holiday Sparkle with the natural beauty of the season.

You only need one 12"x12" paper for a set of six three-dimensional snowflakes. It's amazing the detail that the Cricut can handle. These are really mini works of art when complete.

PC_snowflaketopper_4.jpg

They make a fun banner strung with the wooden beads. And the metallic tones add a fresh touch to the traditional holiday decor.

PC_snowflaketopper_3.jpg
PC_snowflaketoppers_5.jpg

Cricut recently something really fun for the Cricut Explore! You can now Print and Cut. Print any image on your printer and then cut it with your Cricut Explore. Oodles of possibilities!

xoxo, MJ

**I did receive a Cricut machine for free and may receive prizes in exchange for winning projects. I am under consideration for a prize with Cricut Design Space Star. All opinions are my own.

Halloween Games and Crafts
PC_Halloweenparty.jpg

'Tis the season for ghoulish delights and ghastly scares. But sometimes children (and adults) enjoy the light-hearted festivties rather than the fear-inducing elements of Halloween. We celebrated my 5-year old son's birthday, and I put together a few hours of crafts and games that are easy and sure to delight! The beauty of all of these is that they are simple, use mostly what you have around the house, and your kids can even help to create them.

PC_halloweenparty_0.jpg

A twist on a classic - Halloween Bingo! Try using candy corn to mark off the Halloween objects and characters. Even the children that don't shout Bingo when with their extra treats on the board! My favorite Halloween printable board is from The Artsy Fartsy Mama. It has beautiful illustrations, and it's easy enough for our 5 and under crowd to understand!

How about a retake on the classic ring toss? Sometimes Creative had the best idea to use witch's hats! Since this was an afternoon celebration, the room was dark enough to show off our glowstick rings that made the tossing even more fun (and not dangerous for any by-standers). This would be really fun using glow in the dark (sorry, we are all about it these days) paint or tape on the hats, too, and playing it as a night-time game with the older set!

The easiest jack o'lantern treat bags can be made with an orange sack, a hole punch, some black paper, and a green pipe cleaner for the curly stem. We stuffed ours with candy, Halloween stickers, and a special ghostly flashlight! I used the same face shapes for all of the bags so it was a quick assembly line of glue to get them all in order.

PC_halloweenparty_2.jpg

An easy craft for little hands to master? Bat sitters. These are construction paper, paint, pipe cleaners, and a tp tube. Buggy and Buddy made these adorable hanging bats, and we used the same process! To make the creation go easier for the children, I painted the tubes beforehand. I also glued on the eyes and cut out the wings. So, it was their job to attach the wings, and thread through the bat legs for a final winged character.

Talk about using items found around your house... how about a little pumpkin and ghost bowling with toilet paper? I saw these all over Pinterest and had to give it a try. Helpful hint here: have a real pumpkin with some weight to it to toss at the ghosts because that solid three-wide stack of toilet paper is a pretty solid force to knock down. We changed the game to a throw rather than a bowl so we could watch the the tower come down.

PC_halloweenparty_4.jpg

Hanging ghosts and jack o'lantern clementines and cuties are fun to have around (party or not). I've found myself drawing on our oranges even days after the party as a fun way to add the joy of the Halloween to the kids' lunches. In fact, I even got this from my 5-year old:

"Mommy, are you really going to draw on everything?"

"Yes. Yes, I am."

PC_halloweenparty_5.jpg

And why should the fun stop when the party ends? We needed some fun thank you cards after the celebration, and I thought these black cats from Parents Magazine were so clever. We made one the way the free printable (!) shows you and the other, we turned its head so that it could easily fit into an envelope. These are so fun to sit around on tables and shelves. If you run out of googly eyes (like we did) use foam stickers to make your cat have glowing eyes!

PC_halloweenparty_6.jpg

We loved having our friends over to create and play! It's a wonderful way to celebrate Halloween. You can put all this together for a playdate this weekend!

Our costumes are ready. We have a ninja turtle, a Harry Potter character, Dorothy, the Scarecrow, and lucky me is Glenda the good witch this year. How will you be celebrating Halloween this year?

xoxo, MJ

Halloween Hanging Ghosts
PC_hangingghosts.jpg

Ready for a really easy Halloween decor with high impact? Let's make some Halloween Hanging Ghosts. These are an awesome addition to your party and interior decorations for the season.

Inspired by these twirling spiral ghosts, I created these ghoulish creatures that are now hanging from chandeliers and pendants all over our house.

I love how simple they are to create from cardstock, scrapbook paper, or posterboard. You need something that will give you extra weight so that gravity can do its thing.

PC_hangingghosts_1.jpg

You can cut the design with scissors or upload this ghost file on to your Cricut Explore. I mass produced these ghosts so that we could have some hanging from the chandelier in the dining room and the kitchen pendants. These were created from 12" x 12" white scrapbook paper.

This swirl can be transformed into candy corn stripes or the twirly stem of a pumpkin, too! The best part about hanging ghosts is that they catch the wind easily and spin in the air. I attached ours to the ceiling lights with invisible beading string for a fun "magic" appearance.

Have you decked out your home for Halloween yet?

XOXO, MJ

The Great Pumpkin Round-Up and a Glow-in-the-Dark Pumpkin

Pumpkin decoration has become a hobby unto itself. Between painting and carving and dyeing and covering, the pumpkin shape is quite the autumnal muse.

This year we purchased our pumpkins early, and before we carve them, we're having some glow-in-the-dark fun with sllly expressions. These faces have the jack-o-lantern charm. I love how they add the festive fun of Halloween during the daylight and some of the freaky during the dark.

I'm over at Classic Play showing you how to make these glowing faces as well as giving you only the best of the best for The Great Pumpking Round-Up.

How are you decorating your pumpkin this year?

XOXO, MJ

3 Steps to Create an Art Caddy for Kids
PC_artcaddy_2.jpg
PC_artcaddy.jpg

Sometimes you run across a loved object and know that it's just perfect. But, you can't quite put your finger on what it is or what it will be perfect for...

This is.... a chicken feeder, used on farms, and it's seen a lot of good use and has an interesting patina to it.

So, I picked it up at a bargain price.

And we have repurposed it for the perfect art caddy for the kids! It fits in so well with my goal to live in every room.

In every room of our house (save the bathrooms), we have art supplies. We also, of course, have an art room where all major art projects happen. Sometimes my adventurous children want all of the supplies wherever they may be, inside or out.

We've always enjoyed the joy of spontaneous and mobile creation. I have many happy memories of bobbling toddlers and determined preschoolers walking around with buckets of crayons, as my daughters or my son would decide to plop anywhere and draw.

PC_artcaddy_1.jpg

Now we have a chicken feeder converted to art caddy extraordinaire. Here's what every great caddy needs:

1. Portability:

Whether it's a bucket or a shelved unit like ours, a great caddy needs to be easily handled in small hands. Sturdy buckets with strong handles work well indoors and out. Ours is a big piece so the handle bar at the top is helpful, as well as felt pads under the caddy to allow even small people to push this one easily from room to room on our floors.

I love seeing one of my kids creating, with the caddy pulled up right alongside.

PC_artcaddy_3.jpg

2.Select the best of the best supplies:

When children are young artists, they may focus on one medium more than another. Until preschool, my kids were all about crayons. Now everyone has their sophisticated choices for what they want to use.

Our caddy currently holds:

  • Scissors with many different edges
  • Hole punches of various shapes
  • Glue sticks and white glue
  • Tape
  • A ruler
  • A bucket of colored pencils
  • A pencil sharpener
  • A stack of small notepads (always ready to be doodled upon)
  • Three crayon buckets (now that everyone is older, we sort them by primary colors for learning and ease of use)
  • A pack of markers
  • 3 small packs of crayons (great to grab if you're headed to the car)
  • Finger paints
  • Stapler and staple remover

We rotate the caddy supplies in and out as favorites come and go.  What's most used in your house? Make sure your caddy is well stocked for a great invitation to create.

PC_artcaddy_4.jpg

3. Make storage within the storage.

The dollar section at Target or any dollar store have great options for small storage. Keep old Easter baskets, sturdy gift boxes, and even plastic containers to help your caddy stay clear of clutter.

It also allows for easy sharing. One child can grab the bucket of gluesticks and basket of scissors to create out of construction paper, while another takes the box of markers and a hole punch for a birthday card.

___________________________________________________________________

Such a beautiful and clutter-free caddy might just inspire the grown-ups in the house to create and to bring that sense of spontaneous art making anywhere you go!

xoxo, MJ

Fan Girl Friday: The House that Lars Built
Now, bloggers are a funny breed because we work on projects and then we force people to look at them by shouting it from the social media rooftops. By putting ourselves and our work out there we are subjecting ourselves to judgment, for better or for worse.

Brittany, The House that Lars Built

After the article which featured Brittany as one of a select number of bloggers in the New York Times, Brittany is the lady in the spotlight. Can I say that I loved her first? Actually she's well loved all over and has been for quite a while through her on point aesthetic and beautiful creations.

She sums up her work on The House That Lars Built like this:

CREATE: I'm first of a creator. I create crafts, style them, design products and interiors, write, illustrate.  

PUBLISH: This blog is a great platform for featuring your work as well. Let's talk about how to make that happen!

AMPLIFY: Want your word to spread? Let's talk about how to take it to the next level with my social media platforms.

And she does all those things, really well, and also these things:

The incredible Kentucky Derby hat that won on the Today Show. These larger than life, bigger than your imagination flowers.

The fun fruit balloons and the Language of Flowers series.

I click over to her blog for the beauty she regularly posts and creates. She's so versatile - seemingly talented in every arena. And she's totally humble in person, too.

I don't need to shout out the list of high-end magazines that have featured her or list the uber designers with whom she's worked, but I can say that I am always intrigued to see her next post. She keeps challenging herself to try something new and styles to perfection.

I don't know how she gets it all done...but I do know that she's moving into her own studio space, and I know Brittany will have more beautiful projects to share.

Here's a snippet of her from the interview in the NYT responding to blogger burn out:

Perhaps one day I might get burned out to the point where I don't want to do this anymore. But again, I think that's a part of life. There are natural transition points in which we tackle something new while letting go of the old. I don't think it's something to feel guilty about. I do think it's something we should be aware of. I don't think we should unnecessarily overwork ourselves. I do think we can work smarter not harder. Every occupation and job goes through this period self-evaluation and hopefully it ends with what's best for you and your family.

Perfect! Thanks for all of your tireless work and attention to detail and design, Brittany.

I'm a total fan girl.

Blogger pals, are you burnt out? Do you think this job leads itself more naturally to burn out?

xoxo, MJ


We're Going on a Leaf Hunt Wreath with Classic Play
PC_fallwreath_1.jpg

Celebrating fall for all the right reasons - the smells and the flavors, the sounds and the feel. I created this easy Leaf Hunt Wreath with my youngest last week, and I'm delighted to be over at Classic Play sharing a group of mini projects that ended in this.

We're still working out the kinks in the back-to-school schedule, trying to fit in all that we'd like to do without becoming totally exhausted. Sometimes a group of smaller projects works best for us... like this one. Over a series of days, we went on a hunt for fresh fallen leaves, we sorted and pressed them, we admired and painted them, and then we created the indoor fall wreath to show off all of our work and time together.

PC_leafwreath.jpg

The final creation is a colorful addition to your home's fall decor, and your little ones can feel good about their time spent, over many days, hanging out with you!

Happy fall!

xoxo, MJ

If you're looking for more great ideas, check out this easy pumpkin decoration and follow our board for all your fall and Halloween brainstorms!

Flower Lights: A Floral Affair
PC_cricut_floralaffair_PIN.jpg

Lights. Miniature lights, strings of lights, twinkling lights. No matter the season, to me they say, "there's a party going on right here." For this month's Cricut Design Space Star challenge, I wanted to work with light to make a unique party addition.

PC_cricut_floralaffair_2.jpg

Beginning with a 20-count pack of battery-operated lights, I decided to play with the Something Blue idea for a special bridal shower or an anniversary dinner party. Blue flowers, with a few exceptions, are tough to find, so we made some.

To create your own, you'll need a light strand, hot glue gun, vellum sheets, and scissors or a cutting machine (like a Cricut!). I created some petal shapes in three sizes, but all within an inch of one another.

PC_cricut_floralaffair_3.jpg

I uploaded the .svg file to the Cricut Design space. I set my Cricut to cut the vellum petals. I love the translucency of the layers of the vellum in light. To assemble, begin with the inner-most layer and glue the petals into a curling pattern around the center bulb.

PC_cricut_floralaffair_5.jpg

A really simple project, and since these are battery-operated, they sit nicely around a table setting, or down the center of a table, displayed around a cake, or even strung to add life to a boring corner.

PC_cricut_floralaffair.jpg
PC_cricut_floralaffair_4.jpg

Another Lucky #13 Cricut Challenge is coming your way, friends! This time our team created wedding and party decor. And I do have to say, I love all the possibilities!

Happy weekend, friends! Check out all of these wonderful projects from my teammates...

Lucky13_floral-affair.jpg
  1. The Sweet Escapes Floral Cake Topper
  2. East Coast Creative’s Photo Backdrop
  3. Andrea’s Notebook Floral Pinwheel
  4. Sew Creative’s Paper Bridal Bouquet
  5. Pars Caeli’s Flower Lights
  6. Petit a Petit and Family’s Birthday Kit
  7. Suburban Bitches’ Floral Chandelier
  8. Pretty Providence’s Simple Elegant Thank You Cards
  9. The Sweet Escape’s Wedding Cake Topper
  10. That Girl Katie’s Floral Vases
  11. Sew Creative’s Flower Girl Barrettes
  12. Simply Sadie Jane’s Flower Stamped Cake and Flower Party Hats

Also...

Cricut has just announced the second phase of the Cricut - I Made It! contest and this time they’re awarding one winner their own Make it Now™ project line to be sold in Cricut Design Space™!

To help create your line, Cricut will fly you to their headquarters in Salt Lake City to work side-by-side with their design team.  Then you and a guest will enjoy an all-expense paid stay at the Grand America Hotel – a luxury resort in Salt Lake City, home to the best skiing in the world.

The winner will be featured on Cricut.com and every time a Cricut user purchases your project, you’ll earn money. Cricut will even help with your publicity.

To enter the Cricut - I Made It! contest, all you need is a photo of an original project. You can upload up to five photos (which can be five individual projects or multiple photos of one project).

You have until September 30th to enter.  What are you waiting for? It’s time you Made It big! Head to cricut.com to enter today. 

Ali's Birthday Extravaganza: the place cards

We partnered with Tiny Prints to bring you these projects. We were compensated for this post, but all ideas and opinions are our own.

**Ths post is meant to reflect a celebration of life. We honor and remember all those who lost their lives in 9/11. We will never forget.

PC_Ali's-Birthday-Tour.jpg

Kids aren't the only ones who deserve incredible birthday parties. All this week, my Endless Summer Project gals - Alexandra HedinAmy of This Heart of MineJennifer of Classic Play, and Melissa of Lulu the Baker, and I have been throwing a glam-tastic party for Ali! She is the weeknight party girl so we had to go big. I mean, this girl is a big deal. Check out her TV spot, highlighting some of the details from the party.

We were inspired by a pink and gold party invitation from Tiny Prints to set the stage for a night of great music, delicious appetizers, cool decor, a cocktail to write home about, and, yes, you need to tune in tomorrow for the amazing cake.

I wanted to create some unique placecards to celebrate Ali. Building off her cherry skewers, these name kabobs make fantastic bling for just about any party.

PC_Ali's-Birthday-Celebration.jpg

These place cards are super easy to make, and you can pull them together while the crostini is in the oven and the cake is cooling.

PC_Ali's-Birthday-Extravaganza-2.jpg

When the party involves a sequined tablecloth, you have to go over the top. So, for the creating, you'll need:

  • Skewers (like the wooden ones you use for grilling)
  • Wooden beads of various sizes
  • Gold leaf paint 
  • Hot glue gun
  • Gold scrapbook paper or small letters
PC_glamtasticplacecards.jpg

Taking wooden beads from uncoated to gold leafed is more than kind of amazing. Instant sparkle. First paint your beads. I painted mine on the skewers so that I could easily cover all sides.

Next, the letters. I cut mine using a die cutting machine, but store bought letters work just as well! Cut out a thin strip of the paper, fold it in half lengthwise. This is the paper on which the letters will be mounted.

Glue it on to the center of the skewer. Then glue the very bottom of the letters to that piece. The scrapbook paper is heavy enough to allow the letters to stand on their own.

PC_glamtasticplacecards_1.jpg

Add beads to either side, on the skewer. With end beads, squirt a small dab of hot glue into the center, to keep the row of beads secure.

These name skewers look great on top of chargers or cocktails! Or as an introduction to dessert like Ali has them. Also, I might make one for my desk at work. Just because.

PC_glamtasticplacecards_3.jpg

And Amy is bringing the cake. It's pretty spectacular - champagne cake!

AlisBirthdayTour_final.jpg

Happy birthday, dear Ali. Happy birthday to you!

xoxo, MJ

Tinyprints_logo.jpg
Welcome to a Wonderful Year Teacher Presents & Free Printable

This shop is part of a social shopper marketing insight campaign with Pollinate Media Group® and Office Depot, but all my opinions are my own. #pmedia #inspirestudents http://my-disclosur.es/OBsstV

Pineapples are all over the place these days. They're trendy now, and during colonial times, the pineapple symbolized the warmest welcome you could extend to a guest. It has continued to evoke a sense of hospitality and sweet goodness throughout the generations.

Extending welcome is a primary job for a teacher in the first month of the school. Around here, we're already in the third week of school, and the newness is beginning to wear off...which means... it's the perfect time to give your children's teachers a present that they want.

Sharpies! Smelly markers! Window markers! Great pens! The list of fantastic school supplies is a long one. Children aren't the only ones who love these colorful tools. Show the teachers in your life that you look forward to what the next months hold with a Welcome to a Wonderful Year present. You and/or your children can create these gift tags or notecards using pencil erasers and stamping pads. 


We bought fun school supplies at Office Max. Right now, you can save $5 off your purchase of $20 or more on select Newell Rubbermaid brands which include all of our favorites (PaperMate, Expo Neon Window Markers, Sharpie, Uni-Ball, & Mr. Sketch) And, you can cash in on Office Depot Rewards for shopping at Office Max as they are owned by the same company! It's kind of hard to resist...Head over to your Office Max or Office Depot and take advantage of the deal while supplies last.

You'll need some pencils with fresh erasers, an inkpad, and some paper to make these pineapple prints. Draw simple shapes on your erasers, like the ones shown above. With an X-acto knife, cut around these shapes. We made two sets of these shapes so that one of each could go into the yellow and green.

The pineapple shape is a breeze once you get the hang of it. Using a combination of diamonds and triangles, you can create a charming geometric design.

Or, if you aren't ready to take the project right now, click here to download your own pineapple printables.

Wrapping up a bundle of these fun supplies with a parachute cord or ribbon and a tag, lets our teachers know that we appreciate them, and we're looking forward to working together!

My oldest (9) and I created these together in less than an hour. Holding her back from using all the colorful markers was the hardest part....

Happy making!

XOXO, MJ

For the Love of Pumpkin
PC_9pumpkin.jpg

I haven't purchased any yet this season, but it's almost time for pumpkins. The crafting, the eating, the cooking, and the carving - so many wonderful projects coming all from one little gourd! I have been falling in love with pumpkin over and over again through a group board that I collaborate on called Pumpkin Recipes, Crafts, and More. Come on over and check it out...

I'm sharing 9 super ideas with pumpkin that will get you into the spirit of fall and delight your taste buds, too...

Mini Pumpkins:

I created these for Gina's Month of Pumpkin. She's a master with pumpkin recipes, and she let me join in the fun with this super easy pumpkin craft. These balls of yarn are topped with small pieces of pipe cleaners and stacked inside a shadow box. They make great additions to a tablescape and a delightful garland, too.

PC_9pumpkins_1.jpg

How about two great uses for pumpkins?

Pumpkin Pinata:

A balloon, yes! And a pinata! Perfect. What an awesome way to begin or end a night of trick or treating. You get all the info on how to fill the jack o'lantern over at The Gunny Sack.

Chalkboard Pumpkin Planters:

Also, I'm not over chalkboard (I hope you aren't either), and I love this pumpkin turned potted vase for colorful mums. This is a super easy and approachable (quick) project that can make any front door warm and welcoming for fall. Chelsea shows off how-to over at Making Home Base!

Memorable pumpkin treats...

PC_9pumpkins_2.jpg

Easy Pumpkin Krispie Treats:

Rice Krispie treats are always a family favorite around here, and these are too cute as pumpkins. The simplicity is right on for the kids to join in on the creation stage, too. Jen has her creations over on Yummy Healthy Easy. Can you guess what she used for the stem? 

Pumpkin Pie French Toast:

Pumpkin pie French toast? A total yes! This recipe is from Erin Chase over at $5 Dinners which means it's also incredibly affordable. We make pumpkin swirl French toast every Halloween, and I love this variation on it. But why save it just for Halloween?

And two classic desserts...

PC_9pumpkins_3.jpg

Pumpkin Cookies:

When I think of baking with pumpkin I think of these two recipes. Crissy of Parenting Pretty has gorgeous and uncomplicated Melt in Your Mouth Pumpkin Cookies. The texture and moisture of pumpkin is just perfect for these delicious desserts.

Pumpkin Donuts:

Everything tastes better as a donut. Well, almost everything. But for sure on pumpkin. Rolled in sugar... The Blue Eyed Bakers are genius. Click over and make Petite Pumpkin Spice Donuts.

An unexpected must try...

PC_9pumpkin_4.jpg

Pumpkin Pie Spice White Chocolate Caramel Popcorn:

Though I've never eaten this particular flavor combination, I think we'd be fast friends. I'm excited to give it a try. Cooking Classy serves this popcorn in a clever way, too. Go check it out!

And finally for the kids...

Hammer the Pumpkin:

Something to occupy and entertain the young hands in your house is this simple pumpkin activity. Once the gourd has reached a certain ripeness, it's perfect for hammering. Grab a golf tee and a plastic toy hammer.

Okay, it's your turn! What's your favorite way to use pumpkin?

xoxo, MJ 

Golden Pineapple Scarf for Cricut Design Space Star™

Disclosure: I am a member of the Cricut Blogger Network. I may receive prizes in exchange for my winning projects. Even though I am not being directly compensated for these posts, I am under consideration for a prize with Cricut Design Space Star. All opinions are 100% my own.

PC_pineapplescarf.jpg

Sometimes I like to push the limits. When I received my Cricut Explore machine for the Cricut Design Space Star, I wanted to see just what this wonder could do. What materials can I use? How big can I go? How intricate?

How small?

I designed tiny pineapples - like half an inch small - and watched as the Explore trimmed out every little fiber and leaf at the top of the fruit. Pretty amazing. Along with my talented and Lucky #13 team, I wanted to create something with gold. Enter the glitzy glamour of Cricut gold glitter iron on material.

Pineapples are on trend, and when you keep them ultra small, they can accent any outfit really well.

To make yours, gather:

  1. Neutral scarf (I loved the juxtaposition of the soft gauze with the bold glitter)
  2. Gold iron on material
  3. Cricut Explore
  4. Iron/ironing board
  5. Parchment paper 
PC_pineapplescarf_1.jpg

Step One: Design your tiny pineapples. I made an .svg file in Illustrator and uploaded them to the Cricut Design space. The program makes the best use of space for you! Switch the materials setting to Iron On, feed in your mat with the material in place, and watch the magic happen.

The precision of this task is pretty amazing.

PC_pineapplescarf_cricut.jpg

Step Two: Remove the iron on material from the mat. This process is known as weeding. You may want to use a Cricut tool to help you carefully remove each pineapple. I accomplished this task while watching some TV with my kids. It's really fun to see the shape, with such detail appear from the page.

PC_pineapplescarf_2.jpg

Step Three: Place your pineapples on your scarf in the desired pattern with the glitter side up. I did a line of fruit at each end and then a wide pattern for the rest of the scarf.

Step Four: With your iron on the non-steam setting, place a piece of parchment paper over 3-5 pineapples at a time. The iron on paper in the Cricut line adheres really quickly so you only need to move your iron back and forth over the parchment for 8-10 seconds.

Step Five: Remove the parchment and continue ironing the remaining pineapples.

PC_pineapplescarf_3.jpg

I love the flash and subtlety of the finished scarf. And I'm already planning my fall wardrobe around it.

Why not put a pineapple on it? xoxo, MJ

My team, Lucky #13, has put together a wide variety of incredible projects. And you need to check out every single one! Find the links below. Vote for and pin your favorite projects!

You can also search for our projects on this and upcoming challenges with #cricutdesignteam13

Cricutgearchallenge_Lucky13_fashion.jpg

Lucky 13 team in the Cricut Design Space Star™ team:

  1. Booties, Earrings, and Hearts from Andrea of Andrea’s Notebook
  2. Children's shirt and gold sandals from Celina of Petit A Petit and Family
  3. Cut out leather purse with cross lining from Erin & Tricia of Suburban Bitches
  4. Leather cuff from Monica of East Coast Creative
  5. Easy DIY hashtag t-shirts from Sarah and Jessica of Pretty Providence
  6. DIY umbrella and Pineapple Scarf from MJ of Pars Caeli
  7. Leopard leggings and tank from Sadie Jane of Simply Sadie Jane
  8. Laptop decals from Crystal of Sew Creative Blog
Lucky 13 team picture.jpg