We partnered with Tiny Prints to bring you these projects. We were compensated for this post, but all ideas and opinions are our own.
**Ths post is meant to reflect a celebration of life. We honor and remember all those who lost their lives in 9/11. We will never forget.

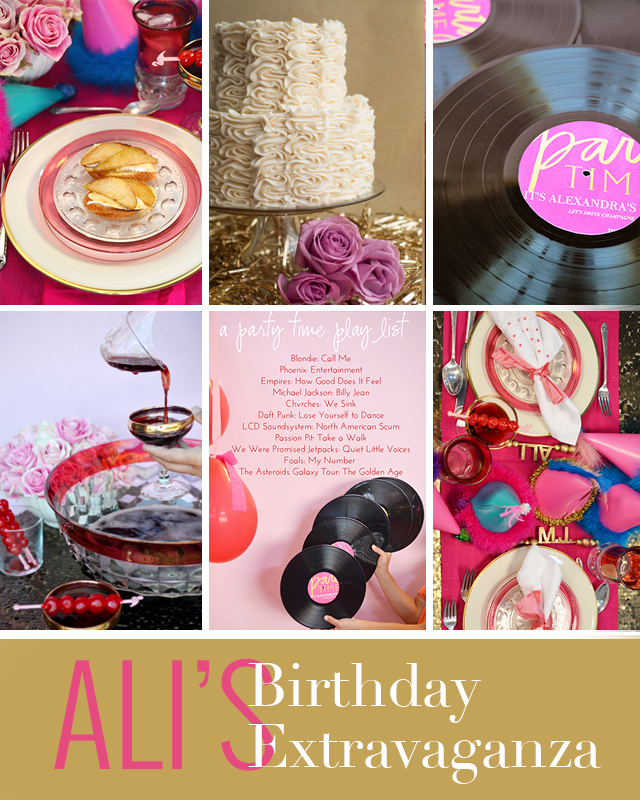
Kids aren't the only ones who deserve incredible birthday parties. All this week, my Endless Summer Project gals - Alexandra Hedin, Amy of This Heart of Mine, Jennifer of Classic Play, and Melissa of Lulu the Baker, and I have been throwing a glam-tastic party for Ali! She is the weeknight party girl so we had to go big. I mean, this girl is a big deal. Check out her TV spot, highlighting some of the details from the party.
We were inspired by a pink and gold party invitation from Tiny Prints to set the stage for a night of great music, delicious appetizers, cool decor, a cocktail to write home about, and, yes, you need to tune in tomorrow for the amazing cake.
I wanted to create some unique placecards to celebrate Ali. Building off her cherry skewers, these name kabobs make fantastic bling for just about any party.

These place cards are super easy to make, and you can pull them together while the crostini is in the oven and the cake is cooling.
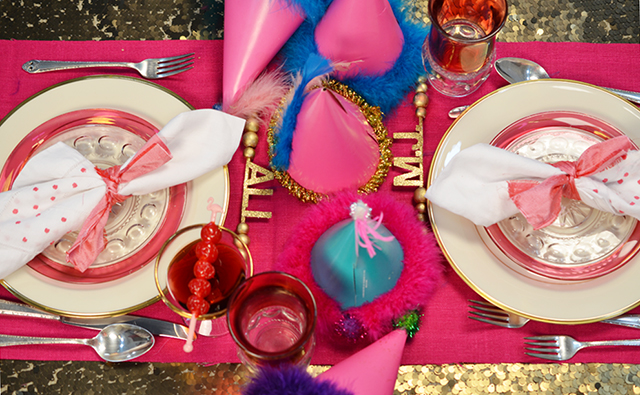
When the party involves a sequined tablecloth, you have to go over the top. So, for the creating, you'll need:
- Skewers (like the wooden ones you use for grilling)
- Wooden beads of various sizes
- Gold leaf paint
- Hot glue gun
- Gold scrapbook paper or small letters

Taking wooden beads from uncoated to gold leafed is more than kind of amazing. Instant sparkle. First paint your beads. I painted mine on the skewers so that I could easily cover all sides.
Next, the letters. I cut mine using a die cutting machine, but store bought letters work just as well! Cut out a thin strip of the paper, fold it in half lengthwise. This is the paper on which the letters will be mounted.
Glue it on to the center of the skewer. Then glue the very bottom of the letters to that piece. The scrapbook paper is heavy enough to allow the letters to stand on their own.

Add beads to either side, on the skewer. With end beads, squirt a small dab of hot glue into the center, to keep the row of beads secure.
These name skewers look great on top of chargers or cocktails! Or as an introduction to dessert like Ali has them. Also, I might make one for my desk at work. Just because.

And Amy is bringing the cake. It's pretty spectacular - champagne cake!
Happy birthday, dear Ali. Happy birthday to you!
xoxo, MJ