Posts in Kids
Sponsored by Wayfair: DIY Didn't I Think of This Sooner for Your Car

This post is sponsored by Wayfair I was compensated for this post but all opinions are mine. Thank you for supporting the brands that support Pars Caeli.


From school to practice to Church and road trips, my family and I spend a lot of time in our car. We plan our journeys carefully, but I always want to be ready for any unexpected adventures we can seize at a given opportunity! Of course, we also have those times when we're stuck in traffic or come upon an emergency, and our car is like a second home and safe haven. 

Thanks to my friends at Wayfair, I'm sharing my top tips to maximize car travel and make any occasion out of the ordinary.

The Just in Case:

  • From bumps and bruises to emergencies, it's a smart idea to keep a First Aid kit handy (even in the back of your car). 

This simple First Aid Kit is all you need.

  • Less major emergencies like dead electronic devices can be avoided by keeping an extra charger for yours and the kids devices in the car.
  • Keeping a few empty, reusable water bottles in the car makes sense and keeps our budget in check during frequent stops.
  • Flashlights or head lamps get more use that you might expect!

For more fun:

  • Between practices or on a beautiful sunny afternoon, spontaneous picnicking is highly encouraged. 

We keep a picnic blanket always ready in the back!

We also keep a set of camping chairs stashed for t-ball and soccer games.

  • This is a little over-the-top, but during warmer months, we keep a simple tent in the back. I think the possibility and the thrill of camping wherever you are is just awesome.
  • Keep some read along CDs/books or audiobooks always at the ready.
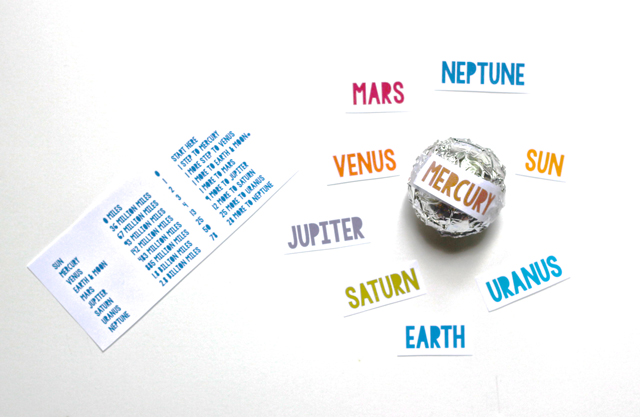
  • Don't forget about the fun that you don't have to pack like car games!! I Spy, The Alphabet Game (finding words on signs that start with each letter of the alphabet), word association, 20 Questions, the license plate game. I also recommend printing off these two games - one for kids and one for teens to help pass long trips.

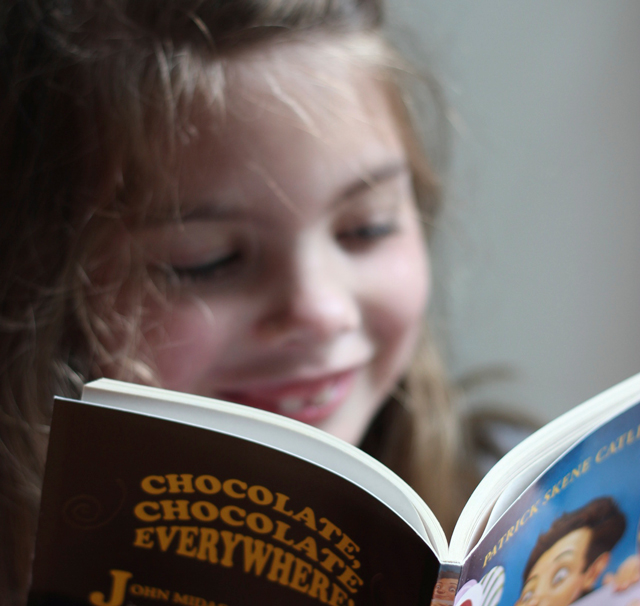
  • When all else fails, have a book, a few CDs, and if your vehicle uses them, DVDs at the ready to entertain.

You might not expect:

  • Crayons, a tablet of paper, and scissors have saved us from tantrums and boredom more than I ever imagined. We use the scissors all the time to cut off tags from new purchases that just have to be worn right away!
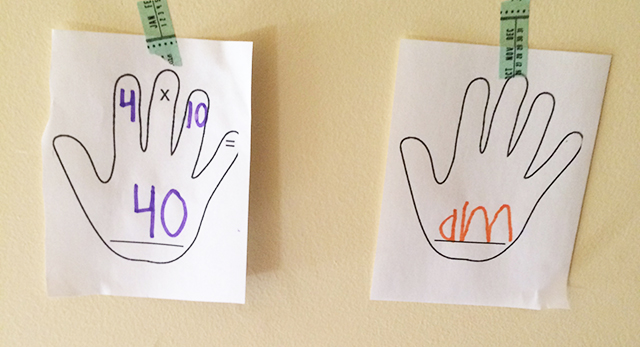
  • Playing cards can be used for card games like War, Rummy, Solitaire as well as simple math games to keep young minds busy,

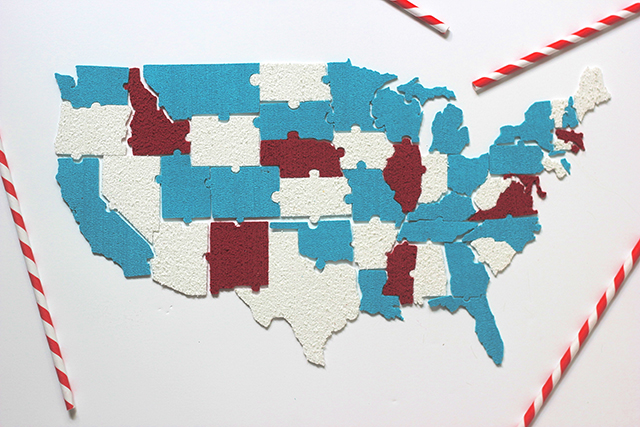
These playing cards are maps, too! They're perfect for road tripping!

  • It's not fancy, but extra trash bags, tissues, napkins, disposable silverware, and straws are always, always helpful!
  • Last but not least, pack your sense of humor. What road trip or fun day of errands would be complete without some jokes!! Pack my lunchbox jokes for 180 illustrated cards and keep them in the side box.

What do you recommend to make the most of every car ride?

xoxo, MJ


How to have the best summer with your kids: The Summer Explorers

Do you know how many school days there are left for your children?

I do–19.

I would describe my feelings about 19 days left as a lively mixture of anticipation, excitement, and . . . dread. Summer has all sorts of blissful expectations (particularly in this part of the world where good weather shines on us a few months a year), and I so want it to be a fun, low-key, fabulous time for my three children AND me. The ten-week summer is also a ton of time together–potentially getting on each other nerves, saying "I'm bored" too often, and falling back on electronic devices for each of us.

But I'm not going to let my fledgling fears get in the way of a great summer. So, here's what I'm doing, and I really hope you'll join in, too.

We're going to approach our summer with a spirit of curiosity. Curiosity builds to creativity and diverse ways to view the world and the people who inhabit it. 

So we begin with this - what do you want to learn this summer? And we pursue their ideas. Secondly, we make our days colorful, messy, loud, and smelly. Many of the wonderful crafts and kitchen experiments that you may remember from childhood can be used to teach real learning, scientific concepts, art history, and so much more. There are also easy and high-quality projects you can do together with your kids that will make the summer weeks memorable and full.

I want to equip me and you with the best tools and possibilities to make this summer awesome. I’ve studied art to discover that possibilities are limitless, and I’ve studied education to learn how to share this knowledge with children. Bundling my experience with our need and desire to make this a wonderful June, July and August, let's be:

THE SUMMER EXPLORERS

PROJECTS FOR PARENTS AND CHILDREN TO DO TOGETHER 

While it's been quiet here on the blog, I've been working on a book project that I'm transforming into weeks of fabulous information and projects for you and your kids!!! I'm so delighted to offer full, detailed weeks of ideas with printables, instructions, links, and how tos you can use right away (in 19 days!!).

You can select a la carte and receive a specific topic week, or you can invest in the whole summer and move ideas around to fit your schedule. These downloads will save you all the searching on Pinterest and Googling, eliminate the midday ponderings of what to do next, and they'll equip you with fun facts to make all the creating together a rich learning experience, too.

EVEN BETTER . . .

I want to offer you a built-in back up - a community of smart and involved moms who want to enjoy their summer, too!! With my pal, Amy Christie of This Heart of Mine, we're putting our heads together to form THE STRESS LESS MAMA. This group will be your pep squad, your tutor, your wicked smart best friend, and your spot to share all the hilarious that comes up. Amy and I are delighted to get to know and to help moms be more present and more themselves through tips, ideas, strategies, and the secret sauce (well, really, there's no secret sauce, but we'll dream together, m'kay?)

Please click over to see all of the bells and whistles I want to send your way!! Let's make this a wonderful summer for us AND our kids.

MORE ABOUT THE SUMMER EXPLORERS AND THE STRESS LESS MAMA.

Kindness Matters and #GoodnessTrending
Adding good news to your feed every Tuesday! Follow Pars Caeli on Facebook.

Adding good news to your feed every Tuesday! Follow Pars Caeli on Facebook.

"What happened in Paris, Mommy? Why do they keep using the word "terrorist" on TV?"

I didn't want to explain a terrorist to my inquisitive 10-year old. I don't know how to, and I desperately wish that we lived in a world where that conversation never needed to happen. But, she's heard the word, and she wants her mother to explain why these horrific events happened to innocent people. "How could someone do that, Mommy?"

I have no good explanation, though in her presence, I tried to seem brave and knowledgeable, so that perhaps the immensity of it all would not overshadow her. "Fear is what they want to evoke," I told her. "It's hard not to be scared. We will mourn, and we will pray, and we will do our best to be peaceful people in our corner of the world. And when we recognize the fear coming up, we will feel it, and find the good. Because good always prevails, always. I am sure of that. And God will strengthen us when we feel helpless and alone. He gave us each other."
A portion of every Do Good product goes to The Sweet Pea Foundation which assists children and their families during hospital stays.

A portion of every Do Good product goes to The Sweet Pea Foundation which assists children and their families during hospital stays.

In an effort to inform and explain, the media covers images and retells stories of threats, attacks, violence, war, and tragedy. All relevant information, all needing to be shared, all compounding for a bleak look at the state of the world.

And despite all that - no, maybe in the face of all that - I see the world that is overflowing with goodness. The poet, Gerard Manley Hopkins said it like this, "The world is charged with the grandeur of God."

It is in the kindnesses that individuals extend to one another, the grand sweeping gestures that impact thousands, and the hopeful discoveries that lead us to believe in a different future. All of these are also happening every day, and in every place. And these acts of goodness need to be shared.

Share the goodness happening in your part of the world by tagging #goodnesstrending

Share the goodness happening in your part of the world by tagging #goodnesstrending

In our very small corner of the world, we're trying to add more goodness to the world. In the shop, a portion of the profits of every "Do Good" product (children's tees, women's tees, and letterpress print) go to help hospitalized children and families through The Sweet Pea Foundation.

And I know that you all are doing this kind of thing in your lives, too!! You're finding ways to stay open to joy, to reach out to those on the margins, and to give to those in need. And we need to share that your good work with the world, lest we all be overcome by the sad news around us and misled to believe that the tragic is all there is.

In honor of Giving Tuesday, this day designated to give to the non-profit of your choosing, we will be sharing goodness every Tuesday over on Facebook (you have to see some of the amazing stories happening there today!!). Let's make every Tuesday one for giving. Tag any of your stories or photos on Twitter or IG with the #goodnesstrending hashtag, and we'll share them on Tuesdays. I challenge you to share these stories with your children and your spouses and your parents and neighbors. Let's remember that goodness is trending. Goodness prevails. 

Perhaps if we can focus on the goodness before us, and share that joy with each other, we might dissipate the darkness, while giving one another a safe hand to hold into the future.

What's something hopeful, something good, happening for you?

xoxo, MJ

How to enjoy and to afford a family trip to Disney World
The most magical place - how to enjoy and afford a trip with your family to Disney World!

The most magical place - how to enjoy and afford a trip with your family to Disney World!

Disney World!! You've just had three children who love princesses and pirates...where are you going?? You're going to Disney World!

If you save your pennies and plan it right, Disney World (in Florida) can be a spectacular family vacation. It also has the potential to break your piggy bank, overstimulate your kids, and leave you feeling overwhelmed all around. My family took treks to Walt Disney World in my childhood, and we've now taken our three children on two trips (first at ages 1, 3, & 5 and then at ages 3, 5, & 7). We are far from experts. If you search the web for Disney, you'll find hundreds, maybe thousands, of people who are experts, but I do think we've caught on to some good ideas on how to enjoy your family time at Walt Disney World.

So, here are my seven (it was good enough for Snow White, it's good enough for me) tips for making the most of your money and time at WDW:

1. Save, save, save:

Whether you surprise your children with the trip or plan your vacation way in advance as a family, make sure you have an ample fund from which to pull for your Disney trip. There are a ton of ways to save like staying at a well-themed discount resort or staying off site or camping at Fort Wilderness. Park ticket prices are lower per day the longer you stay at Disney World. Dining plans can be a great and affordable option, too.

My advice is to have a budget in mind, work to save to get there, and plan according to it. You can easily overspend (and not even know it!) so do your research on Disney's sites or call their info line and ask ANY questions you have.

We opted to tell our children in advance. For each of their birthdays, we gave our children Mickey-shaped silver tickets. Building off of Willy Wonka (a movie the kids loved), the idea of a golden/silver ticket was so exciting! We counted down the days until our vacation together. We worked to set aside the funds, and let our children play a role, too. We were intentional in choosing to eat at home and save our money for the Disney trip. Knowing that a fabulous vacation was at the end of the road made the skipped pizza meal easier for our children to handle. Of course, we had to make other sacrifices as well, but we wanted our children to understand, in a small way, the value that our choices make in big investments.

The most magical place - how to enjoy and afford a trip with your family to Disney World!

The most magical place - how to enjoy and afford a trip with your family to Disney World!

2. Think carefully about your energy

Our travels have been with little people ages five and under so we've taken advantage of strollers. We are not stroller people (basically having our kids out of strollers as soon as they were able to walk). However, Disney days are long, and young legs and spirits can wane. Though we don't own a double stroller, we learned about renting a stroller in Orlando. We arranged for ours to be delivered and picked up at our hotel so we had no hassles with any kind of transporting.

Also, Disney has an AMAZING transit system. Once you're in or near a park, you can likely take a free bus, train, tram, monorail, or even boat to get to your destination. Take advantage of all of those options! Our kids at younger years enjoyed the bus and boat rides as much as the shows. 

And this is no surprise, but still worth noting: Make sure everyone has reliable - like they've worn them in well - and comfortable shoes for the journeys.

3. Do not underestimate the power of a great pool day

This tip came from my sister-in-law, and it helped ALL of us a ton. Right in the middle of our stays in WDW, we planned a full day of pool time. I was so tempted to book another visit to the Magic Kingdom and pack in another visit to It's a Small World and The Haunted Mansion. But, after two days of walking and experiencing it all, we needed some downtime, unstimulated. 

Disney resorts have incredible pools and water features, and if your hotel doesn't have one that you like, you can take advantage of another hotel's options. Do your research here because the slides and splash pads are so fun! They gave our family time to laugh and to splash and to play together in a different way than the rides and shows allowed. 

If you're not able to make a whole day of swimming, consider blocking off time for a longer meal or a stroll through Disney Springs to break up all of the attention-grabbing excitement. You'll have a smoother, happier trip because of it.

Try these 7 real life, practical tips for how to enjoy and to afford a family trip to Disney World.

Try these 7 real life, practical tips for how to enjoy and to afford a family trip to Disney World.

4. Do not try to do it all

This is a huge one, especially when you have small children. There is always more to see, more to do, more to buy. Do not push your crew to ride all the rides and get exhausted. Do not try to do it all.

We all know that you saved and paid big bucks to take this trip, but Disney can be so stimulating for children that it can quickly zap their attention spans and patience. Avoid being "that" parent, making their children hug a character while the child is bawling from exhaustion!! When we traveled with nappers, our family would get into the park when it first opened, head back to the hotel for lunch and nap, and then go back into the parks for an evening of fun. For our older children, this break was a great chance to play with new souvenirs and recap the day's fun/plan for more. And for the littles, it was an essential part of a joyful experience! And let's be honest, we parents could use a little down time, too.

If you know that you want to see certain lands or rides, do your research! Get the fast pass plus or Magic band to make your wait times quick and easy. Consider looking into site like Easy WDW that has cheat sheets for every park, thinking through what days are least busy, the best times to go to rides for the smallest lines, and a guide to the parades and special shows that you will want to see.

As a general rule of thumb, we planned out the three rides we wanted to do in every park and hit those as soon as the park opened. With young children, you're already awake early - use that to your advantage and get to the gates before they open!

5. Have your souvenir plan thought through

Disney is an incredible marketing machine, and everywhere you go, there is something to purchase. Don't be caught off guard, getting everything you don't need or want. Keeping budget in mind, you can purchase giftcards with set dollar amounts for children to use towards gifts they want. You can set an overall dollar limit on what they might bring home. We had a rule of one small souvenir each day so that when we went to each of the different parks, the kids could get something to remember the day. It saved us a lot of aggravating conversations about begging for items because we all knew the plan. And even a 3-year old could stick to it!

Think about double duty gifts, too. We watched the parades in mid-November, and the weather turned cold. We bought everyone Disney beach towels and used them as blankets for the fireworks' show! If you're looking for something off season and don't see it in a shop, ask a cast member because they likely have what you're looking for in the back. :)

Try these 7 real life, practical tips for how to enjoy and to afford a family trip to Disney World.

Try these 7 real life, practical tips for how to enjoy and to afford a family trip to Disney World.

6. Eating can get you.

I know there's a ton of advice out there on how to save money eating at Disney World. And I encourage you to look through some of it. The dining plans can be a great choice. Planning ahead can be a great choice.

We were on one end of the spectrum and shipped a box of food to our hotel to meet us there. We had a kitchenette (YES!) so we shipped down basic cereals, pb&j, snacks, and other non-perishables. When we came back for naps, we'd fix sandwiches and applesauce. And we had mac & cheese more than one night for dinner. We always had granola bars and Goldfish crackers ready in our backpack to avoid spending a lot of money on snacks. We all had refillable water bottles, and refilled in fountains as needed. We made a decision to save our money on food and spend it elsewhere.

Disney has a ton of high quality food experiences that are just as good as a themed ride. Consider splurging for one or two. For example, character meals are bucks up, but also a really memorable experience. We loved our time at the Grand Floridian breakfast with Mary Poppins and a whole crew of other characters, and eating with the princesses in the castle was a super special experience for our little girls.

7. LET YOURSELF BE IN AWE

Disney does everything over the top. Everything is bigger, louder, brighter than you imagine it will be. It's highly likely your kids will be amazed. And, if you're like me, you might go one of two ways: you could put on your skeptic hat, or you could jump in with two feet. Let me highly encourage you to go all in

Look at the entire experience through your children's eyes!! Take pictures with the characters, wave to the parade dancers, run to get in line again for Space Mountain, wear your mouse ears. No one is too old or too cool for the magic.


We're hoping to make another trip soon with our kids now 6, 8, & 10. And we'll be using all of these tips and maybe some of yours!! Have you made a family trip to Walt Disney World? What are your recommendations?

xoxo, MJ

P.S. If you're hear from Hear Motherhood, welcome, welcome!! Make yourself at home. If you are ready to listen to a fun conversation between two friends on motherhood, traveling, and the lessons learned: tune in here.

Holiday Traditions to Try with Your Family
Holidays traditions that add more meaning and more fun into this year's celebrations. Build and fill this charming paper village from The Land of Nod as you countdown to Christmas.

Holidays traditions that add more meaning and more fun into this year's celebrations. Build and fill this charming paper village from The Land of Nod as you countdown to Christmas.

I'm a big fan of traditions. For me, they provide something to look forward to and a memory that gets richer with layers. Right now is prime time for me to hog wild (maybe just a little over the top!) and inject the giving spirit into our home.

When you think about it, there's just a little over a month of time between Thanksgiving and the ball dropping on New Year's Eve. So we have a lot of fun to pack into a short timespan. 

But also, I have no interest in exhausting me or my family so we pick and choose how to squeeze the best moments from our time together. Here are our current favorite holiday traditions - and I'm always looking to add more!

1. All the Christmas tree-ing together

Whether your tree is real or fake, prepping it and decking it out in all of its finery is a fabulous family tradition. We pack up the entire family, drive an hour in the minivan to arrive at a tree nursery we've really grown to love. They have a great selection of varieties, and we all vote on which tree we want. Then, grabbing a saw from the tool shed, we wander through beautiful rows of tress and decide on the perfect match for our home. We each take turns sawing the tree trunk - it's amazing what a challenge that is!! While the tree is bundled and wrapped, we enjoy a cup of hot cocoa and the rich smell of pine. 

Holiday traditions to start with your family!! With a few reserved for parents and extended family.

Holiday traditions to start with your family!! With a few reserved for parents and extended family.

2. Gratitude stars

All of our Thanksgiving guests have a little homework to do before they arrive for the party. They receive an email with a printable page of stars upon which they write one person/experience/item for which they are thankful. Each person comes with 3-4 (as well as their names and year on the back) and while the meal prep is going on, we attach ribbons to the paper stars and read one another's as we place these first ornaments on the Christmas tree. Only the white lights and white gratitude stars fill the tree for the first week of Christmas to remind us what really matters in the season.

In a black, leather bound binder, I keep the stars through the years, and I love looking through them and remembering the guests and gifts of years past and seeing how many remain throughout the seasons.

3. Books around the tree

I've been collecting Christmas picture books since I was a girl. So, without having to do the math, let's just say we have dozens of beautifully illustrated holiday stories. Nothing goes under our tree except for these books!! And my children often prop themselves next to the tree, and flip through the magical stories. On the night before Christmas, we read the famous tale, and reading through our favorite stories has become a treasured holiday memory

4. St. Nicholas Day

Do you know the tradition of leaving your shoes out for St. Nicholas to fill? On the evening of Dec. 5, all five of us put out a pair of our shoes by the fire. Why? As the legend of St. Nicholas is told, on his feast day (Dec. 6), he visits all the children of the world, for whom he had great affection, and leaves them surprises in their shoes! I've heard of gold chocolate coins and silly socks being some of the most popular presents in his sack.

Advent calendars, Christmas tree chopping, and date night shopping. Pin it!! All kinds of holiday traditions.

Advent calendars, Christmas tree chopping, and date night shopping. Pin it!! All kinds of holiday traditions.

5. Advent calendars and countdowns

The great waiting until Christmas dat is all part of the fun! We use Advent calendars to build up the drama and to prepare our hearts. We have chocolate calendars to eat our way through the season as well as a calendar with jokes for each day! The printable village box calendar featured above from The Land of Nod is our latest, and it's just the right size for a small and special treats each day.

6. Light tours and hot cocoa

Do you have a park with a special light display or a neighborhood that has channeled the spirit of Clark Griswold? Make an event of it. We have a few neighborhoods that join together to put on a light show worth driving through. We stop off for hot cocoa and cookies at a local restaurant, and we dedicate an hour of one evening to pumping up the volume onChristmas carols and driving slowly through the streets. We began when our oldest daughter was in the backward facing baby seat, and we now have all three children ooohing and ahhing from their big kid chairs (sob, sob). What flicks make your list?

7. Invest big in the holiday movie

What a better time of year to be cozy inside watching the great Christmas movies? Around here, it's bitter cold and always snowy so we warm up the fireplace and snuggle under the covers for our list of must sees. For us that includes, Rudolph the Red-Nosed Reindeer, Elf, Polar Express, and the original How the Grinch Stole Christmas. And once the kids have gone to bed, my husband and I break out It's a Wonderful Life, and I still cry every time George Bailey returns back to Bedford Falls.

8. Nativity helpers

We are a house of many Nativity sets, our largest is near life-size! Next to that set we keep a carved, heart-shaped bowl, filled with red and green string for our children to use to make a cozy manger. When family members are helpful and especially kind to one another, we put a string in Jesus's manger to keep him warm and soften his rest. We began this tradition when the children were toddlers and have kept it up. Sweet and simple.

Nativity sets can have all kinds of character. Use the Advent season and your manger to prepare your family for Christ's birth.

Nativity sets can have all kinds of character. Use the Advent season and your manger to prepare your family for Christ's birth.

9. Late night date night shopping

I saved my favorite for last!! Here's a secret tradition of mine. I put off Christmas shopping until the last minute - intentionally!

Three years ago, Christmas snuck up on us. I know, it's the same time every year, but we were so immersed in the daily stuff that planning for something even two weeks away seemed luxurious and frankly, impractical.

My husband and I had our social and professional calendars booked. When were we going to have time to shop for Christmas? In exhausted exasperation, we added a date for shopping after his office Christmas party. 

On the evening of the office party, we donned our holiday duds (and even smelled good!) and we whisked off together, wonderful babysitter safely watching over the den for the duration. At the cocktail reception, we mingled with couple after couple, making conversation about one another's holiday plans. "Are you ready for Christmas?" we were asked over and over. 

Funny enough, whether we were caught by surprise or not, it was coming - Christmas was coming. In the din of jovial conversations, I remembered the wonder of the season. I was struck by the silly and temporal nature of my worries as I explained over and over that we were behind on our preparations. You know how sometimes hearing yourself say something makes you realize just how ridiculous you are?

That we hadn't (gasp!) shopped for Christmas.

And although I was stressed by all that I had to do, I felt a glimmer of hope that no matter what was still left in boxes or unchecked off the list, Christmas was still coming. Christ's birth would still be celebrated - and in full force at our house.

I watched my husband explain to his colleagues, in good humor, how we were going out AFTER the party to begin our Christmas shopping. 

We left the party, laughing together. 

At 9pm, we were the best dressed shoppers. With barely a soul around, you could hear our heels and dress shoes, as we meandered the aisles - he pushing the cart and me with my arm wrapped through his - strolling and talking about our life together, our children, and the joy of the season.

It was that moment right before you turn over the snow globe, when everything stands still just for a little while. We slowed down the world and remembered the family we have built and the love that we share.

All the gifts were purchased. Checklists completed.

And Christmas did in fact come.

What makes your holidays season magical? Add your traditions in the comments section!!

xoxo, MJ


DIY Teeny Tiny Tic-Tac-Toe Game

This post is sponsored by Sprout by HP. The project and ideas are all mine. Thank you for your support of the brands that support Pars Caeli.

Shrink a classic toy down to its miniature for a new game of Tic-Tac-Toe. 

Shrink a classic toy down to its miniature for a new game of Tic-Tac-Toe. 

We love to make things around here, and when I can get my children involved in the making, the joy multiplies quickly. From looming to sculpture, watercolors to oil pastels, our creations fill the walls and shelves of our home.

And now our creations even fill our game cabinet. Or, at least, a teeny tiny portion of it.

Using 3D scanning technology, create a miniature tic-tac-toe set! #sproutbyhp

Using 3D scanning technology, create a miniature tic-tac-toe set! #sproutbyhp

Using our Sprout, we decided to transform my "vintage" Little People figure into a micro version of its former self. What is it about making things small that triples their adorable factor?

Since the Sprout has an integrated desktop 3D scanner, it was easy to experiment with our sizing for the game. We want as tiny as their hands could hold comfortably. Using a small piece of putty to hold the toy to the tabletop scanner, the kids and I scanned the figure from all angles.

Watch our quick movie below to see the creation is progress (my 6-year old was blown away by the scanning/pattern process - ah, so was I). 

Printing the 2.5" figure as a 1/2" copy took approximately four minutes from pressing print. This was my first experience with 3D printing and gazing at the layering process of each tiny figure was mesmerizing!!

As you can see below, the object is created layer upon layer to produce a finished "fine wire" texture. My children likened it to the grain of wood.

Have you tried 3D scanning? The results will surprise you. 

Have you tried 3D scanning? The results will surprise you. 

We printed ten tiny people in an hour! To get these ready for a fierce, yet small game of tic-tac-toe, I painted them two different colors. Using Sharpie paint markers, coloring the figures was fast and easy. Using a small piece of birch, I scraped the hashtag gameboard in the wood, and we're off on our first game.

These miniatures make a fun, new take on the traditional tic-tac-toe game. Put them in a tiny giftbox, and you're set for any restaurant wait.

These miniatures make a fun, new take on the traditional tic-tac-toe game. Put them in a tiny giftbox, and you're set for any restaurant wait.

The teeny tiny tic-tac-toe game adds its own level of new challenges! If you knock over your own player or someone else's you lose your turn. So the obvious moves and strategy you typically employ for the game are now turned on their head!!

After this experience of taking something right from our life and making it into something new and different, I can't believe how close we are to printing and to creating our own worlds! 

What would you create with a Sprout?  See more creations using the Sprout or find a retailer to buy one near you.

xoxo, MJ


A parent's role in a growth mindset: Helping children embrace challenges
The ways we praise our children affect how they see their own strengths and weaknesses. Get on the growth mindset train with this free printable.

The ways we praise our children affect how they see their own strengths and weaknesses. Get on the growth mindset train with this free printable.

I think I can.

I think I can.

I think I can.

What if the Little Train had more genius to it than we ever imagined? What if the true belief that you CAN moves you closer--significantly closer--to that possibility?

As a former educator and a mom who fancies herself a lifetime learner, I've been looking into how I can incorporate the idea of a growth mindset with my children. Have you heard of this concept? It was developed by Carol Dweck, a famed psychologist and researcher, who identified two motivations of the intellect: a fixed mindset and a growth mindset. Dr. Dweck explained these two ways of thinking like this:

"In a fixed mindset students believe their basic abilities, their intelligence, their talents, are just fixed traits. They have a certain amount and that's that, and then their goal becomes to look smart all the time and never look dumb. In a growth mindset students understand that their talents and abilities can be developed through effort, good teaching and persistence. They don't necessarily think everyone's the same or anyone can be Einstein, but they believe everyone can get smarter if they work at it."
Strategies for parents: easy ways to help your children embrace challenge! Free printable reminders.

Strategies for parents: easy ways to help your children embrace challenge! Free printable reminders.

In my family, I'm the youngest of three, the baby to two brilliant siblings. Growing up, I often compared myself to my sister (with the photographic memory) and my brother (with the immense capacity for knowledge). I believed that I was born with less than they were. Somewhere the thought occurred, "did my parents run out of all the good genes by the time I was born?" Through a variety of influences, including unassuming teachers and mentors who told me I was smart and talented, I came to the childhood/adolescent conclusion that I was this smart, with these talents, and could therefore do these things.

And then my world--neat, pre-determined, and a little sad--was knocked off its orbit by the asteroid of art. In the great quest for pubescent self-discovery, I decided that my niche would be art. This talent was also already taken by my siblings, but, nevertheless, I was determined that I could be a better artist than I had been. Somehow the subjective bandwidth in art broke down my fixed mindset, little by little, making way for new discoveries into how I could and I was progressing and always building upon my own talents.

Quite naturally (and beautifully) this idea that I could get better, learn from my mistakes and build upon them, and grow with hard work permeated into other areas of my life. I had once viewed myself a poor, slow reader, and I was now reading and comprehending stacks of books, and enjoying them. Moreover, I began to understand that despite whatever perceived struggles or limitations I might have in any area, with effort and determination (a key here), I could and did improve.

You might be thinking, "hello, obvious, how are you?" But let's take this idea a step further into parenting.

When was the last time you told your child (in an effort to be a supportive, loving parent), how smart she/he is? Or mentioned how talented she/he is?

Do you have a growth mindset for yourself? Take the simple quiz here.

Subtle adjustments to our parenting talk (and our internal dialogues) can make enormous changes in the ways our children perceive, achieve, and embrace challenge. Gah!

Let me retype that.

Changing the comment from "You are such a smart girl!" to "You worked so hard and look what you achieved!" can alter how our children perceive their own abilities. Encompassing a growth mindset instead of a fixed one, helping them to strive for progress and growth instead of an unachievable (and therefore ultimately disappointing) finite goal can all be a part of our parenting conversations and the family environment that we cultivate.

Get the free printable guideline on how to talk with your children in ways that will help them grow and embrace challenge.

Get the free printable guideline on how to talk with your children in ways that will help them grow and embrace challenge.

Most stunning to me is how easy this is to implement. 

Consider the brain as a muscle that gets stronger with use, and the more challenge we give it, the more opportunity we have to grow.

Consider next time when your child comes running to show you the great grade on a math test, how will you respond?

"You are brilliant. Look how smart you are at math!" or

"You worked so hard, and it paid off.  It's great to see your determination." 

Are you ready to help your child move to a growth mindset? Or ready to adopt one for yourself? I've made this easy guide to keep handy to get you on track quickly and easily. Click the yellow box below to get it and more Pars Caeli goodies!

Sign up and get our free and totally helpful, one-page simple guide!

xoxo, MJ


Simple Shibori for Kids
Bring fresh pattern and process to tie dying with your children through the ancient art of Shibori! A simplified process that's fun to follow.

Bring fresh pattern and process to tie dying with your children through the ancient art of Shibori! A simplified process that's fun to follow.

Every once in a while (pretty close to once a year), I work up the momma guts to brave the world of fabric dye with my children. My excitable young artists are drawn like happy moths to the flame of the permanent, color-rich saturation that only a dye can create. My thought this year? Let's go all in. Enter the beauty and variation of shibori.

Have you heard of shibori? I was first introduced in this post, and I recall admiring the beautiful results of folding, wrinkling, and twisting. Shibori dates back into ancient Japanese art forms of the 8th century using indigo powder to design patterns.

Shibori is an ancient Japanese technique used to dye and create patterns on fabric. Take the basic process and simplify it for a fun outdoor craft with the kids!

Shibori is an ancient Japanese technique used to dye and create patterns on fabric. Take the basic process and simplify it for a fun outdoor craft with the kids!

Using the basic concepts of shibori and capitalizing on modern liquid fabric dyes, my kids and I made some simple and modern shibori shirts. To give this a go, make sure you have these supplies:

  • White cotton shirts
  • Fabric dyes (squirt bottle versions work really well for kids)
  • Rubber bands
  • Cardboard tubes and squares
  • Twine/rope
  • Gloves and clothes you don't mind also dyeing
  • Glass bowls 

I highly recommend using an outdoor space to create when possible. We chose a sunny, warm day in our backyard, and we definitely dyed our grass!!  So be prepared that when you're working with kids (or clumsy parents, eh hem), you'll have permanent spills.

We tried four different techniques to find very different results. Hover over each photo to peek into the process. Follow the instructions on your fabric dye to ensure the desired effect. For all of our patterns, once the dye was fully applied, we wrapped the entire shirt (plus the tube in one case) in plastic wrap and set it aside for 24 hours. After a full day we unwrapped the shirt, rinsed and untied the shirt until water ran clear through it. We then hung them over a drop cloth to drip dry. Be sure that you wash these shirt separately, at least initially to avoid color bleeding.

Wrap t-shirt on a diagonal around a cardboard tube. Secure twine in a criss cross fashion all the way down the tube. Scrunch shirt as you go. 

Wrap t-shirt on a diagonal around a cardboard tube. Secure twine in a criss cross fashion all the way down the tube. Scrunch shirt as you go. 

THE WRAPPED TUBE

My 5-yo used two different dyes (one starting on each end) to make a very cool and unintentional ombre effect. The wrapping and folding of the shirt allowed the color to saturate on the edges and form stripes. This technique was a great one for young hands. With just a thin layer of material around the tube, my son could see and saturate the fabric as he wanted to. No mystery involved there, and it made for one happy camper in the end.

Bring fresh pattern and process to tie dying with your children through the ancient art of Shibori! A simplified process that's fun to follow.

Bring fresh pattern and process to tie dying with your children through the ancient art of Shibori! A simplified process that's fun to follow.

THE TWIST AND TIE

This is a fun design for the more adventurous soul because the unpredictability brings its own magic. To create this feel you tie the four corners of the shirt and twist each until they meet in the middle. Since the bound shirt is pretty thick be sure to saturate this one in dye for a while.

Take each corner of the shirt and tie a knot. Once you have all four knots, twist each knot until they meet up in the center. Keep the bundle tight together with overlapping rubber bands.

Take each corner of the shirt and tie a knot. Once you have all four knots, twist each knot until they meet up in the center. Keep the bundle tight together with overlapping rubber bands.

THE FLAT FOLD

Create a square from cardboard. We made ours 4 inches and then folded the entire shirt around it. We then bound the bundle with crosshatching rubber bands for a truly unique final product!

Create a square from cardboard. We made ours 4 inches and then folded the entire shirt around it. We then bound the bundle with crosshatching rubber bands

Create a square from cardboard. We made ours 4 inches and then folded the entire shirt around it. We then bound the bundle with crosshatching rubber bands

SPIRAL ROUND

This one is hippy tie dye meets shibori. This is a classic tie dye technique that works particularly well for adding a rainbow of colors. My 8-yo could easily see the sections that she wanted to color and could put them in the order she wanted them to spin. The spiral round becomes a large ball of thickness so be sure to soak the shirt thoroughly with dye for a bright finished product.

The classic tie-dye pattern derived from shibori methods. Find your center point, and twist the entire shirt to create a spiral-galaxy-like bundle. Section off areas to focus dye by adding 2-4 rubber bands.

The classic tie-dye pattern derived from shibori methods. Find your center point, and twist the entire shirt to create a spiral-galaxy-like bundle. Section off areas to focus dye by adding 2-4 rubber bands.

We all loved exploring the varieties of possibilities these new methods offered! Having you given Shibori techniques a try? I'd love to see what you created!

xoxo, MJ

Don't Quit Your Daydream: From Doodles to Product

"Those lunchbox cards are helping me feel like a great mom and giving me the opportunity to communicate with (my children) mid-day which I really really like. Thank you."

Don't quit your daydream! How one mom took her lunchbox notes from paper bags to product launch.

Don't quit your daydream! How one mom took her lunchbox notes from paper bags to product launch.

This summer was a whirlwind. A major dream came true (with a whole lot of work behind it), and I opened my online shop. I also spent focused time creating precious childhood memories with my three kids in something I called the 18 Summers Challenge (we really only get 18 summers with our kids!! Weep). And something even better than my wildest dreams came to life. In collaboration with The Land of Nod, I created launched my first product - a collection of lunchbox jokes! I present the Lunchtime LOL Notes.

When my oldest daughter went off to full-day Kindergarten, I, like so many parents, added a note to her lunch. After hearing from my daughter about quiet lunch times, I decided to add a joke and doodle to my messages. Teachers and lunch helpers would read them to the table, and everyone got a kick out the silly pictures and corny jokes.

As I searched daily to find something sweet to draw, I wondered if other parents would find it helpful to have an easy way to add something extra to their child's lunch like I was. I started sharing these notes on Instagram and hearing from other moms and teachers who would reuse them with their kids! And it was so exciting to see where in the world and in what ways these notes were used! I loved the idea that I could help other parents connect (in the middle of the day or on a long drive or in a doctor’s office) with their children.

As more and more people commented and shared these illustrated jokes, I began to wonder if I could take them to the next level. Should I produce these on my site? Or furthermore, find a brand who might want to bring this idea to their audience.

I first mapped out what I wanted the lunchbox notes to be: an entire pack ready for 180 days of the school year for parents, cards that had a blank back for parent's personal notes, and special jokes for certain holidays and times of the year.

How do you make your daydream a reality? A story of one mom entrepreneur and her pack of lunchbox jokes, now sold at The Land of Nod.

How do you make your daydream a reality? A story of one mom entrepreneur and her pack of lunchbox jokes, now sold at The Land of Nod.

With these parameters in mind, I thought through my pie-in-the-sky favorite paper, children's, and card companies. Which ones best fit my own aesthetic and hope for these fun notes?

The Land of Nod kept coming to the top of my list. I've purchased many pieces from their collections throughout the years for my children, and I find their products smart, well made, and the right mix of whimsy and art. Blogging throughout the years, I had developed a mother-designer friendship with Danielle, Creative Director for the company. I worked up my biggest entrepreneurial boost of confidence and sent her an email to pitch the idea of lunchbox notes.

And she didn't say no. In fact, she said yes.

And months later I found myself illustrating for not only a brand that I love, but for people who help me make other moms and dads feel awesome. And handle my creation with the kind of positivity and wit that I'd hoped. And it's kind of awesome.

This is not the norm for product creation or working with brands, but every once in a while the heavens align and dreams come true. And there's just no reason why the same couldn't happen to you. Keep dreaming and taking big girl leaps to make those dreams come true.

And get yourself some Lunchtime LOL Notes! They've already sold out once so get your order in soon!!

xoxo, MJ


6 Picks for Back to School
Back to school gear is functional and fabulous! See our top picks for the retailers that do it best.

Back to school gear is functional and fabulous! See our top picks for the retailers that do it best.

1. Lunchbox 2. Lunchtime LOL Notes 3. Modern Backpack 4. Water bottle 5. Mini pack 6. Backpack for all

The excitement of school is in the air! It's my favorite time of the year with all the fresh starts that it brings. If you haven't noticed already, you'll soon see all major retailers filling shelves and racks with back to school gear.

For our crew, it's always online shopping that wins out. Not only do we avoid the crowds, but the selections are amazing and coupons abound. 

Here's what my kids will be packing this year:

1. A durable lunchbag: We pack most days, and we have to have a pack that can last through spills, drops, and washes. From our year's of use, I highly recommend the Land's End lunchbags.

2. A great sense of humor: How could I not include my Lunchtime LOL Notes? I partnered with The Land of Nod for my first product - a pack of 180 lunchbox jokes to last year the whole year through. Each one has a full-color illustration and joke with the back side blank for your special message! Hurry and order yours today before they sell out - again!

3. A stylish backpack: My tween wanted something out of the ordinary for her bag this year, and we love what PBTeen had to offer! This vintage inspired polka dot is a classic. I'm highly likely to steal this from her.

4. A strong water bottle: Camelbacks are great for kids, too. These cute designs are available at L.L.Bean, and they withstand the dishwasher oh so well for those of us who avoid hand washing just about everything.

5. The sweetest little thing: The Land of Nod has the most adorable animal packs that you have to scoop up for your darling preschooler. That doggie!!

6. Customization galor: If your child wants a lot of choices and options, Pottery Barn has the best selection we could find. Sizes, patterns, colors, patches, and monograms are all out there to explore. But act fast to be sure you have it all complete come the start of school!

Have you done your shopping yet? Tell me, what's your favorite purchase?

xoxo, MJ

5 Places in Your Home that can Help Your Child Learn
Use these five places in your home as natural spaces for learning. Some creative ideas you'd never expect, but ones you'll use after reading this post!

Use these five places in your home as natural spaces for learning. Some creative ideas you'd never expect, but ones you'll use after reading this post!

As a teacher alum (AKA former teacher), I'm always interested in finding natural, positive ways that my children can fall in love with learning. We (my husband and I) utilize the summer months and casual moments together to reinforce what happens in the classroom as well as open up new avenues for curiosity and learning.

Your home can be a fun place to bring subject matter to life, and to practice and hone in on the challenges your child might be encountering. Here are 5 places in our home that we use for learning:

Use your stairways as a place to high five review learning concepts like site words and times tables. As she/he goes up the stairs, your child says the problem out loud and then gives a high five to the paper.

Use your stairways as a place to high five review learning concepts like site words and times tables. As she/he goes up the stairs, your child says the problem out loud and then gives a high five to the paper.

1. THE STAIRS:

This is a fun exercise in reviewing new and old information! I saw it over at Creekside Learning, and we had to give a it a try. (Ssshh, don't tell my kids they're learning as they're having fun high-fiving.)

The idea is this: Trace your hand onto sheets of paper and add facts that you want to remember. Think facts like multiplication tables or sight words. We have two sets up right now - one for my Kindergartener and one for the 3rd grader (see above). As each goes up or down the stairs, they say the problem (e.g.: "4 times 10 equals 40") aloud and then slap the hand. Using their hands and minds in collaboration helps children to reach a new level of connection. And why not have something to do as you go up and down the stairs? High fives!!

2. THE KITCHEN:

Natural opportunities for learning come up all the time in the kitchen! Measuring ingredients and learning fractions go hand in hand. Doubling recipes or halving them bring out the division skills. Authentic world cuisines bring in history and geography. 

We've brought the kids into the kitchen more and more to make great food and to learn great skills. Here are some easy tips on how to have more success (and joy!) with the kids. 

3. THE COMFY CHAIR OR FAVORITE WINDOW:

Sometimes the learning can be very casual and independent, too. Think of the natural places your children go for comfort or rest. For my children, there are comfy chairs near our sunny windows that are always filled with their presence. Not coincidentally we try to keep the shelves and tables near the chairs filled with books that my kids might want to pick up. I'm all for increasing their associations with comfort and reading. :) 

I like to switch out books for the holidays to catch their attention as well as move new series into the space. We also keep our new library reads in this space so that their reading choices are at hand just when they want to reach for them.

4. THE BREAKFAST TABLE:

A lot of our best thinking happens early in the morning, and the breakfast table can be a good environment for learning, too! Sometimes we use our kitchen's chalkboard wall to learn a new word or try a challenge word problem together. If your child is more on the quiet side first thing in the morning, consider leaving out a relevant newspaper article for him/her to read or even a maze to do while enjoying their morning meal.

5. THE GARAGE:

Ok, maybe I'm stretching the definition of home for this one, but for all of you parents out there who spend hours transporting your children every week, you most likely would consider your car an extension of your home. And all that time in transit can be great learning time, too! If motion sickness is not an issue for your child, have them keep a book next to their seat to read as you drive. If it is, consider checking out audio books that you can cue up for errand running and longer trips. 

Keep a BrainQuest pack of questions in the glove compartment that you can ask each other when you're getting gas or driving to school. 

And most importantly, show your children that you're passionate about learning and growing. Join in the fun with them, and you'll also be building special family moments!!

How do you incorporate learning into your home? We're always hoping to add new ideas!

xoxo, MJ

Create a Constellation Board
Help your children explore the stars with a constellation board! A great craft that brings in geometry and science.

Help your children explore the stars with a constellation board! A great craft that brings in geometry and science.

Summer nights are the perfect time to get out and explore the stars. We've had star gazing on our bucket list, and to kick it off we made a constellation board. Learning the star patterns that can be seen in the night sky as well as some of the stories behind their origins helps the world feel a bit smaller to young minds. If you're looking for some great reading on constellations, check out the picture book, A Zoo in the Sky with its bright and colorful illustrations.

The constellation I can always spot best is Orion the hunter, with his belt of three stars, but that constellation is visible in the winter sky for those of us in the Northern Hemisphere. So I needed to brush up on my knowledge of the star patterns, too! I found the above fabulous constellation map at Mr. Printables, and I think it's the loveliest version I've seen.

From this map, we were able to explore the shapes of the constellations. Some constellations are more faint to the eye than others so we decided to study the original shapes to see if we could find all of the connecting stars. 

Taking this to the next level, we mapped out the shapes ourselves. To make a constellation board, you need:

  • A cork board
  • Pins
  • String in a few different colors
  • Scissors

Beginning with the Summer Triangle, three bright stars in the summer skies, we placed pins on the board and wrapped yarn around them. Tying a tight knot, we trimmed off the excess string. Next, we placed the pins for the stars in Cygnus which became a great lesson in geometry, scale, and art. 

We added the other two constellations that make up the Summer Triangle as well as a few other constellations that my children found particularly interesting because of their names or stories, like Hercules and Pegasus. To create a truly colorful piece of art, we chose a different bright-colored yarn for each constellation. The final product is a beautiful piece of string art that we have hanging for all of us to enjoy during the summer days and nights!

Constellation boards are a colorful, modern way to bring science into art.

Constellation boards are a colorful, modern way to bring science into art.

How do you share the intergalactic beauty with your children?

xoxo, MJ

Make Sponge Bombs
Sponge bombs are created from strips of household sponges. Follow this easy DIY to make these in a few minutes and play all afternoon long!

Sponge bombs are created from strips of household sponges. Follow this easy DIY to make these in a few minutes and play all afternoon long!

The summer weather has finally turned warm here, and we've been looking for ways to keep cool. I ran across this video from Inner Child Fun and decided we needed to add sponge bombs to our summer projects. Spoiler alert: these take 2 minutes to create!!

Sponge-bomb-supplies

Here's what you need: scissors, three sponges, and a hair tie or rubber band. Cut each sponge vertically into three pieces. You'll then have a total of nine thin strips.

Gather these in your hands, turn a few of the strips to make a round fistful. Tie together with the rubber band or hair tie.

Spread out the strips evenly in the ball and dunk in a cold bowl of water. (Ok, it doesn't have to be cold, but that definitely adds to the drama). We played catch in pairs with the sponge bombs, tracking how many consecutive catches we could make. These are also a lot of fun to throw AT someone in a sponge bomb fight.

Hot weather and time to play? Make some sponge bombs.

Hot weather and time to play? Make some sponge bombs.

And for a fun twist: have one person hold a bowl on their head. They work with a partner to try to catch the sponge bombs in the bowl. Play as teams to see who can catch the most (and get the wettest) in their bowls.

Are you ready to beat the heat?

xoxo, MJ

DIY US Map Puzzle
Make your own game with this free puzzle pattern of the United States! Use foam to create a game you can use and re-use.

Make your own game with this free puzzle pattern of the United States! Use foam to create a game you can use and re-use.

This post is sponsored by Cricut, but the opinions and ideas are all my own. Thank you for supporting the brands who support Pars Caeli!

Some of my best parties have been the ones where I've planned games for every generation to enjoy! And this fourth of July I'm continuing the success with this fun puzzle activity for guests to take on together.

Create your own map of the U.S.! Use Cricut foam and this free pattern.

Create your own map of the U.S.! Use Cricut foam and this free pattern.

We decided to make ours from foam to give it the weight of a real puzzle, and we added in our patriotic colors to add to the fun. 

Supplies:

Upload the US Map puzzle file to the Cricut Design Space as a vector file. This will create multiple pages of boards with states on them. If you'd like to use less foam (or less colors), you can ungroup the image and consolidate your states onto less sheets.

Replace the normal cutting blade with the deep cut blade. This is super simple: open the latch, release the blade cartridge, press down on the top button to release blade, and insert the new blade. Place the foam on the heavy grip matte. When you select your material on your Cricut Explore, be sure to set the dial to custom, and then on the app, select foam. Also, did you know that the Cricut Explore has a new app for your Iphone? Yup, you can design from anywhere.

Once you've cut all of the pieces from the foam, carefully remove the states from each piece. The Cricut Explore can cut even the smallest states so be careful as you remove them from the larger piece to make sure you capture all the details!

Get the whole crowd involved in this fun foam map puzzle that you can create! Bring the family together as you build our nation. Pinning this for 4th of July parties!

Get the whole crowd involved in this fun foam map puzzle that you can create! Bring the family together as you build our nation. Pinning this for 4th of July parties!

Are you ready to win a Cricut prize pack? Head on over to the Facebook page and click on the Summer Love Tab. Here are the details on the giveaway:

Until Friday, July 3, 2015 , submit through the online Facebook form your answer to this question: Where will you create and/or use the Cricut Design Space™ app for iPhone® this summer? Complete entry details will be available by 9:00 AM MDT June 29, 2015, on the Official Cricut Facebook page. Entrants’ answers must be submitted through the form on the Official Cricut Facebook to be considered, and meet criteria listed in Selection of First Prizes section below.

  • One (1) Weekly Winner will receive: One (1) Cricut Explore One™ Machine, a Brights Cricut® Vinyl Sampler Pack, Cricut® Transfer Tape, a Cricut® Tools Weeder, a Cricut® Material Sample Package (contents will vary) and a $100 gift card from Jo-Ann Fabric and Craft Stores. (Approximate Retail Value: $427.96 USD)
  •  Selection of weekly winners:  A panel of judges will select the top three entries per week from among all eligible entries received.  The top three entries will then be sent to a panel of judges who are bloggers (that’s me) to pick one winner per week based.  The entries will be chosen by each panel of judges based on the following judging criteria:
    • Originality of submitted item
    • Creative use of daily themes (as specified above)
    • Educational value
    • Demonstrates new possibilities for use of Cricut® products
    • *If you will submit a supplement photo through Instagram, you must follow @OfficialCricut on Instagram, use tags of @ OfficialCricut and #CricutSummer and provide your Instagram handle in your entry form on the Facebook page so that Sponsor can match the photo to the entry. A photo is not required to enter or win.
Crayon Scratch Off Fireworks
Do you remember making crayon scratch offs as a child? Enjoy the same fun with your children with firework art.

Do you remember making crayon scratch offs as a child? Enjoy the same fun with your children with firework art.

Crayon scratch off art is a fun project that shows off the bright colors that lie just below the dark, top layer. The contrast of the bright and dark make a great backdrop for firework art!

Did you make these as a child? I remember pressing so hard against a piece of white paper with my crayons, covering every last bit of white space. And then grabbing the black crayon to cover over it all. 

For this firework art, you'll need:

  • Posterboard or heavy paper
  • Crayons or oil pastels
  • Black tempera or acrylic paint
  • Paintbrush
  • A scratching tool like broken tip pencil or dull pen

Begin by covering your entire paper with color. We wanted to create a firework sky perfect for the fourth of July so we made a spiral of blue and red. Be sure to go all the way to the edges.

PC_crayonscratchoff_firework.jpg

Next, paint on an even coat of the black. Let it dry completely. To be sure that the black is a solid, deep tone, add on another coat of black paint and let it dry. This whole process took less than an hour.

Once dry, take your scraping tool and draw fireworks of various shapes and sizes. Be sure to leave enough black on the paper to illustrate the night sky. Add in bits of sparkle and stars that shine through the shapes that you create.

Keep in mind that sometimes the paint will require a few strokes to remove completely. And some will remain on the poster board, making a scattered fizzle like we all love in our favorite fireworks!

These would be a great craft to set up for the kids at your July 4th celebrations! Fireworks before it even gets dark!

XOXO, MJ

P.S. If you're joining in the 18 Summers Challenge, and making the most out of this summer with your children, join us tomorrow as we make some marbelized paper from shaving cream and food coloring.

How big is the solar system?
Create a scale model of the universe in your own backyard by pacing off the planets! A great lesson with other fabulous planetary resources.

Create a scale model of the universe in your own backyard by pacing off the planets! A great lesson with other fabulous planetary resources.

You are out of this world! And just how far is that? Our universe is so vast it's almost incomprehensible. Almost!!

Today we're shrinking the universe to fit in your backyard or local park. Using balls and your footsteps, you can explore the distances between planets and the sun. We found this great idea from here on how to imagine the vastness of the universe. We paired the Planet Roll Call chant we found from Scholastic (check out their resource page), and finally, we watched over and over this animated song with fun facts about the solar system. How did I not know that Venus rotates the opposite direction of earth?

Here's what you need to travel with us:

  • The printable above! It has the steps you need to take to walk the distances, learn quick facts about each planet, and colorfully label the 8 planets and the sun
  • 9 balls. If possible, find balls that would be similar to the sizes of the planets. The sun becomes the largest, Jupiter and Saturn should be the next two largest, and the rest get smaller from there, with Mercury as the smallest.
Create a scale model of the universe in your own backyard by pacing off the planets! A great lesson with other fabulous planetary resources.

Create a scale model of the universe in your own backyard by pacing off the planets! A great lesson with other fabulous planetary resources.

Here's our labeling process mid-way through. If you're motivated, you can recreate each ball to look like the planets. For this exercise, we wanted to keep things simple so we taped the names to each of the nine balls.

Beginning with the sun and taking steps from there, we put the planets in order. As a fun example, I asked C to put her finger next to our model earth. This distance across one finger is the relative distance to the moon.

Imagine that's the furthest that any human has traveled thus far! Looking back from Neptune, it seemed almost an invisibly small fraction of the universe.

I found myself understanding the solar system in new ways, too! Thinking about how life might be possible on other planets due to their proximal nature to the sun, but also nearly impossible for many others because of the extreme distances of others.

Also, the sun is our closest star, and the next closest star, Alpha Centauri, is another 200 miles in steps, even in our scaled model. Amazing!! And lots of whoas from the kids.

Our planet exploration was a wonderful reminder of the vastness of the universe and our relatively tiny spot within it.

Give this unusual walk a try and see how much you can discover about the expansive nature of the solar system!

xoxo, MJ

P.S. We're moving onto a study of the night sky through the story of constellations tomorrow! You'll need a corkboard, string/yarn, and some pins/pushpins.

Balloon Rockets
Watch how the force of air leaving a balloon can launch a rocket!

Watch how the force of air leaving a balloon can launch a rocket!

Balloons are always around our house, usually used for balloon volleyball, and today we're transforming them into rockets! Have you launched a balloon rocket before? It's a simple way to show cause and effect and a fun way to have races in the backyard (or in the living room on a rainy/snowy day).

Watch how the force of air leaving a balloon can launch a rocket!

Watch how the force of air leaving a balloon can launch a rocket!

To make your own you'll need, balloons, scissors, string, a straw, tape (we used packing tape to make sure our straw and balloon stayed together), and an image of rocket. We drew ours on some poster board. Any image you create or print will work just fine as long as it's not too heavy.

Select an elevated course to use: we decided to go from the post on our back deck which is three stairs off the ground down to the grass. If you're indoors, you can go from a cabinet handle or a railing to the floor. With the rope, I tied one end around a deck post. On the other end I threaded half of a straw through until it reached back up top to the post. That straw piece is your rocket launcher and keeps your balloon from swirling and twirling all over the place.

Grab a helper or secure the lower end of the rope. My son was all about assisting on this one! Next, blow up the balloon. Blow it all the way up and hold the end tight. Do not tie it off.

While keeping it securely closed with your hand, add the rocket to the top with tape. We rolled some tape on the back of the rocket beforehand so it was easy to do quickly. Put tape around the straw as well so that it attaches well to the balloon. We lost a few rockets when the balloons became detached from the straws.

The best part of this activity for me was seeing his excited face at the other end of the line! "Come on, Mom, another rocket!!"

Make a dramatic countdown - 10. 9. 8.... And all at once, release your grip on the end of the balloon and let your rocket shoot out! Make sure your string is tight, your straw is straight, and your balloon is really full of air to get the most our your rocket launch!

Enjoy, enjoy!

XOXO, MJ

P.S. We're forming constellations tomorrow with pins, string, and a corkboard!

The Best Biggest Bubbles
These bubbles are amazing! A must-try for summer. Great for any age.

These bubbles are amazing! A must-try for summer. Great for any age.

Bubbles.

If they aren't the quintessential childhood amusement, they're pretty close. I've seen some fantastic images on Pinterest of these amazing giant bubbles, and I wanted to include some of these in our 18 Summers Challenge. There are a TON of great options for the perfect blend of liquids for the bubble solution as well as just the right wands to make. Our favorite is Valerie's, from Inner Child Fun. Head over to her site (and then come right back) to see the fabulous videos on how to make a great wand and the perfect bubble solution!

The best 30 minutes we've spent all summer - creating these bubble wands and magic solution from Inner Child Fun. You have to give these a whirl!

The best 30 minutes we've spent all summer - creating these bubble wands and magic solution from Inner Child Fun. You have to give these a whirl!

I sort of assumed that this kind of project was one that would either take a long time (nope) or not really work for little hands (totally wrong). And I know I say it a lot, but this is one you really do need to try. All three kiddos were loving bubble creation for almost an hour, and I was asking if I could please have a turn, too!

Use household string to measure one arm length and cut. Measure another for the entire wingspan. With the long string in hand, thread on a metal washer. Tie strings to eyehooks on dowel rods, and you're ready to roll!

Use household string to measure one arm length and cut. Measure another for the entire wingspan. With the long string in hand, thread on a metal washer. Tie strings to eyehooks on dowel rods, and you're ready to roll!

We took a trip to the hardware store to get all we needed:

  • One 3/8" dowel rod (I cut this in half with a steak knife because they are both thin and soft enough wood, and I was not ready to break out the power tools) So you have two wands from the one dowel.
  • Two small eye hooks (you can easily hand screw these in)
  • Household string
  • One metal washer
  • Scissors
  • Paint, markers, glitter to make the wands super fabulous

Screw one eye hook into one end of each dowel. Measure one arm span and cut the string. Measure the full arm span, and cut another string. Tie each end of the short string onto the eye hooks. Thread a metal washer through the long string and tie both ends into the eye hooks. The washer will slide freely on the string.

I told the kids they could decorate their wands, and they went hog wild! My oldest created an abstract bubble pattern on the ends of hers, and my youngest drew stripes up and down his. And my middle child spent an hour to create a fantastical rainbow set. Pretty beautiful stuff, even without the bubbles.

Once your bubble wands are made, your children are going to want to get right to making the bubbles! If possible, make the recipe below and let it sit out for a few hours. Bubble experts suggest that the Dawn liquid needs a few hours to release certain ingredients that could deter the bubble's longevity. This is hard core stuff!

We made our solution in the kitchen and let it sit for 30 minutes (we're not good at waiting). We made sure that it was kept pretty dust free, small particles will deter bubble making.

These bubbles work best on humid, windless days. But the best part for me was seeing that they worked from the first try to the last.

Use a flat pan on some kind to hold the solution, and be sure to dip your entire length of string into the solution. Slowly pull up and out of the pan and walk backwards to create long, large bubbles!

Bubbles are great for every age. You have to try these easy-peesy giant versions!

Bubbles are great for every age. You have to try these easy-peesy giant versions!

Each child developed their own method, and it was amazing to see their faces light up every. single. time. We will definitely be making more of the best biggest bubbles this summer, and I can't wait to have a playdate with friends to give them a try, too!

This recipe and wands would make a wonderful birthday present for some playful kids (or adults) in your life!

XOXO, MJ

P.S. We have a great Father's Day banner coming your way using tape resist and watercolors!

P.P.S. If you haven't yet, be sure to subscribe to our newsletter to get all you need to know for next week's Out of this World activities.

2 Easy Exploding Experiments!
Make these two simple exploding experiments for some gooey, summer fun!

Make these two simple exploding experiments for some gooey, summer fun!

Summer is the right time to get kids' hands dirty and involved in learning! An open space that that can be get messy (or left dirty) can become the canvas for explosions and explorations. We decided to do some easy chemical reactions and see the results.

I have always wanted to try the erupting volcano experiment with my kids so we decided to gather the simple ingredients and head to the backyard.

If you want to try this, here's what you need:

  • A flat surface (we used a cookie pan covered in aluminum foil)
  • Tall jar or bottle
  • Baking soda (quarter cup)
  • Water (quarter cup)
  • White vinegar (quarter cup)
  • Red food coloring and dishsoap (not necessary, but way more fun)
  • Dirt, sand, or clay for volcano making
Make these two simple exploding experiments for some gooey, summer fun!

Make these two simple exploding experiments for some gooey, summer fun!

THE ERUPTING VOLCANO

In the bottle or jar, add 1/4 cups baking soda and water. Squirt in red food coloring and a strong squeeze of dishsoap. These will add foam and drama to your explosion. Put the lid back on the bottle or jar.

Using sand, dirt, or clay, mound up around the bottle. We used potting soil and water to build up the volcano sides. Once those are in place, take off the lid and pour in 1/4 cup of vinegar. The eruption is quick but not overwhelming. The kids wanted to touch the "hot lava" right away and were surprised that it smelled so good. :)

THE EXPLODING GEYSER

This next experiment we did right after the volcano because the kids wanted a bit more drama to the eruption. Have you done the Mentos candy in bottle of soda? Really, it's super fun and surprising to the unsuspecting.

To make the exploding geyser, you'll need:

  • One pack of mint Mentos
  • 2L bottle of soda (Diet Coke works the best)
  • A piece of paper and tape
  • A business card or strong piece of cardboard
Make these two simple exploding experiments for some gooey, summer fun!

Make these two simple exploding experiments for some gooey, summer fun!

Place the soda on a flat surface. Roll a piece of paper in to a tube to a size that fits the Mentos inside. You want to be able to drop all of the candies in at the same time for the most dramatic effect. Keep a card over the top of the soda until you're ready to let the Mentos drop in. Be ready to flee quickly once they drop in!

The explosion is no more than five seconds, but we've watched the replay over and over again!

These two simple and quick experiments delight on the cheap. Make them a part of your 18 Summers Challenge (even if you've already done them before!).

XOXO, MJ

P.S. We have fantastical bubbles and wands coming your way tomorrow. They are SO much fun. Stay tuned.

P.P.S. The newsletter is on its way, too, with prep for next week's Out of this World adventures.

Rainbow Water Music
A quick and fun way to bring music into your summer! Create a scale with water and food coloring and let your children try out their own music.

A quick and fun way to bring music into your summer! Create a scale with water and food coloring and let your children try out their own music.

Water makes beautiful music! And through this simple activity with food coloring, eight identical glasses, and water, you can discover an entire musical scale.

In our home, we always have music playing (or are playing music) so when I saw this graphic on E is for Explore, I knew our kids would enjoy creating their own color-infused instrument. The beauty of this activity is that it's great for any time of year, uses what you already have, and clean up is super fast, too. It also teaches measurement and fractions, pitch, color mixing, and so much more!

We used 8, 8-oz. glasses and filled them in with measurements of 8 oz., 7 oz., 6 oz., 5 oz., 4 oz., 3 oz., 2 oz., and 1 oz.. Once the glasses were full, we began the color process. Everyone was able to mix their favorite color with a wooden skewer until we have a spectrum of eight colors.

We used our silverware as the mallet for the water xylophone. At first, the kids just wanted to hit the full run of notes, up and down, along the sides. But the more they hit the glasses, the more they began to recognize music within the collection of sounds.

Can you name the tune we're playing?

We tried recreating simple songs that we all know. And as we did so, we adjusted the amount of water in each glass. Did that note sound too sharp? Or too flat? And we'd add or pour out water accordingly.

A quick and fun way to bring music into your summer! Create a scale with water and food coloring and let your children try out their own music.

A quick and fun way to bring music into your summer! Create a scale with water and food coloring and let your children try out their own music.

Have you ever tried this out for yourself? The food coloring is not necessary, but it definitely adds to the fun!! And perfect for a sunny day.

XOXO, MJ

P.S. Don't forget to check out all the ideas for the 18 Summers Challenge by searching for #18SummersChallenge. We're continuing with explosions and transformations tomorrow with our own volcanoes and soda pops!