Posts tagged pineapples
Welcome to a Wonderful Year Teacher Presents & Free Printable

This shop is part of a social shopper marketing insight campaign with Pollinate Media Group® and Office Depot, but all my opinions are my own. #pmedia #inspirestudents http://my-disclosur.es/OBsstV

Pineapples are all over the place these days. They're trendy now, and during colonial times, the pineapple symbolized the warmest welcome you could extend to a guest. It has continued to evoke a sense of hospitality and sweet goodness throughout the generations.

Extending welcome is a primary job for a teacher in the first month of the school. Around here, we're already in the third week of school, and the newness is beginning to wear off...which means... it's the perfect time to give your children's teachers a present that they want.

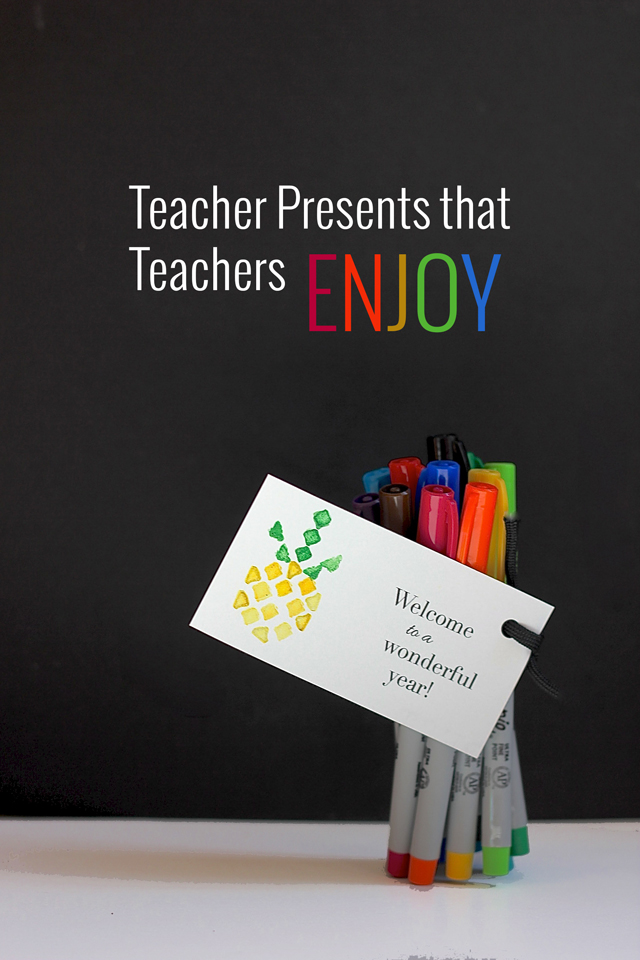
Sharpies! Smelly markers! Window markers! Great pens! The list of fantastic school supplies is a long one. Children aren't the only ones who love these colorful tools. Show the teachers in your life that you look forward to what the next months hold with a Welcome to a Wonderful Year present. You and/or your children can create these gift tags or notecards using pencil erasers and stamping pads. 
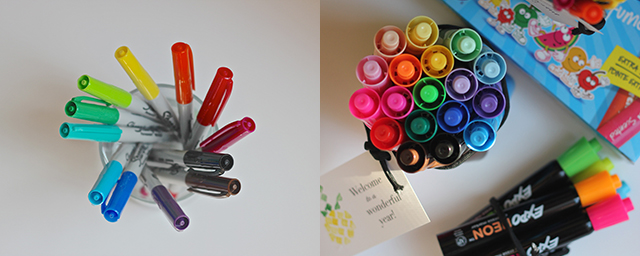

We bought fun school supplies at Office Max. Right now, you can save $5 off your purchase of $20 or more on select Newell Rubbermaid brands which include all of our favorites (PaperMate, Expo Neon Window Markers, Sharpie, Uni-Ball, & Mr. Sketch) And, you can cash in on Office Depot Rewards for shopping at Office Max as they are owned by the same company! It's kind of hard to resist...Head over to your Office Max or Office Depot and take advantage of the deal while supplies last.

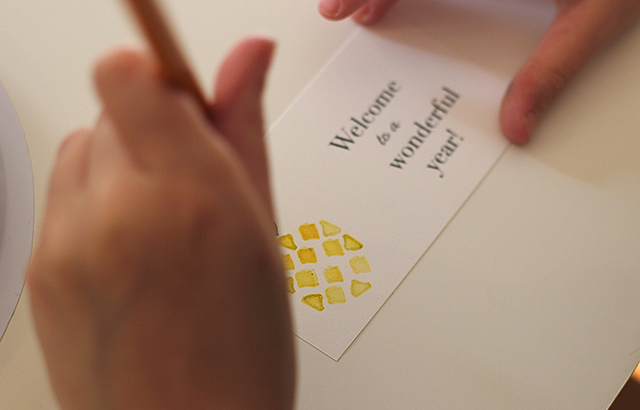
You'll need some pencils with fresh erasers, an inkpad, and some paper to make these pineapple prints. Draw simple shapes on your erasers, like the ones shown above. With an X-acto knife, cut around these shapes. We made two sets of these shapes so that one of each could go into the yellow and green.

The pineapple shape is a breeze once you get the hang of it. Using a combination of diamonds and triangles, you can create a charming geometric design.

Or, if you aren't ready to take the project right now, click here to download your own pineapple printables.
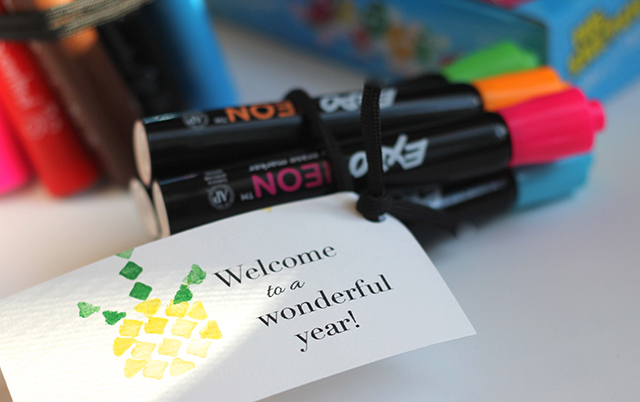
Wrapping up a bundle of these fun supplies with a parachute cord or ribbon and a tag, lets our teachers know that we appreciate them, and we're looking forward to working together!
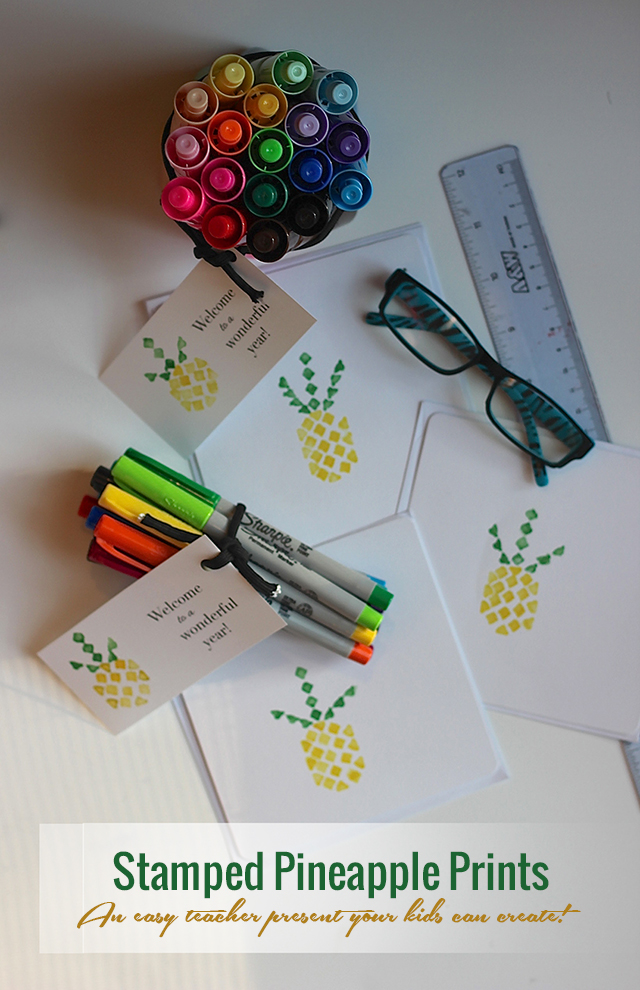
My oldest (9) and I created these together in less than an hour. Holding her back from using all the colorful markers was the hardest part....

Happy making!

XOXO, MJ

DIY Umbrella on the Cricut Design Space Star™

Disclosure: I am a member of the Cricut Blogger Network. I may receive prizes in exchange for my winning projects. Even though I am not being directly compensated for these posts, I am under consideration for a prize with Cricut Design Space Star. All opinions are 100% my own.

PC_DIYumbrella_pin.jpg

I've wanted to turn my Pars Caeli cloud into an umbrella design for the longest time, with no tools to make it happen. And then this wild and wonderful Cricut Design Space Star contest comes blowing into my life, and I know exactly what I want my first project to be!

This cloudy umbrella is basically a no-mistake project. Vinyl shapes can be moved and removed without leaving marks or residue. The shapes cling easily to the coated material, and the transparency of the umbrella allows you to see what you're doing the whole way through. I had my first bubble umbrella when I was six, and I've loved them ever since. These clear canvases also pair beautifully with the opaque vinyl.

So now that we've all left our intimidation at the door, here's what you need to make your own:

  • Clear umbrella (this one is from Totes in a classic design)
  • White vinyl sheets
  • Cricut Explore
  • Gold paper or vinyl
  • Cloud and lining template

Step One: Design your pattern. Of course, I wanted clouds. Using Illustrator I created an .svg file. Based on the size of my umbrella, I made the clouds about three inches wide. I was happily surprised with how many clouds I could fit on one sheet. Using the vinyl setting, feed your mat with vinyl into the machine and carefully remove the cut clouds from your mat when complete.

PC_diyumbrella_cricut.jpg

I created another .svg file with the thin lining that rests on the bottom of the clouds. I changed the setting to paper, and fed in gold hammered scrapbook paper. These were fragile so removing them from the mats was a careful process.

Step Two: Next I wanted a GOLD lining for the clouds. I'm joining with a merry group of ten creatives for this Cricut Design Space Star challenge, and we had decided early on that we wanted our theme to be Gold is the New Black. And, do you know what's even better than finding the silver lining on a cloud? Yes, that's right, finding a gold lining.

PC_DIYumbrella_close.jpg

Step Three: Press the gold paper lining to the bottom of the white vinyl cloud. 

Step Four: Press the clouds to the interior of the umbrella. This will protect your design from the wear of the elements. I kept the clouds to the lower portion of the umbrella, with three on each panel, so that I could still see through the bubble. Decide on how much vinyl coverage you want on yours.

PC_DIYumbrella_1.jpg

We've had a rainy end to the summer, and this umbrella, with its gold lining reminders is the perfect way to stay happy and dry in the downpours.

If you love this idea, head on over to the Cricut Pinterest board, and repin! I am so appreciative of your support and kindness!

PC_designspacestarlogo.jpg

My team, Lucky #13, has put together a wide variety of incredible projects. And you need to check out every single one! Find the links below. Vote for and pin your favorite projects!

You can also search for our projects on this and upcoming challenges with #cricutdesignteam13

Cricutgearchallenge_Lucky13_fashion.jpg

Lucky 13 team in the Cricut Design Space Star™ team:

  1. Booties, Earrings, and Hearts from Andrea of Andrea’s Notebook
  2. Children's shirt and gold sandals from Celina of Petit A Petit and Family
  3. Cut out leather purse with cross lining from Erin & Tricia of Suburban Bitches
  4. Leather cuff from Monica of East Coast Creative
  5. Easy DIY hashtag t-shirts from Sarah and Jessica of Pretty Providence
  6. DIY umbrella and Pineapple Scarf from MJ of Pars Caeli
  7. Leopard leggings and tank from Sadie Jane of Simply Sadie Jane
  8. Laptop decals from Crystal of Sew Creative Blog
Lucky 13 team picture.jpg