Posts in DIY 2
Ali's Birthday Extravaganza: the place cards

We partnered with Tiny Prints to bring you these projects. We were compensated for this post, but all ideas and opinions are our own.

**Ths post is meant to reflect a celebration of life. We honor and remember all those who lost their lives in 9/11. We will never forget.

PC_Ali's-Birthday-Tour.jpg

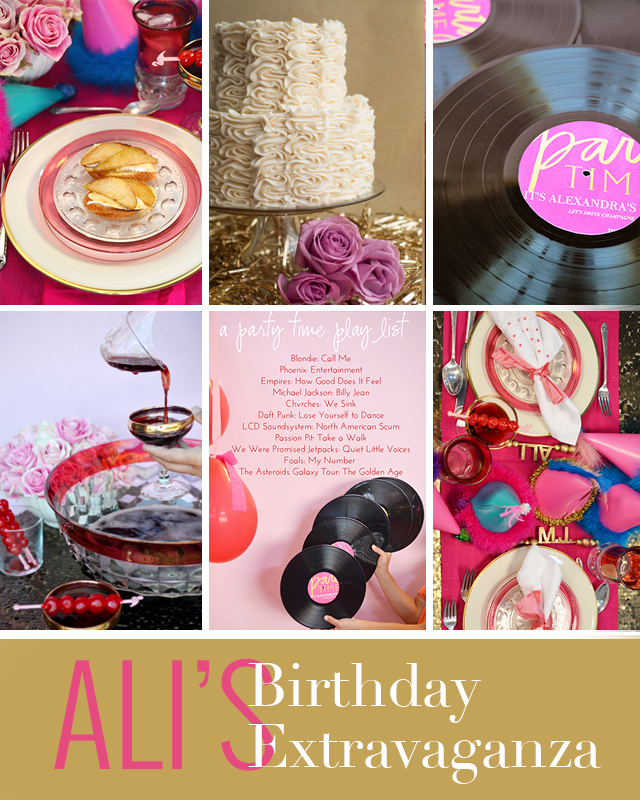
Kids aren't the only ones who deserve incredible birthday parties. All this week, my Endless Summer Project gals - Alexandra HedinAmy of This Heart of MineJennifer of Classic Play, and Melissa of Lulu the Baker, and I have been throwing a glam-tastic party for Ali! She is the weeknight party girl so we had to go big. I mean, this girl is a big deal. Check out her TV spot, highlighting some of the details from the party.

We were inspired by a pink and gold party invitation from Tiny Prints to set the stage for a night of great music, delicious appetizers, cool decor, a cocktail to write home about, and, yes, you need to tune in tomorrow for the amazing cake.

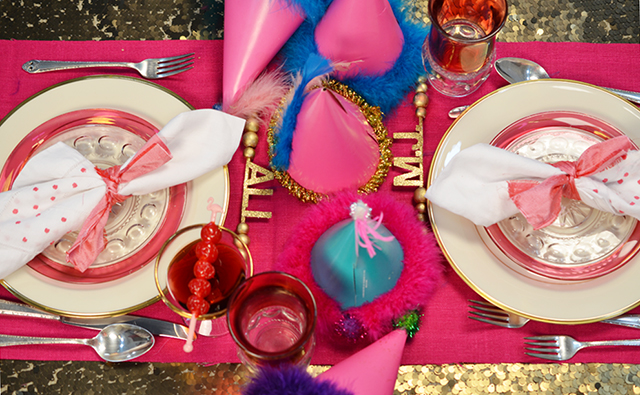
I wanted to create some unique placecards to celebrate Ali. Building off her cherry skewers, these name kabobs make fantastic bling for just about any party.

PC_Ali's-Birthday-Celebration.jpg

These place cards are super easy to make, and you can pull them together while the crostini is in the oven and the cake is cooling.

PC_Ali's-Birthday-Extravaganza-2.jpg

When the party involves a sequined tablecloth, you have to go over the top. So, for the creating, you'll need:

  • Skewers (like the wooden ones you use for grilling)
  • Wooden beads of various sizes
  • Gold leaf paint 
  • Hot glue gun
  • Gold scrapbook paper or small letters
PC_glamtasticplacecards.jpg

Taking wooden beads from uncoated to gold leafed is more than kind of amazing. Instant sparkle. First paint your beads. I painted mine on the skewers so that I could easily cover all sides.

Next, the letters. I cut mine using a die cutting machine, but store bought letters work just as well! Cut out a thin strip of the paper, fold it in half lengthwise. This is the paper on which the letters will be mounted.

Glue it on to the center of the skewer. Then glue the very bottom of the letters to that piece. The scrapbook paper is heavy enough to allow the letters to stand on their own.

PC_glamtasticplacecards_1.jpg

Add beads to either side, on the skewer. With end beads, squirt a small dab of hot glue into the center, to keep the row of beads secure.

These name skewers look great on top of chargers or cocktails! Or as an introduction to dessert like Ali has them. Also, I might make one for my desk at work. Just because.

PC_glamtasticplacecards_3.jpg

And Amy is bringing the cake. It's pretty spectacular - champagne cake!

AlisBirthdayTour_final.jpg

Happy birthday, dear Ali. Happy birthday to you!

xoxo, MJ

Tinyprints_logo.jpg
For the Love of Pumpkin
PC_9pumpkin.jpg

I haven't purchased any yet this season, but it's almost time for pumpkins. The crafting, the eating, the cooking, and the carving - so many wonderful projects coming all from one little gourd! I have been falling in love with pumpkin over and over again through a group board that I collaborate on called Pumpkin Recipes, Crafts, and More. Come on over and check it out...

I'm sharing 9 super ideas with pumpkin that will get you into the spirit of fall and delight your taste buds, too...

Mini Pumpkins:

I created these for Gina's Month of Pumpkin. She's a master with pumpkin recipes, and she let me join in the fun with this super easy pumpkin craft. These balls of yarn are topped with small pieces of pipe cleaners and stacked inside a shadow box. They make great additions to a tablescape and a delightful garland, too.

PC_9pumpkins_1.jpg

How about two great uses for pumpkins?

Pumpkin Pinata:

A balloon, yes! And a pinata! Perfect. What an awesome way to begin or end a night of trick or treating. You get all the info on how to fill the jack o'lantern over at The Gunny Sack.

Chalkboard Pumpkin Planters:

Also, I'm not over chalkboard (I hope you aren't either), and I love this pumpkin turned potted vase for colorful mums. This is a super easy and approachable (quick) project that can make any front door warm and welcoming for fall. Chelsea shows off how-to over at Making Home Base!

Memorable pumpkin treats...

PC_9pumpkins_2.jpg

Easy Pumpkin Krispie Treats:

Rice Krispie treats are always a family favorite around here, and these are too cute as pumpkins. The simplicity is right on for the kids to join in on the creation stage, too. Jen has her creations over on Yummy Healthy Easy. Can you guess what she used for the stem? 

Pumpkin Pie French Toast:

Pumpkin pie French toast? A total yes! This recipe is from Erin Chase over at $5 Dinners which means it's also incredibly affordable. We make pumpkin swirl French toast every Halloween, and I love this variation on it. But why save it just for Halloween?

And two classic desserts...

PC_9pumpkins_3.jpg

Pumpkin Cookies:

When I think of baking with pumpkin I think of these two recipes. Crissy of Parenting Pretty has gorgeous and uncomplicated Melt in Your Mouth Pumpkin Cookies. The texture and moisture of pumpkin is just perfect for these delicious desserts.

Pumpkin Donuts:

Everything tastes better as a donut. Well, almost everything. But for sure on pumpkin. Rolled in sugar... The Blue Eyed Bakers are genius. Click over and make Petite Pumpkin Spice Donuts.

An unexpected must try...

PC_9pumpkin_4.jpg

Pumpkin Pie Spice White Chocolate Caramel Popcorn:

Though I've never eaten this particular flavor combination, I think we'd be fast friends. I'm excited to give it a try. Cooking Classy serves this popcorn in a clever way, too. Go check it out!

And finally for the kids...

Hammer the Pumpkin:

Something to occupy and entertain the young hands in your house is this simple pumpkin activity. Once the gourd has reached a certain ripeness, it's perfect for hammering. Grab a golf tee and a plastic toy hammer.

Okay, it's your turn! What's your favorite way to use pumpkin?

xoxo, MJ 

Golden Pineapple Scarf for Cricut Design Space Star™

Disclosure: I am a member of the Cricut Blogger Network. I may receive prizes in exchange for my winning projects. Even though I am not being directly compensated for these posts, I am under consideration for a prize with Cricut Design Space Star. All opinions are 100% my own.

PC_pineapplescarf.jpg

Sometimes I like to push the limits. When I received my Cricut Explore machine for the Cricut Design Space Star, I wanted to see just what this wonder could do. What materials can I use? How big can I go? How intricate?

How small?

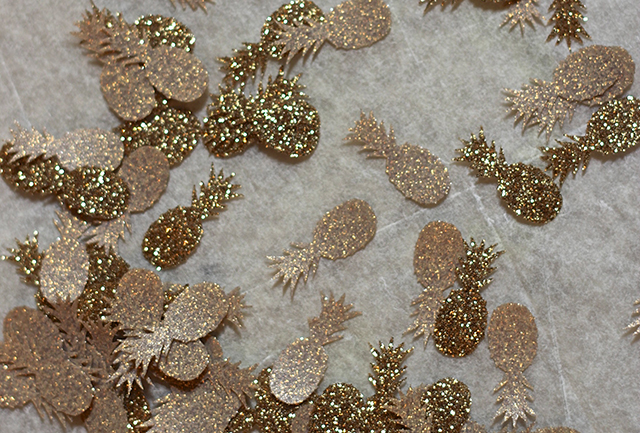
I designed tiny pineapples - like half an inch small - and watched as the Explore trimmed out every little fiber and leaf at the top of the fruit. Pretty amazing. Along with my talented and Lucky #13 team, I wanted to create something with gold. Enter the glitzy glamour of Cricut gold glitter iron on material.

Pineapples are on trend, and when you keep them ultra small, they can accent any outfit really well.

To make yours, gather:

  1. Neutral scarf (I loved the juxtaposition of the soft gauze with the bold glitter)
  2. Gold iron on material
  3. Cricut Explore
  4. Iron/ironing board
  5. Parchment paper 
PC_pineapplescarf_1.jpg

Step One: Design your tiny pineapples. I made an .svg file in Illustrator and uploaded them to the Cricut Design space. The program makes the best use of space for you! Switch the materials setting to Iron On, feed in your mat with the material in place, and watch the magic happen.

The precision of this task is pretty amazing.

PC_pineapplescarf_cricut.jpg

Step Two: Remove the iron on material from the mat. This process is known as weeding. You may want to use a Cricut tool to help you carefully remove each pineapple. I accomplished this task while watching some TV with my kids. It's really fun to see the shape, with such detail appear from the page.

PC_pineapplescarf_2.jpg

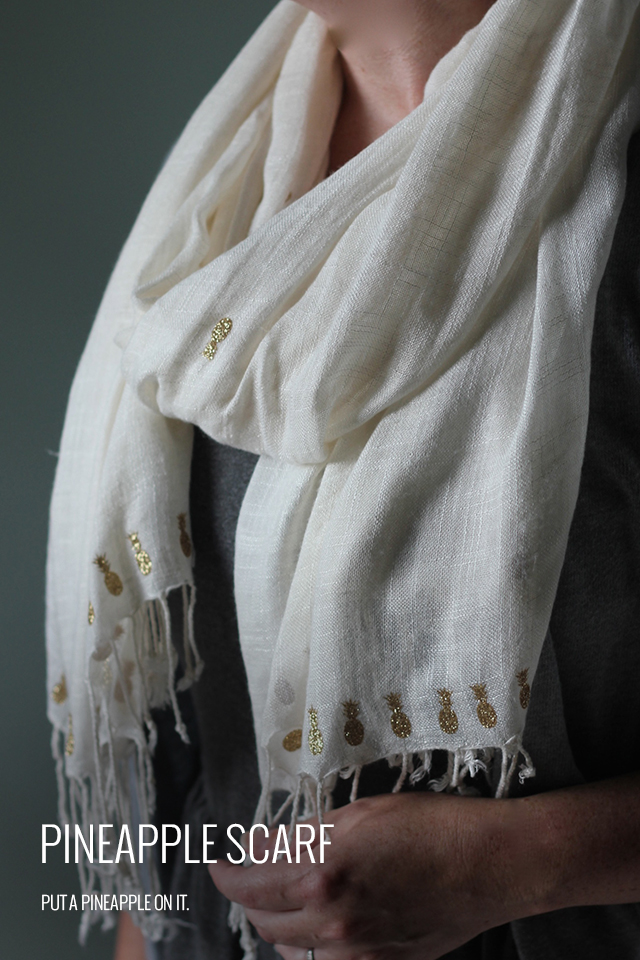
Step Three: Place your pineapples on your scarf in the desired pattern with the glitter side up. I did a line of fruit at each end and then a wide pattern for the rest of the scarf.

Step Four: With your iron on the non-steam setting, place a piece of parchment paper over 3-5 pineapples at a time. The iron on paper in the Cricut line adheres really quickly so you only need to move your iron back and forth over the parchment for 8-10 seconds.

Step Five: Remove the parchment and continue ironing the remaining pineapples.

PC_pineapplescarf_3.jpg

I love the flash and subtlety of the finished scarf. And I'm already planning my fall wardrobe around it.

Why not put a pineapple on it? xoxo, MJ

My team, Lucky #13, has put together a wide variety of incredible projects. And you need to check out every single one! Find the links below. Vote for and pin your favorite projects!

You can also search for our projects on this and upcoming challenges with #cricutdesignteam13

Cricutgearchallenge_Lucky13_fashion.jpg

Lucky 13 team in the Cricut Design Space Star™ team:

  1. Booties, Earrings, and Hearts from Andrea of Andrea’s Notebook
  2. Children's shirt and gold sandals from Celina of Petit A Petit and Family
  3. Cut out leather purse with cross lining from Erin & Tricia of Suburban Bitches
  4. Leather cuff from Monica of East Coast Creative
  5. Easy DIY hashtag t-shirts from Sarah and Jessica of Pretty Providence
  6. DIY umbrella and Pineapple Scarf from MJ of Pars Caeli
  7. Leopard leggings and tank from Sadie Jane of Simply Sadie Jane
  8. Laptop decals from Crystal of Sew Creative Blog
Lucky 13 team picture.jpg
DIY Umbrella on the Cricut Design Space Star™

Disclosure: I am a member of the Cricut Blogger Network. I may receive prizes in exchange for my winning projects. Even though I am not being directly compensated for these posts, I am under consideration for a prize with Cricut Design Space Star. All opinions are 100% my own.

PC_DIYumbrella_pin.jpg

I've wanted to turn my Pars Caeli cloud into an umbrella design for the longest time, with no tools to make it happen. And then this wild and wonderful Cricut Design Space Star contest comes blowing into my life, and I know exactly what I want my first project to be!

This cloudy umbrella is basically a no-mistake project. Vinyl shapes can be moved and removed without leaving marks or residue. The shapes cling easily to the coated material, and the transparency of the umbrella allows you to see what you're doing the whole way through. I had my first bubble umbrella when I was six, and I've loved them ever since. These clear canvases also pair beautifully with the opaque vinyl.

So now that we've all left our intimidation at the door, here's what you need to make your own:

  • Clear umbrella (this one is from Totes in a classic design)
  • White vinyl sheets
  • Cricut Explore
  • Gold paper or vinyl
  • Cloud and lining template

Step One: Design your pattern. Of course, I wanted clouds. Using Illustrator I created an .svg file. Based on the size of my umbrella, I made the clouds about three inches wide. I was happily surprised with how many clouds I could fit on one sheet. Using the vinyl setting, feed your mat with vinyl into the machine and carefully remove the cut clouds from your mat when complete.

PC_diyumbrella_cricut.jpg

I created another .svg file with the thin lining that rests on the bottom of the clouds. I changed the setting to paper, and fed in gold hammered scrapbook paper. These were fragile so removing them from the mats was a careful process.

Step Two: Next I wanted a GOLD lining for the clouds. I'm joining with a merry group of ten creatives for this Cricut Design Space Star challenge, and we had decided early on that we wanted our theme to be Gold is the New Black. And, do you know what's even better than finding the silver lining on a cloud? Yes, that's right, finding a gold lining.

PC_DIYumbrella_close.jpg

Step Three: Press the gold paper lining to the bottom of the white vinyl cloud. 

Step Four: Press the clouds to the interior of the umbrella. This will protect your design from the wear of the elements. I kept the clouds to the lower portion of the umbrella, with three on each panel, so that I could still see through the bubble. Decide on how much vinyl coverage you want on yours.

PC_DIYumbrella_1.jpg

We've had a rainy end to the summer, and this umbrella, with its gold lining reminders is the perfect way to stay happy and dry in the downpours.

If you love this idea, head on over to the Cricut Pinterest board, and repin! I am so appreciative of your support and kindness!

PC_designspacestarlogo.jpg

My team, Lucky #13, has put together a wide variety of incredible projects. And you need to check out every single one! Find the links below. Vote for and pin your favorite projects!

You can also search for our projects on this and upcoming challenges with #cricutdesignteam13

Cricutgearchallenge_Lucky13_fashion.jpg

Lucky 13 team in the Cricut Design Space Star™ team:

  1. Booties, Earrings, and Hearts from Andrea of Andrea’s Notebook
  2. Children's shirt and gold sandals from Celina of Petit A Petit and Family
  3. Cut out leather purse with cross lining from Erin & Tricia of Suburban Bitches
  4. Leather cuff from Monica of East Coast Creative
  5. Easy DIY hashtag t-shirts from Sarah and Jessica of Pretty Providence
  6. DIY umbrella and Pineapple Scarf from MJ of Pars Caeli
  7. Leopard leggings and tank from Sadie Jane of Simply Sadie Jane
  8. Laptop decals from Crystal of Sew Creative Blog
Lucky 13 team picture.jpg
Lunchbox Whiteboard: Back to School
MJ-whiteboard-DIY-logo.jpg

Celebrating back to school around here means that we're getting a whole host of lunch box notes ready to go. These little love notes have become a treasured part of my communication with the kids while they're away at school. We retell jokes on roadtrips, and my oldest is challenging herself to come up with original jokes all the time.

When they heard that I was going to be doing a back to school project, they asked for a little something special for their lunches. Hence the birth of the lunchbox whiteboard.

This project is a breeze to make (you can even have your kids make it themselves), and it will bring smiles for a long time to come!

PC_bts_whiteboard_1.jpg

Grab an inexpensive, small frame (we bought ours at CVS, and it's 3"x3"). Painting is not necessary, but we wanted chalk paint on the frame so that it could be decorated for special occasions like holidays and birthdays.

Trim a piece of notebook paper to fit in the frame. Assemble.

Write your note, create your joke, or draw your doodle with a dry erase marker.

Top the note with a piece of transparency trimmed to the size of the frame. This helps to keep the note from wiping off while it's in the lunchbag. It also allows your child the opportunity to write a note back to you. My children have already discussed a rating system for my jokes. :)

I recommend keeping the frame in the front pocket of a lunchbag if possible just to keep the food and drinks away from the frame. If that's not an option, consider wiping down your frame and pen as you pack the lunch.

PC_bts_whiteboard_2.jpg

If you're looking for joke ideas, follow me @parscaeli on Twitter or Instagram or Facebook to see a daily joke. We'll begin a fresh school year of giggles next week. And you can always search the archives by following #pc_lunchboxnotes (over 100 in there to get you going).

Aannnd...

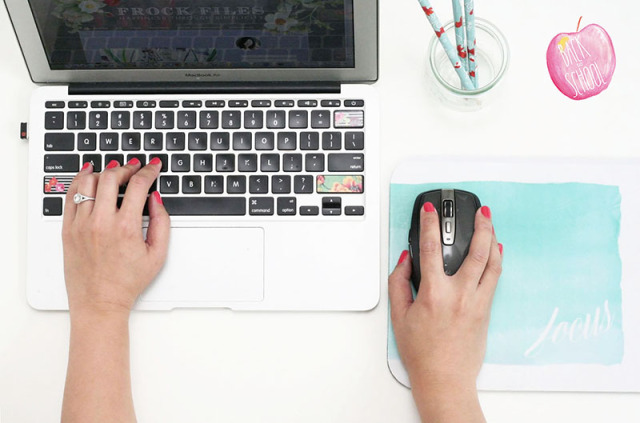
I have one more awesome surprise today. We're making chic mouse pads as a part of this series. Head over to Frock Files to see the incredible work of Joy. So good. The watercolor effect and the perfect typography.

Thanks to all who helped out with this awesome week of projects. It's been a blast to see how everyone gets ready to school in their own very cool way.

Are you ready to head back?

xoxo,

MJ

PC_backtoschool_logos.jpg
Shell Memories: Endless Summer Projects

This post is sponsored by Bing.

Endless Summer Projects returns this week with the perfect way to combine travel and nature. Ali has crafted these adorable shells that capture their summer adventures. They are a sweet way to relive a wonderful experience, and I think they'd make a great conversation starter when put out during dinner parties, too.

We took the family to the ocean for the first time this summer, and the experience of the ocean's tide was a beautiful discovery for my children. Seeing the constant movement and listening to the waves...as well as experiencing all the fresh leftovers the waves reveal...shiny bits of shells, running crabs, bubbles upon bubbles.

PC_esp_shells_2.jpg

Now we have a new way to savor the memories within our shells!

Don't forget to catch up on all of the Endless Summer Project posts:

Bing_Logo_General_Orange_RGB.png
Back to School Geometric Initial Totes

This shop is part of a social shopper marketing insight campaign with Pollinate Media Group® Elmer’s and Wet Ones, but all my opinions are my own. #pmedia #CraftandCleanUp http://my-disclosur.es/OBsstV

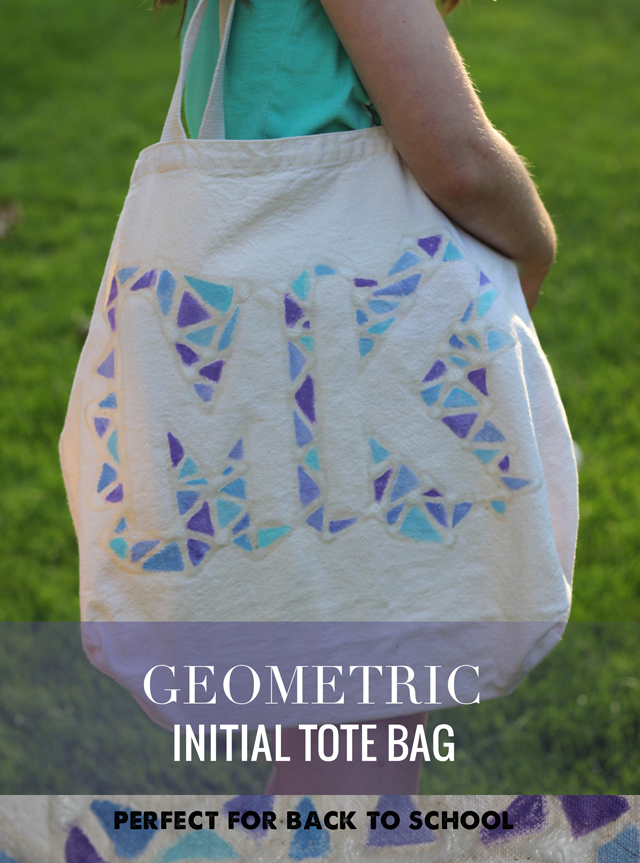
PC_geometricmonogramtote_pin.jpg

We are getting excited for school around here, and, to celebrate, we created geometric initial tote bags to hold the after-school supplies. Backpacks, lunchbags, and school shoes of all sorts are filling the store shelves and catalogs in our mailbox. Ready or not, summer is coming to a close and a new school year is about to begin. Quite honestly, it's one of my favorite times of year. The beginning of school is like New Year's, with better Midwestern weather. So much potential bundled up into fresh pencils and new notebooks.

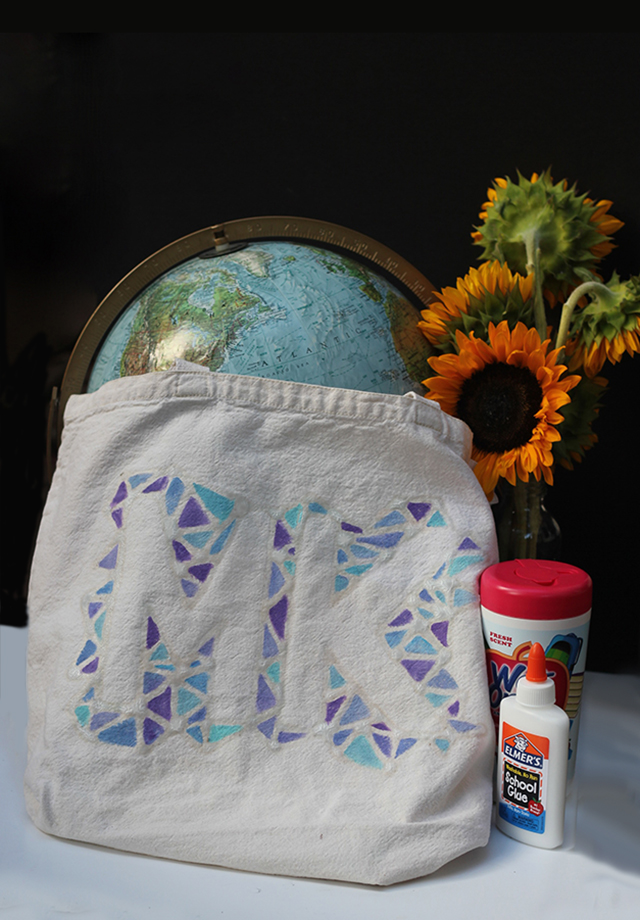
For once, we're ready with school supply purchases. I like to hit Target early to see the entire landscape of what they're offering. I grabbed up this Elmer's and Wet Ones combo pack in the Back to School section. The pairing of these two is genius.

PC_geometricmonogramtote_8.jpg

This year my girls, now in second and fourth grade, are involved in a full schedule of after school activities. We purchased some awesome backpacks, but we were still in need of something to hold the piano books, soccer balls, Daisy folders, choir schedules, and more. Little hands tire quickly at the end of the day and carrying all of the other equipment in their arms just isn't practical anymore.

So, with the help of some Elmer's glue and a pack of Wet Ones to clean up our smudges and messes, we got crafty and transformed some plain tote bags into geometric initial totes that the girls can use every day.

PC_geometricmonogramtote.jpg

We purchased durable canvas tote and drawstring bags, found some acrylic paints in colors that the girls loved, grabbed our Elmer's glue and a paint brush and went to work.

To begin, I drew in a very light pencil, each girl's initials on the bag. I freehanded ours, but you could easily transfer on a large letter image from your favorite font. I'd recommend something simple and bold since the detail of this craft comes through in the geometric shapes.

PC_geometricmonogramtote_1.jpg

Next, trace over your lines with glue, trying to maintain the same thickness in each line. Sometimes you'll catch an air bubble or make your own goober so be sure to keep a Wet One wipe close by to clean up your mistake in no time.

PC_geometricmonogramtote_2.jpg

Once you have your initial outlined, the fun begins! From the edge of a letter, draw a small triangle and then another and connect them. Be silly, go geo-crazy, and surround your letters with shapes. Be sure to leave the inside of the letters clear of any glue. Make sure that the layer of glue you paint is thick and dimensional.

Let glue dry for a good 2-4 hours.

Grab your paints. We chose just two colors for each bag and mixed different shades together to create an analogous palette. Paint each shape right up to the glue, allowing the glue to act as a barrier to the next shape.

PC_geometricmonogramtote_7.jpg

My ladies were quite happy with their new, personalized bags. Fingers crossed for a cleaner minivan.

PC_geometricmonogramtote_6.jpg
PC_geometricmonogramtote_3.jpg

These bags are getting a workout already with soccer practices nearing and piano lessons every Monday. I love that my ladies are so well rounded and involved, and I'm happy they have some place to keep all of their stuff for these busy times as well!

PC_geometricmonogramtote_4.jpg
PC_geometricmonogramtote_5.jpg

So many possibilities with this technique! Find a bottle of Elmer's gel glue to create a washable design for your bags that might need more laundering.

We're on the countdown to school with just over three weeks to go. How about you?

xoxo, MJ

The Curators of the best DIY round ups
PC_curatorsofDIY.jpg

Finding fabulous projects is not as easy as it may seem. These three curators are the ones to follow for the best DIY round ups on the worldwide web.

Before I began blogging, I had little appreciation for what we lovingly term a "round up post." These are typically a list or a collage of ideas or images found around the web based around a particular theme or topic. Searching out the best of the best is a tedious process; it's more than a Google search or Pinterest entry. It's a keen eye, a great sense of design, and a knowledge of what's possible and practical.

Rachel, Marlene, and Sarah post the best DIY round ups to be found.

You've likely seen Rachel's round ups on Pinterest. Her blog The Crafted Life is jam-packed with her process, inspiration, and business-sharing advice. Her themes are unique and her picks are always beautiful. Rachel mixes the complex with the super simple to create a lovely blend for every level of creator. Even when I'm not ready to make one of the recommended pieces, I find myself returning to her pages just to see what's inspiring her and what's trending for DIY. She always has the latest.

Marlene of Jade and Fern has a modern and clean feel to her round ups. I am always surprised by her finds and wishing to find time in my schedule to create such beauty. Though a handful of her tutorial links are outside of my comfort zone, none of them feel unapproachable or, even worse, undesirable. She has her eye set on her brand and every DIY that she selects fits well with her own posts that are in their own right gorgeous as well.

Sarah of Sarah Hearts wins for color and pattern. She finds DIYs with texture, design, and charm. Her projects are just the kinds you want to create for your best friend and yourself. The energy with which she creates her own posts comes through in her picks. My favorite part? She never picks a dud. Every project is fresh, unique and approachable for a variety of skill levels.

In today's busy times, finding great projects can be a challenge, or at least a time challenge. Follow these three curators for only the best of the best. You'll appreciate their careful editing and helpful suggestions, I promise.

Who would you add? Who always finds just the right project?

xoxo, MJ

Stamped dish towels

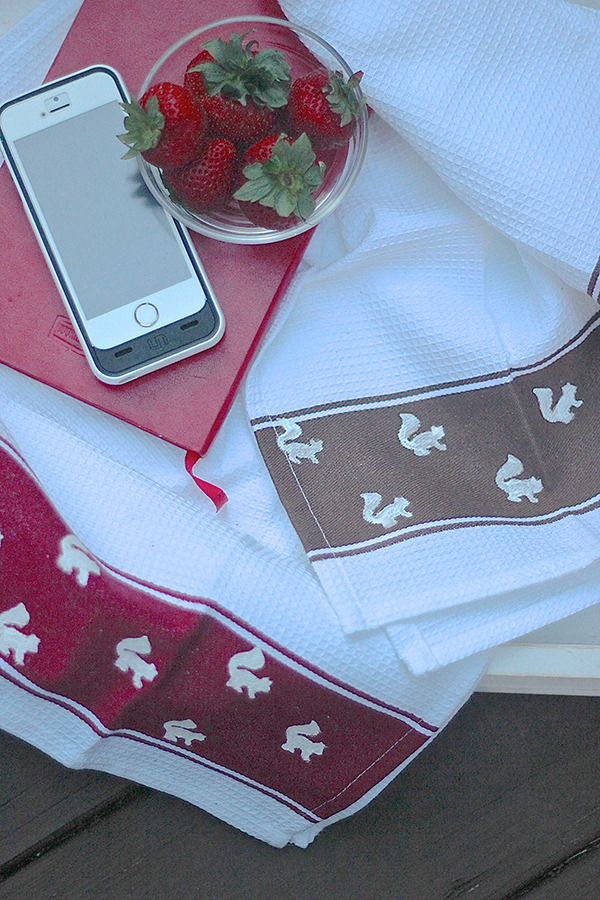
Move over hedgehogs, bunnies, and owls - squirrels are the new hipster animals. I'm sharing a fun project, stamped kitchen towels, using the charming icon of Squirrelly Minds. I think it's the perfect blend of practicality and whimsy.

140710-pars-caeli-stamped-squirrel-towels_2.jpg

Have you made your own stamps? I've only recently gotten into the gig, and I may have already made a dozen or so with my kids. The power of making your own patterns! Admittedly, the carving of the design takes some patience, but the final results are completely worth it.

140710-pars-caeli-stamped-squirrel-towels_3.jpg

Head on over to Squirrelly Minds to see the full project. I think the towels would make a great housewarming present or hostess gift for those early fall dinner parties with friends.

xoxo, MJ

DIY Puppet Show

I'm sharing a quick craft you can make for and/or with your children today over on Classic Play. Puppet shows are always fun, no matter the season or occasion. We created our own mobile theater that fits in our doorframes by transforming a pillowcase into a stage curtain.

It's an easy project that will last you all summer long. We also made paper bag puppets (remember these?), and you better believe that sock puppets are on tap for another project this summer.

IMG_4880.jpg

Click on over to Classic Play to see all of the details! See you back here tomorrow for one crazy good circus for Endless Summer Projects!

xoxo, MJ

Large scale art with Wayfair

Wayfair offers a zillion things home – the largest selection of home furnishings and décor across all styles and price points. For more information and inspiration, visit Wayfair and follow Wayfair on Facebook, Twitter & Pinterest. Wayfair compensated me for this post but all opinions and project ideas are mine.

PC_esp_largescaleart_pins.jpg

Welcome to week #2 of Endless Summer Projects! I'm delighted to team up again this week with my blogger pals: Ali, Melissa, Jen, and Amy. We taking our project to the big leagues this week with a large two foot by three foot canvas. Grab your favorite tapes and some scissors and let's get to work.

PC_esp_largescaleart_1.jpg

When my little guy L was an even littler guy, we took he and his sisters to the Art Institute of Chicago. They ate up all the painting and sculptures, but the wing of modern art was a favorite. At 2, L fell in love with this giant striped piece and ever since then I've been thinking about how to bring this idea to his space.

PC_esp_largescaleart_old.jpg

With all of the awesome washi tape and duct tape varieties now available, this striped project got a whole lot easier. The supply list is simple: a large canvas (the large scale can better handle the wide variation in pattern), tapes, and scissors as well as your favorite stripe lover. L is just a little bit bigger than this canvas, which was a fun way to note his relative age/size as we were creating this together.

PC_esp_largescaleart_3.jpg

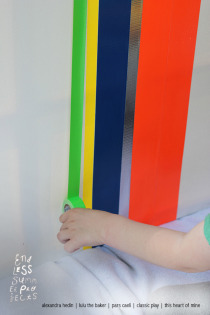
We decided together that we wanted vertical stripes, and we began off center so that we could create a non-symmetrical striped pattern. You can predetermine the order of your stripes or do what we did and create balance as you go by making some of the stripes extra thick and others thinner.

PC_esp_largescaleart_4.jpg

Secure each stripe by extending the line to the back of the canvas. Perhaps the most challenging part of this DIY (though none of the steps would really be considered challenging) is making sure that your lines stay straight as you pull the tape down the canvas. Little hands can easily select what colored stripe comes along next and guide the roll of tape as you straighten and trim the ends.

PC_esl_largescaleart_5.jpg

Let's just say this project had us at hello, and L was so excited with his new canvas, even if it had one lone stripe. But we kept moving forward, mixing up the width of tapes as we added new colors to the canvas.

We had five different colors and a windy day, but all in all this project took us 30 minutes from start to complete in his room.

L and I worked together to hang our new artwork above his dresser. It already houses some Wayfair pieces! And I've been looking at these three as other fun additions to this big boy room (a fire extinguisher water hose is the best)!

PC_esp_largescaleart_wayfair.jpg

Wayfair Firefighter Gear  + Whitney Bros Mirror  +  WallCandy Arts Mural

PC_esp_largescaleart_6.jpg
PC_esp_largescaleart_9.jpg
PC_esp_largescaleart_7.jpg

The finished art offsets L's very special items and pops all the bright colors in the room in a fun and festive way. L pulled out a classic quote on me while we were making this, "Mommy, whenever I look at this, I'll think of you and all the fun we had making this!" Awh. So sweet. How could I not give this kid something special?!

My blogger gals and I are hopping around today to show off our favorite picks from Wayfair for children's and tween's bedroom and playspace. Click on over and see the adorable ice cream supplies with Alexandra, the colorful picks at Lulu the Baker, the chic art prints at Classic Play, and all the animal love you could want at This Heart of Mine!

Alexandra Hedin, Lulu the Baker, Classic Play, and This Heart of Mine

If you missed it last week, be sure to grab Jen's printable summer banner for end of the academic year celebrations that kicked off our Endless Summer Projects series. Thank you all for visiting and sharing and enjoying time spent with your kids in the creation process!

xoxo, MJ

Make it together Mother's Day
PC_mothersdaymake_1.jpg

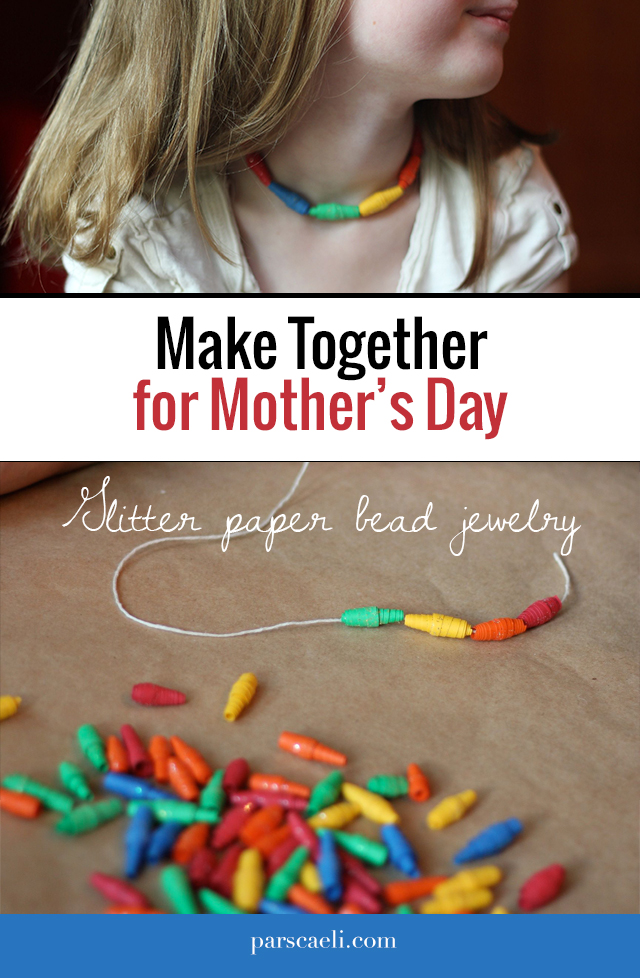
May is a busy month with birthdays, year-end celebrations, sports, and Mother's Day! Sometimes special dinners out and shopping trips don't make the final agenda before Mother's Day. And though I sometimes enjoy the quite solitude when everyone leaves our home, I really love experiencing all of us together in this space - making and creating.

So why not craft together as an activity for Mother's Day? Or have your children to create alongside special grandmothers or aunts for a sweet Mother's Day experience?

PC_mothersmake_2.jpg

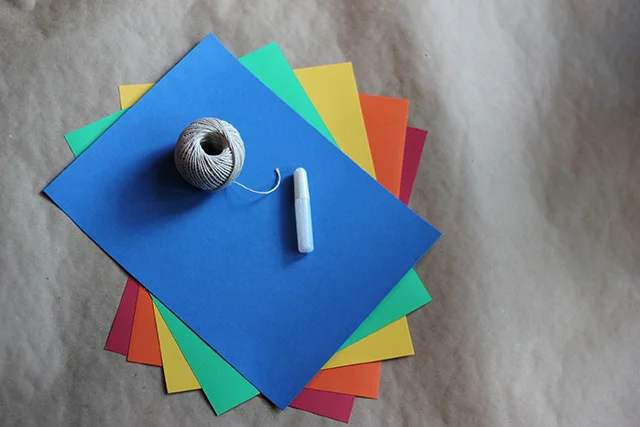
This is an incredibly budget-friendly (slightly time intensive) craft that all three of my children enjoyed. Gather together:

  • Paper (we chose rainbow and only used one piece of each color paper to make all the beads here)
  • Scissors or paper cutter
  • Glitter glue (really, any glue is fine, but glitter makes everything better, right?)
  • Pencil or pen (to wrap the paper)
  • String or twine for necklace/bracelet/anklet creations
PC_mothersmake_3.jpg

First step? Cut isosceles (ish) triangles out of your paper. Ours were about an inch at the thick end. Here's the important next step: begin with the thick end and tightly wind the entire triangle around the pencil. We made different shapes by doing this. Some beads were exactly symmetrical, some looked more like cones or party hats, and others looked like a wobbly top.

PC_mothersmake_4.jpg

As you get close to the end of the wrapped paper, squirt a dollop of glitter glue on the front and back of the end tail and graciously smear it all over the end and the rest of the bead. This will help secure the tight wrap and spread the glitter around the whole bead.

Once the bead is secured, carefully remove it from the skewer and let it dry for a few minutes before crafting further.

PC_mothermakes_5.jpg

String your handmade beads for necklaces and bracelets that are one of a kind. You'll have the finished product made from little hands, and the priceless memory of the entire experience as a special Mother's Day treat.

PC_mothermakes_6.jpg

Happy Mama's Day! And happy crafting!

xoxo, MJ

Flourescent and Gold Leaf Flower Vases
This post is part of a social shopper marketing insight campaign with Pollinate Media Group® and All You Magazine, but all my opinions are my own. #pmedia #lifeforless http://my-disclosur.es/OBsstV.
PC_budvase_4.jpg

Happy Monday, lovelies! What a treat to be greeting you at the very beginning of your week.

Temperatures are warming; we even saw our first bulbs peeking through the mulch this weekend! Spring brings fresh blossoms with their gorgeous color and fragrance. I love to bring in bunches of lilacs and snips of hyacinths and tulips, too. Often, after the larger bouquet has lost its brilliance, when one or two blooms remain fresh, I like to float them in a bowl to savor their beauty a few days longer. And more often, my three children find "daisies" (AKA: dandelions) and peonies they want to bring in to our house to cherish.

With no specifically charming bowls to hold the buds and flower heads, I went out to search for floating bowls. Nothing I found seemed unique enough to showcase our buds. I did, however, fall for these cute ice cream bowls. The shape was just what I had in mind for a "personalized" size of bowl - perfect for place-setting color, sparkle on a tray, or brilliance on a desktop.

PC_budvase.jpg

To transform the ice cream bowls, I ran over to our local Meijer and grabbed frosted glass spray paint and flourscent spray paint. And I had some gold leaf paint on hand, just a small bottle, from another project. It was more than enough to gild the interior of the bowls. I took this entire project outside and grabbed a box from the recycling to keep me from overspraying.

Follow the direction on your paint can! The frosted glass paint I used required three coats in order for the glass to reach a filmy state, a slight texture in which another paint would be more likely to adhere. Drying time for each layer was only 10-15 minutes so the process went rapidly.

PC_budvase_1.jpg

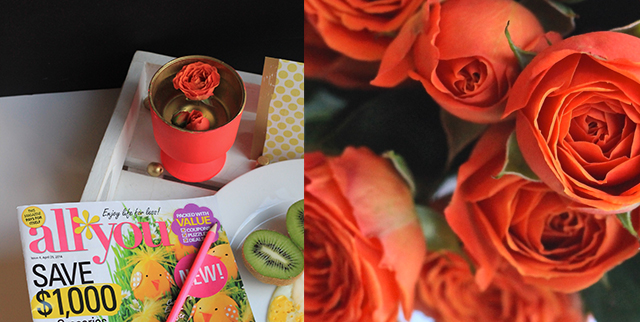
Once I was happy with the frosted (slightly textured) nature of the glass paint, I added the flourescent! Neon when used sparingly can add a lot of life to a room or table. This pink-orange shade was the perfect burst of tone I wanted to compliment the warm weather. The picture below shows off the look of the new vases after three coats of the flourescent. If you want your vase to have more of a tinted look, paint on only one or two coats. For a glossier, opaque feel, keep adding layers!

PC_budvase_2.jpg

Next up, making it golden. Beware, gilding objects might make you want to treat everything with a fresh wash of gold. It's amazing how simple objects can turn from ordinary to treasure with the addition of gold leaf. My paint was oil-based (to help with the waterproof nature), and I let the two layers dry overnight.

PC_budvase_5.jpg

And voila! $3 ice cream bowls transform into show stopper flourescent and gold flower vases!

PC_budvase_6.jpg

The colors from the new magazine, All You, inspired this palette, and I'm pretty sure that the golden pool of water will make even our common dandelions look pretty spectacular.

PC_budvase_8.jpg

All You is available at many national retailers including Target, Safeway, Kroger, Dollar General, and Meijer. Grab a copy for yourself by using this $1 off coupon while supplies last.

PC_flowervases_pin.jpg

And for this project or so many others you may have on your to do list, I'm giving away $50 to Meijer stores. Enter below for your chance to win!

Here's to a great week, golden and bright!

xoxo, MJ

Entry

-Form

Mini Cooks: Enchilada Lasagna
Minicooks_red.png

It's time for another beautiful installment of Mini Cooks with my friend, Joy of

Frock Files

. She's cooked up an easy, hands on meal cheerfully titled Enchilada Lasagna. And it's perfect for our family and probably yours, too.

I am a huge pasta fan, favoring of course fresh pasta above all, but still a fan of ramen and even Spaghettios (oh, gees, I just admitted that). And yet I am raising three amazing children who have absolutely no interest in noodles or pasta. Joy's recipe today takes some of the flavors we adore and adds in tortillas - you've got to check it out.

It's what we're having for dinner. I wish it could look this pretty.

Thank you all for the amazing support of this collaboration! We've had a ton of fun planning and prepping it all for you and your families. Do you have an awesome recipe to share? Tag it with #minicooks so we can pin it to the

Mini Cook Pinterest

board.

Catch all of the recipes and tips on these posts!

5 ideas for getting started with Mini Cooks

Egg in a Basket

Snack Granola Bars

Lunchtime Vegan Smoothies

xoxo, MJ
Paper Daffodil Wreath
PC_daffodilwreath_writing.jpg

It's time for another fun project in collaboartion with our incredibly talented friends over at Classic Play. Today we're making paper daffodils with the kids for some pretty fantastical results.

This wreath is so simple to make from supplies you have around your house. Grab some paper (we used misprinted letterhead) in white and yellow, cotton swabs, food coloring, and some scissors. Bring your children into the process and let them feel the sense of accomplishment form their paper flowers.

We decided to dye our cotton swabs yellow using diluted yellow food coloring first. First, trim off one swabbed end, and dip and dunk them into the yellow dye. This step is not necessary (you can paint or color these with a permanent marker), but the process itslef added to the fun. My son, 4, became our specialist in creating the centers of the flowers.

make paper daffodils with the kids

We dunked ours a few rounds for fun. Take those out of the dye and place them to the side while you craft the petals. The process for creating these paper flowers is super similar to that of folding a paper snowflake. You want to create from a square piece of paper so fold over a right triangle and trim the excess to form.

You'll work from a square piece of paper (so from the first image, trim off the extra paper at the bottom.) Fold the large triangle in half. And then fold it in half again. Your triangle should look something like the one on the right below. Hold it with the end that is connected to the main fold.

PC_daffodils_folding.jpg
PC_daffodil_folding_2.jpg

Next cut out your petal shape, making sure to only cut along the two open sides. You'll cut a C curve along the top of the triangle. Creativity is encouraged here; some of our daffodils had pointed petals and some very round ones. Unfold your flower to discover!

Next up, create inner yellow circle. Shape it into a cone and secure with glue or tape.

tutorial for making paper daffodils

Using a sharp pencil or the colored cotton swabs, poke a small hole in the center of your white flower. Push the cone tip through the hole in the white flower and insert the yellow swab into the center of the yellow cone. Secure all the flower parts together with invisible tape around the stick (and behind the petals) of the cotton swab.

PC_daffodils_3.jpg

We decided that with all these “fresh” flowers we needed to make something bigger. With the help of a simple styrofoam wreath, we pushed the blunt end of each swab into the circle form. With the handiwork of my children, we were able to fill about half of the wreath, and I wanted a really full final product so I kept on creating for an hour after they lost interest.

PC_daffodils_writing.jpg

These everlasting flowers are charming on their own or strung as a banner. And this process was just as fun as the finished wreath. We're all very proud of our new door decoaration.

Happy crafting!

xoxo, MJ
Valentine (no sew) t-shirt bag
Every now and again, I add features or links to posts from companies that sponsor the blog. When I do this, I'll let you know right at the top of the post. Sponsor companies are ones that I select and shop myself. Products are theirs, but opinions are mine. Today's valentines were selected by me and provided by Minted.
PC_valentine.jpg

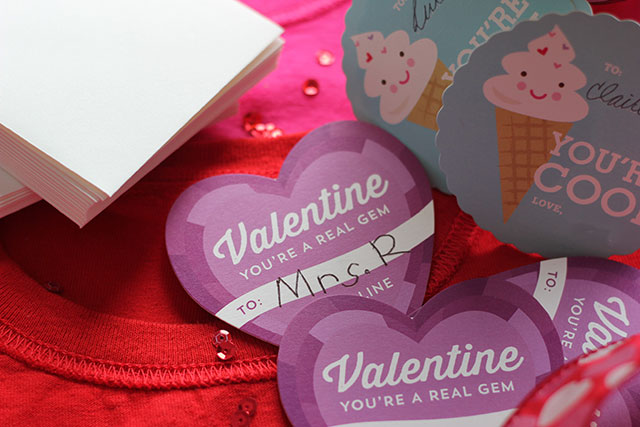
Happy (almost) Valentine's Day, friends! We are in full-on Valentine prep around here with classroom parties galore. The great folks at Minted offered us classroom valentines of our choice (and, oh, the choices!), and I'm pretty sure these are the nicest valentines we've ever sent. They came personalized with my daughter's names, too, so we've had fun adding special touches to the envelopes (hello ring pops) since the hard work was already done!

Since our cards are stepping it up this year, we decided to take our valentine container up to the next level, too. Did you decorate shoe boxes to collect your valentines as a kid? Or make a heart complete with doilies and ribbon to hold your cards? I did, and I loved the creation of the container almost as much as the cutesy notes themselves.

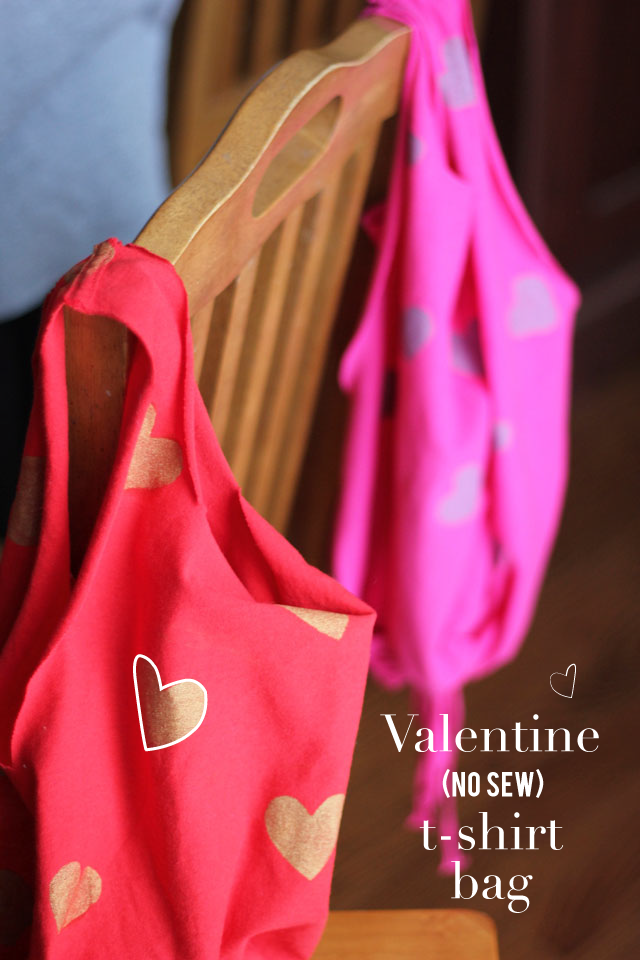
Well, times have not changed, but instead of gluing my box or envelope, my kids and I crafted some sassy t-shirt bags to tote our love notes. These bags are super easy, upcycled, and take less time than construction paper and glue (no...really). I have a sewing machine that loves dark corners of my basement, and I wasn't ready to change its mind for this project so I found this idea and made it valentine.

PC_valentine_1.jpg

(And also, I love that my daughters were most excited to send their teachers cards!)

STEP ONE:

Dig to the bottom of the drawer, or for us the bag of giveaway clothes. We found a pink and a red t-shirt that were too small to wear but in awesome shape, ready to be remade. *Just a note, if you're making a bag suitable for kids, use a kids t-shirt so that the bag won't be too large for their size.

STEP TWO:

We wanted a blank canvas so we turned the shirt inside out. Trim off the tag as well as the sleeves (with a little extra for the handles). Next trim a rounded or squared shape from the neckline to create the handles of your bag.

PC_valentine_3.jpg

STEP THREE:

We made our bag with three holes in the bottom and therefore we cut three slits at the bottom of the shirt, about equi-distant from one another.

STEP FOUR:

With the sleeves that you trimmed, cut 1/2 inch strips the entire length of the sleeve width. Pull on the strip to make it curl on the edges (neat-o trick).

STEP FIVE:

Grab one of the strips, pin it with a safety pin on the end and feed it through the seam allowance at the bottom of the shirt. Thread it through two sections of the shirt, pull the cord, and tie a knot. Continue to do this with the two other strips and the remaining seam sections. Tie all ends into one large knot at the bottom of the bag.

PC_valentine_4.jpg

STEP SIX:

Grab your freezer paper and cut a heart stencil. Apply paint evenly with the brush or sponge of your choice. We chose a metallic paint to add some shimmer to the bag and stamped simple hearts on the front and back.

PC_valentine_6.jpg

That's all there is to it! Our first shirt took us 20 minutes with painting included, and we whipped up the second in under 10.

PC_valentine_11.jpg

My 9-yo could craft these on her own, and they'd make great party favor bags for a sleepover or to go bags from a crafternoon.

PC_valentine_7.jpg
PC_valetine8.jpg

Maybe gift wrap for a galentine's day present?Or make one for yourself to show that you love Love Day!

PC_valentine_10.png

Happy Valentine's, dear readers. You all are the sweetest!

xoxo, MJ

Host a You Paint Party

Birthday parties!! They have become bigger and pricier since my sweet days of paper crowns and kids meals at Burger King. My daughter, M, and I were dreaming up what would fit her personality and passion for a 9-year old sleepover party with friends. Locally we've had all sorts of group painting stores and party places open up. These are fabulous for unique get togethers, and they are also a little more than we could afford so we decided -- Let's do our own You Paint Party.

PC_youpaintparty.jpg

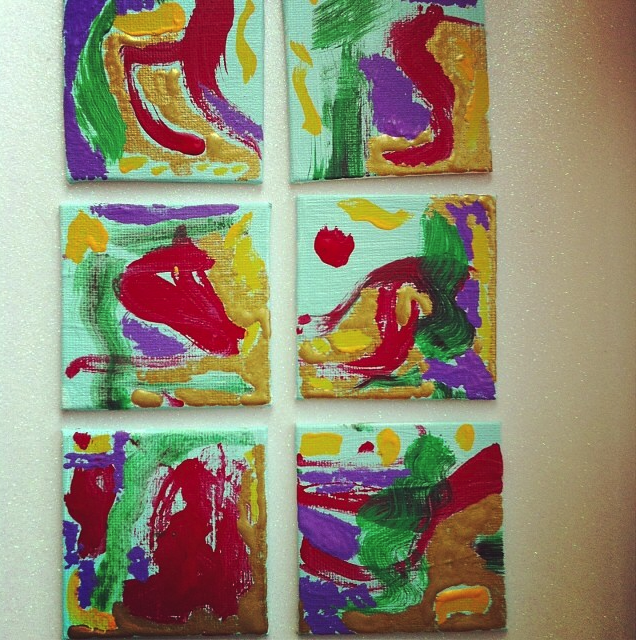
It began with the 2 inch canvases that M painted for invitations. She embraced the abstract and each one became its own masterpiece. We glued event details to the back and mailed them out.

PC_youpaint_invites.PNG

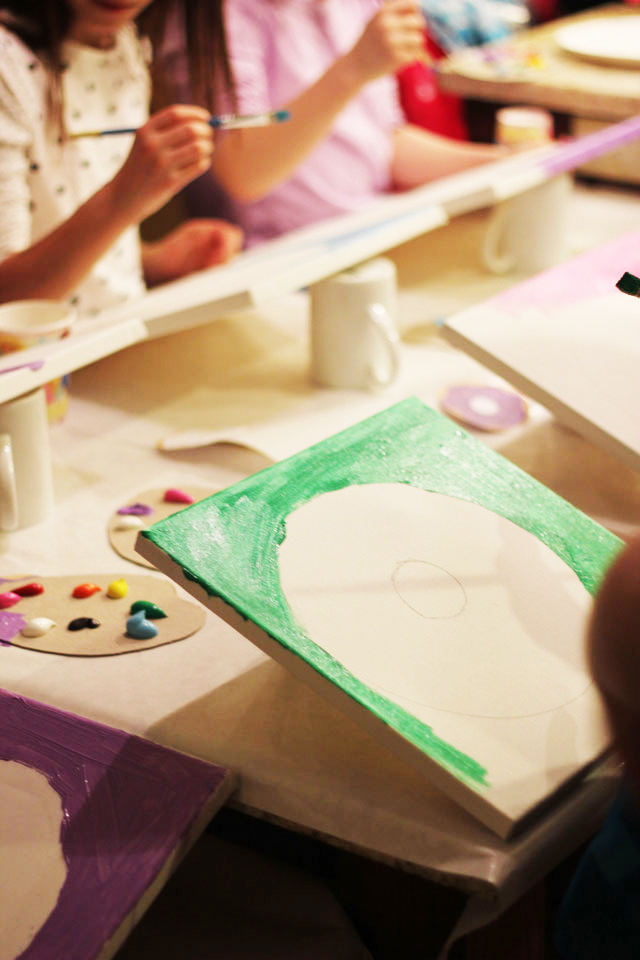
M also loves donuts so we decided that the girls would paint canvases of sprinkled donuts on them. We kept our eyes open for great sales on canvases, and we were able to grab a bundle from Michael's for a steal. We chose 12" squares to accommodate our studio space (also known as our kitchen) as well as ease in transporting after the party.

To convert our home into a studio, we prepped the kitchen. Covering the table with freezer paper and removing the chairs was the first step. Creating make-shift easels from canvases propped on coffee mugs worked out perfectly!

PC_youpaint_setup.jpg
PC_youpaint_cup.jpg

Each painter received a thin and thick brush as well as a mini palette of paints. We created our palettes from cardboard sheets, and each artists had her own array to choose from.

PC_youpaint_palette.jpg

To make our guests of every skill and comfort level feel ready to dive into the project, we decided to offer some easy guidelines. Paper plates made a handy outline for the outer edge, and the bottom of paper cups become our stencil for the donut hole.

PC_youpaint_circle.jpg

We began with the background color(s) first to set the stage, and already personality came through!

PC_youpaint_first.jpg

We then moved onto glaze followed by the cake of the donut. The best part was all the giggling and compliments they lavished on one another. Such a supportive group of painters!

PC_youpaint_second.jpg
PC_youpaint_finished.jpg
PC_youpaint_final_pin.jpg

The form of a donut is such a beautifully simple one that painters from all backgrounds can own their own sense of style to it! I was amazed at how many variations we had on the same theme, and I loved that no one felt frustrated in trying to make their painting look too realistic. There's something fantastical about donuts, no?

xoxo, MJ

Valentines in the Classroom
PC_valentinesclassroom.jpg

Hey lovelies! Valentine's Day is but a week away, and we are stamping, sticking, and stuffing some gorgeous classroom valentines from Minted at our house. Check back next week for a super cute bag we'll be making to tote all the love notes!

Have I mentioned that I'm a classroom mom? I have resisted and avoided for five years until this year, my oldest daughter's teacher asked me (!) to be the stewardship parent. And I said, only if my husband and I can do it together. So we are. We are the parents for the class which means we get to organize their service projects (which is really why I jumped in) and plan their parties (which is really why I ran away at any notion of assisting in the past).

The third graders will have a simple yet fun-filled celebration of friendship and love, rotating from center to center. I've been scouring the interwebs and pinboards to find crafts that are hip enough for this tween age and easy enough to accomplish in 15 minutes.

Here are my top five picks for a Rad Classroom Valentines:

1. Paper heart chain: Easy supplies, great results. Make one for your doorway even if you don't have kids!

2. Orgami hug: Two hand prints and an accordion fold and kids can declare their love.

3. Arrows through my heart: Free printable for these beauties. And don't forget about the red velvet.

4. Chocolate covered strawberries: Slice, coat, drizzle. Repeat. And save some for the class.

5. Awesome sauce!: Love this simple addition to store bought sauce.

Any fabulous ideas you want to share?

xoxo, MJ

Endless Summer Projects: Shoebox Frames
PC_endlesssummerprojects_shoebox_pin.jpg

I cannot believe it. Here we are at my last Endless Summer Projects! We've been planning these and posting them for so many weeks now, that I can't believe we're at the finish line already. And that feeling of quick endings is all around us as we squeeze the literal juice out of the remaining two weeks of summer.

PC_endlesssummerprojects_shoeboxframes1.jpg

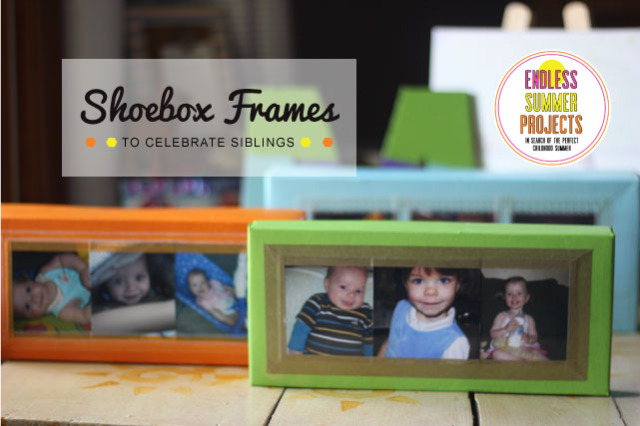
In our house, August brings the start of school preempted by one of our favorite (made up) holidays, Siblings Day! To foster great relationships and celebrate the special people we have right around us, our family indulges in a special dinner, a lasting craft, silly games, some storytelling of great memories, and silly pictures together.

My children are 8,6, and 3, and although rather close in age, their ability levels and interests can seem light years apart at times. Lots of "he's not old enough" and "she's too big" get thrown around in conversation. I wanted a way for everyone to see each other on a level playing field... So we spent some time going through baby pictures as a family. Each sibling heard stories of the other sister or brother and their habits as babies, the toys they loved, the ridiculous noises and first words they said.

And each one selected a baby photo of their brother and/or sister to hang in their rooms. Sometimes it's good to remember that your bossy older sister was once an adorable baby, too. And that annoying little brother, well, he was super huggable with those pudgy cheeks.

Once we had our photos selected and printed, we were ready to get to work.

PC_endlesssummerprojects_shoeboxframe.jpg

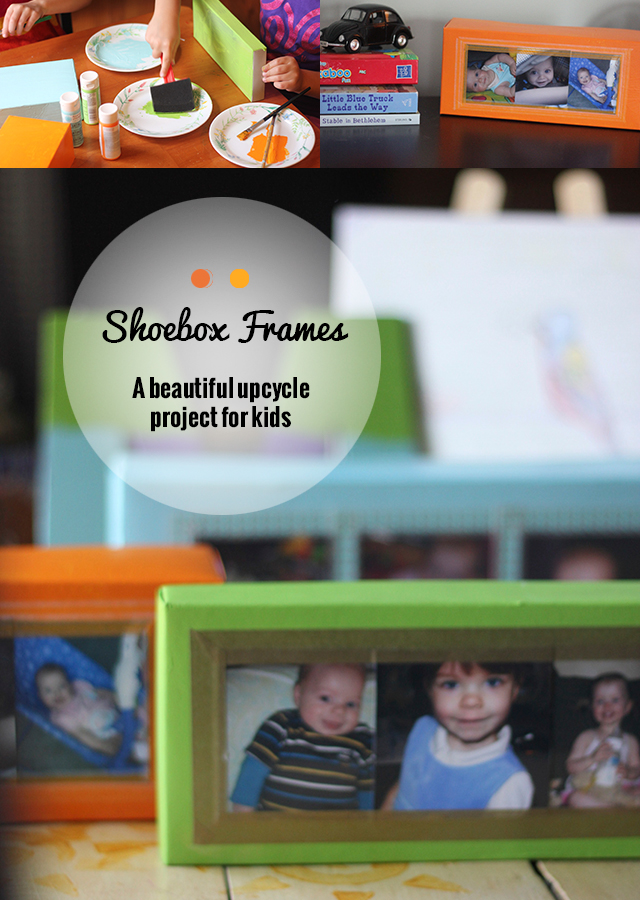
Wanna make some, too? Super simple supplies for this one: sturdy shoeboxes, quality paint, brushes, photographs, scissors, and washi tape

PC_endlesssummer_sb1.png

My daughters picked the box lids, and my son wanted the box bottom, (and either side can turn out quite nicely)! Have children paint the boxes, likey 2-3 coats, depending on the coverage.

PC_endlesssummer_sb2.png

Once the box lid is completely covered in paint, assist your children in trimming the baby photos to all the same size. For the size boxes we had, I trimmed the photos to 3" x 3".

PC_endlesssummer_sb3.png

Line up photographs on the long flat surface of the box or box lid, and carefully adhere to the box with washi tape. I also glued the photos onto the boxes to insure that the washi tape would have some assistance in keeping the pictures in place.

PC_endlesssummer_sb4.png

Finished boxes make cute photo bricks on dresser and shelves.

PC_endlesssummer_sb5.png

Add fun washi tape patterns to add some visual interest to your frame.

And don't forget to find a spot on the wall to show off your new creation.

PC_endlesssummer_sb6.png
PC_Endless_summer.jpg
Endless Summer Projects: Rings of Color Sharpie Dyed Shirts
PC_Endless_summer.jpg

It's my turn! (I am so bad at delayed gratification.)

Time to welcome you all to another wonderful Endless Summer Project from the team of hyper-cool moms: Melissa, Alexandra, Jen, and me If you stepped into the vast wormhole of the internet last week and missed Alexandra's hopping backyard BBQ, you missed a safe alternative to horseshoes, a great grilling recipe, and an adult beverage to adore. Skip on over and enjoy... and then come right back. Or maybe go check out Melissa's cute mosaic stepping stones first. And THEN return, bright-eyed and bushy-talled to check out our Rings of Color Sharpie Dyed Shirts!!

PC_endlesssummer_sharpieshirts.jpg

Last summer we did a great tie dye shirt project together, and my children loved crafting and wearing their shirts. To kick off our summer together, I wanted to make another wearable piece, and what could be better than an excuse to use Sharpie markers?

This project is totally inspired by the great Martha Stewart (I'm hoping we'll be BFFs after next week). To see a helpful video on how to, go here.

Here's what you need:

  • Light-colored shirts
  • Sharpie markers - be sure to avoid contrasting colors unless you want brown hues
  • Isopropyl alcohol
  • Eye dropper
  • Circular surface
  • Rubber bands
  • Cookie sheets

We took our project to the backyard for more summertime fun, but this craft is safe enough to do in a clear spot inside for a foolproof rainy day creation, too!

PC_endlesssummer_sharpiedyedshirts.jpg

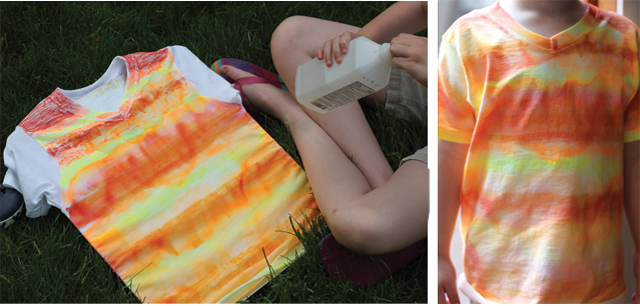
Neon is all over the place this summer so we chose new NEON Sharpies. Their saturation was a great choice for the brilliance in color palette.

Step One: Insert a clean cookie sheet into the t-shirt. This will prevent the alcohol and markers from bleeding through to the back of the shirt.

PC_endlesssummer_sharpiedyedshirts_1.jpg

Step Two: Visualize your design (or not). My girls and I decided we wanted to created a strip of colors that ran down just one side of the shirt so we planned out where we wanted the circular shapes to go. If you're more into free form, you can set up one circle at a time and add as your fancy desires.

Step Three: Insert the circle object underneath the top layer of the shirt. Secure its placement with a rubber band.

PC_endlesssummer_sharpiedyedshirts_2.jpg

Step Four: Draw thicker dots with Sharpies in a ring pattern.

PC_endlesssummer_sharpiedyedshirts_3.jpg

Step Five: The fun!! Fill an eye dropper with isopropyl alcohol. Squeeze out one drop at a time and watch the colors slowly bleed. Try different effect for dropping it inside the circle where no color is and dropping it right onto the dots themselves. To keep your colors more brilliant, limit your drops of alcohol. To spread your circles the most, keep adding drops.

PC_endlesssummer_sharpiedyedshirts_4.jpg
PC_endlesssummer_sharpiedyedshirts_5.jpg

Step Six: If you don't want the rings to bleed into one another, be sure to wait until the alcohol has mostly dried before moving on OR spread out the rings so that they do not overlap.

PC_endlesssummer_sharpiedyedshirts_7.jpg

Step Seven: Allow the alcohol to dry (mostly) and flip to the other side to create more patterns and fun! Once the alcohol has dried completely on both sides, remove from cookie sheet. Pop in the dryer for 5-10 minutes (on its own) to set colors.

Step Eight: Wear to your heart's desire! Colors should now be set within the fibers but I'd still recommend washing with like tones on the first machine wash.

PC_endlesssummer_sharpiedyedshirts_6.jpg

Fair warning here, friends: fun projects like this might ensue a whole lot of sillyness and laughter so be prepared to make great summer memories.

PC_endlesssummer_sharpieshirts.jpg

Sidenote: Sharpies bleed in the most wonderful ways so for my 3-year old son, we made a striped shirt. Try your hand at all sorts of patterns and shapes! L wore this for three days straight until I had to cut him off. :)

PC_endlesssummer_sharpiedyedshirts_9.jpg

So grab your Sharpies, friends, and get creating!! We'd love to see your creations - share them with us using the hashtag #endlesssummerprojects and look for sneak peeks of Jen's fabulous project for next week!

Here's to an endless summer of childhood fun.

xoxo, MJ