Posts tagged Endless Summer
Endless Summer Projects: Super Soaker

Today is definitely an oxymoron around here. It's the end of Endless Summer Projects!! When the four of us conceived this series way back when, it seemed like August was worlds away.

Here we are.

Huge thanks to my collaborator girls - Melissa (the brains behind the series) of Lulu the Baker, Jen of Classic Play, and Alexandra of AlexandraHedin.com. We have something cooking already to help with the happiest holidays ever.... stay tuned.

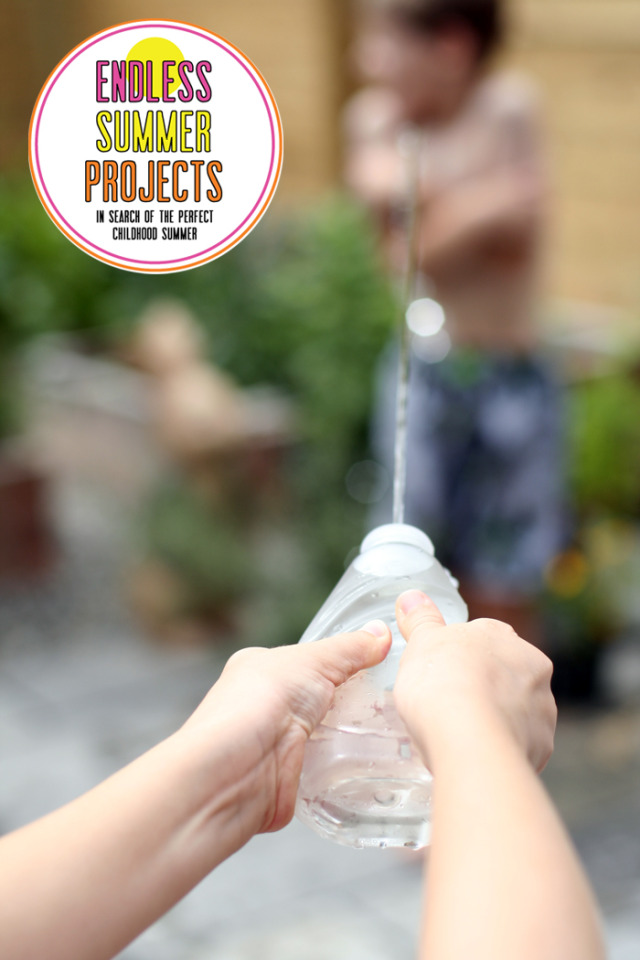
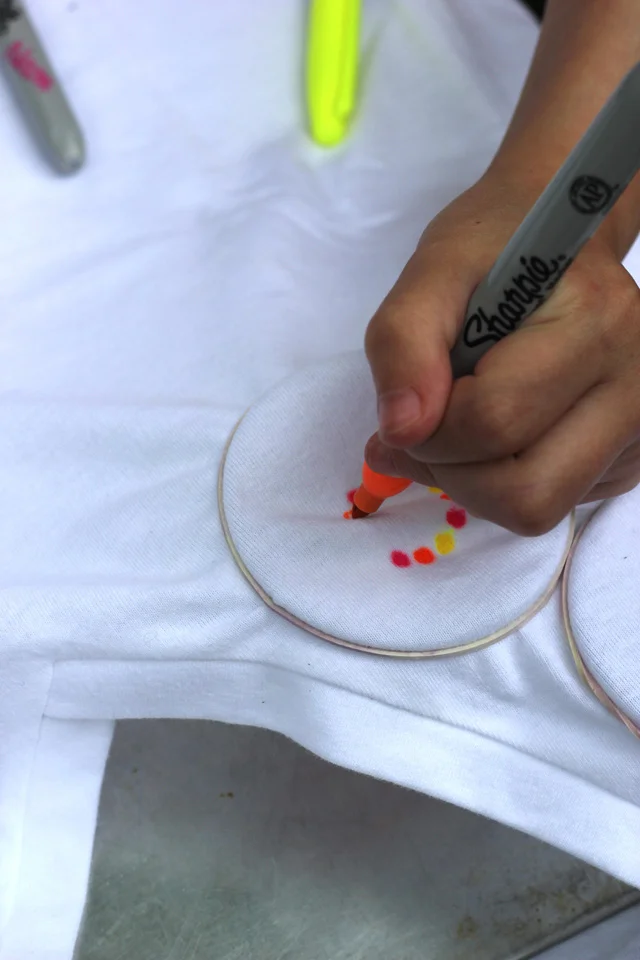
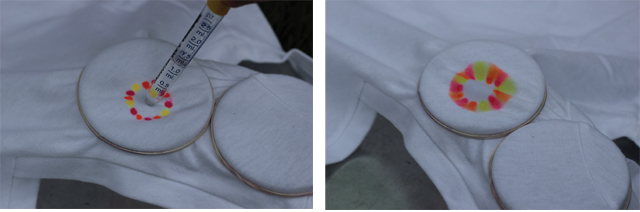
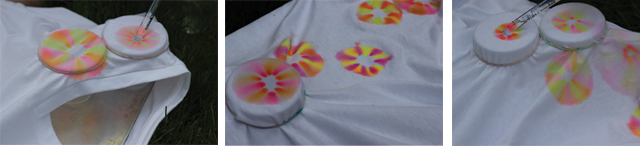
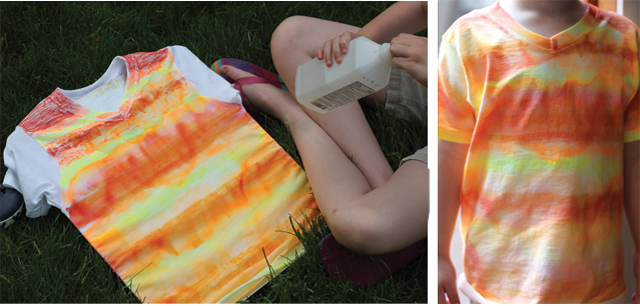
Today's project is over at Classic Play, and it's such a great one to close the summer fun. The Super Soaker is made right from items you have in your kitchen, and your kids are going to love it!!

In my house, we're in T minus 6 over here for the start of third and first grade as well as preschool. All my kiddos will be at the same school this year, and it's getting me all emotional...and all excited that my commutes will be just a bit more efficient!!

I'm taking off tomorrow in blogland, but I'll see you here next Tuesday for the final Celebrate the Normal post. Please join in!! It's going to be a beautiful way to mark the close of summer.

xoxo, MJ


The Entire Series of Endless Summer Projects:

Mosaic Stepping Stones by Lulu the Baker

Weeknight Barbeque by Alexandra Hedin

Sharpie Dyed Tee Shirts by Pars Caeli

Endless Summer Projects: A House Fit for a Bug

Hello lovelies!

Shouting out to you from the road today. I'm on a crack-of-dawn flight out of Chicago this morning, and I'm on my way to meet some great friends and enjoy a delicious dinner in New York City.

I'm not leaving you lonely though!! I have a fabulous project to share from the incredible Jen of Classic Play. I have had a handful of mommas ask me how we're filling our days this summer. Well, guess what? We are making bug houses! That's a great response, right?

We're growing caterpillars/butterflies right now, and my children have been mesmerized by the growth cycle. I can get all three of them calm and excited (interesting combo) just by sitting down next to the butterfly netting to observe for 3 minutes. It's a great transition method. My son calls these four creatures our new pets. And what would a new pet want more than.... a beautiful house.

So head on over to Jen's blog and check out all the details. We'll be back next Wednesday with another fun project from Melissa over at Lulu the Baker. Stay tuned.

And speaking of Lulu, I'm in her kitchen today! Well, you know, on her feature In My Kitchen - though I would love to head over to Melissa's home because I know I'd grab a handful of these, and she'd support me all the way. Can you guess how I answered this question... In my kitchen, I cook up...

Hint: it's not edible.

Don't forget to follow the madness that is my first trip to NYC and AltNYC on Instagram and Twitter at #ParsCaeliatAltNYC

xoxo, MJ


Endless Summer Projects: Rings of Color Sharpie Dyed Shirts
PC_Endless_summer.jpg

It's my turn! (I am so bad at delayed gratification.)

Time to welcome you all to another wonderful Endless Summer Project from the team of hyper-cool moms: Melissa, Alexandra, Jen, and me If you stepped into the vast wormhole of the internet last week and missed Alexandra's hopping backyard BBQ, you missed a safe alternative to horseshoes, a great grilling recipe, and an adult beverage to adore. Skip on over and enjoy... and then come right back. Or maybe go check out Melissa's cute mosaic stepping stones first. And THEN return, bright-eyed and bushy-talled to check out our Rings of Color Sharpie Dyed Shirts!!

PC_endlesssummer_sharpieshirts.jpg

Last summer we did a great tie dye shirt project together, and my children loved crafting and wearing their shirts. To kick off our summer together, I wanted to make another wearable piece, and what could be better than an excuse to use Sharpie markers?

This project is totally inspired by the great Martha Stewart (I'm hoping we'll be BFFs after next week). To see a helpful video on how to, go here.

Here's what you need:

  • Light-colored shirts
  • Sharpie markers - be sure to avoid contrasting colors unless you want brown hues
  • Isopropyl alcohol
  • Eye dropper
  • Circular surface
  • Rubber bands
  • Cookie sheets

We took our project to the backyard for more summertime fun, but this craft is safe enough to do in a clear spot inside for a foolproof rainy day creation, too!

PC_endlesssummer_sharpiedyedshirts.jpg

Neon is all over the place this summer so we chose new NEON Sharpies. Their saturation was a great choice for the brilliance in color palette.

Step One: Insert a clean cookie sheet into the t-shirt. This will prevent the alcohol and markers from bleeding through to the back of the shirt.

PC_endlesssummer_sharpiedyedshirts_1.jpg

Step Two: Visualize your design (or not). My girls and I decided we wanted to created a strip of colors that ran down just one side of the shirt so we planned out where we wanted the circular shapes to go. If you're more into free form, you can set up one circle at a time and add as your fancy desires.

Step Three: Insert the circle object underneath the top layer of the shirt. Secure its placement with a rubber band.

PC_endlesssummer_sharpiedyedshirts_2.jpg

Step Four: Draw thicker dots with Sharpies in a ring pattern.

PC_endlesssummer_sharpiedyedshirts_3.jpg

Step Five: The fun!! Fill an eye dropper with isopropyl alcohol. Squeeze out one drop at a time and watch the colors slowly bleed. Try different effect for dropping it inside the circle where no color is and dropping it right onto the dots themselves. To keep your colors more brilliant, limit your drops of alcohol. To spread your circles the most, keep adding drops.

PC_endlesssummer_sharpiedyedshirts_4.jpg
PC_endlesssummer_sharpiedyedshirts_5.jpg

Step Six: If you don't want the rings to bleed into one another, be sure to wait until the alcohol has mostly dried before moving on OR spread out the rings so that they do not overlap.

PC_endlesssummer_sharpiedyedshirts_7.jpg

Step Seven: Allow the alcohol to dry (mostly) and flip to the other side to create more patterns and fun! Once the alcohol has dried completely on both sides, remove from cookie sheet. Pop in the dryer for 5-10 minutes (on its own) to set colors.

Step Eight: Wear to your heart's desire! Colors should now be set within the fibers but I'd still recommend washing with like tones on the first machine wash.

PC_endlesssummer_sharpiedyedshirts_6.jpg

Fair warning here, friends: fun projects like this might ensue a whole lot of sillyness and laughter so be prepared to make great summer memories.

PC_endlesssummer_sharpieshirts.jpg

Sidenote: Sharpies bleed in the most wonderful ways so for my 3-year old son, we made a striped shirt. Try your hand at all sorts of patterns and shapes! L wore this for three days straight until I had to cut him off. :)

PC_endlesssummer_sharpiedyedshirts_9.jpg

So grab your Sharpies, friends, and get creating!! We'd love to see your creations - share them with us using the hashtag #endlesssummerprojects and look for sneak peeks of Jen's fabulous project for next week!

Here's to an endless summer of childhood fun.

xoxo, MJ