


Getting down and dirty today. Do you ever feel like you're being covered by children's papers, projects, and homework? I do, or I did. Here's how I'm showing this year's clutter who's boss.
Our kitchen is the hub of our house. It's located off of the garage and mud room, and it's where we enter our home most of the time. The kitchen had also become the final resting place for all paper and kid clutter. Typical meal prep would involve a grand shifting of piles, that would lead to misplaced papers or unchecked homework assignments.
But that era, my friends, is over. For under $10, we have a new system to keep the counter tops free and clean, to keep kids school work in the right places, and to allow all of us (parents included) to have a piece of responsibility in the process.
It's a simple three-step process. I share it with you in the hopes that it might alleviate your own piles or missed
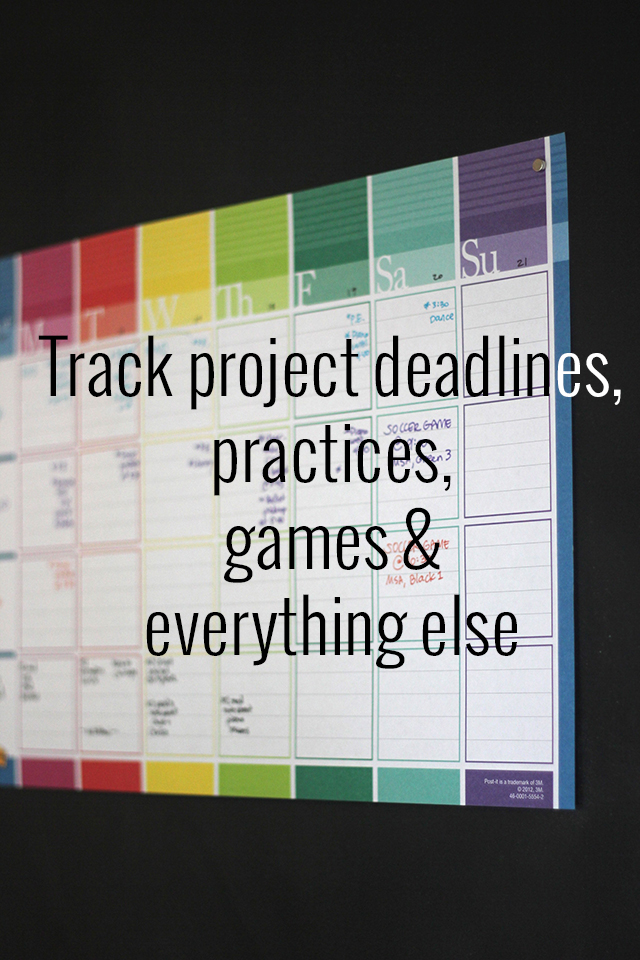
Step One: It all goes up on the calendar. A paper calendar these days, you ask? I have my Google calendar that tells me when to sit and when to stand. :) It also has important dates for my husband and children on it. But with children the ages of 9, 7, and 4, I don't have a way to share this electronic info easily with the people who need to understand it most.
So this rainbow pad from 3M is where it's at. I complete it only a week at a time (too many things shift for me to go much further in advance), and post it on our chalkboard wall in the kitchen. It's helping all three to take responsibility for prepping their after school bags, squeezing in time to practice instruments, and buying school lunches. Each child has a row, and Mom and Dad have one, too. Guess who gives us helpful reminders, too?
Step Two: Next hurdle to tackle, the unpacking of the backpack. Each child has their own hook and drawer for shoes. This was not a problem. It was the, "Look, Mommy, what I did today!" moments. Folders undone, papers here and there.
Now, I spend time with each child individually (yes, we're all practicing patience) going through the folder. We look at what homework needs to be completed, and we get right to that. The papers that have come home just for review get clipped by the child to the "Done Door." Go with me on this gimmick. This door is also the door to our garage, a metal door that, thanks to the use of these strong magnetic clips, has a ton of space for everyone to use. So oldest on top, middle in the middle, and youngest on the bottom. It's still in our main traffic area, but it's gleefully off of the kitchen counters.

This activity is a fun one for L, the youngest. The task of clipping and sticking the magnet to the door has proven endlessly entertaining.
Step Three: Because my hubs and I look over work at different times, we ran into the challenge of keeping the papers in a central location for him to see. Now, they all hang on the Done Door. Most of the time, each child brings over things they want to show him.
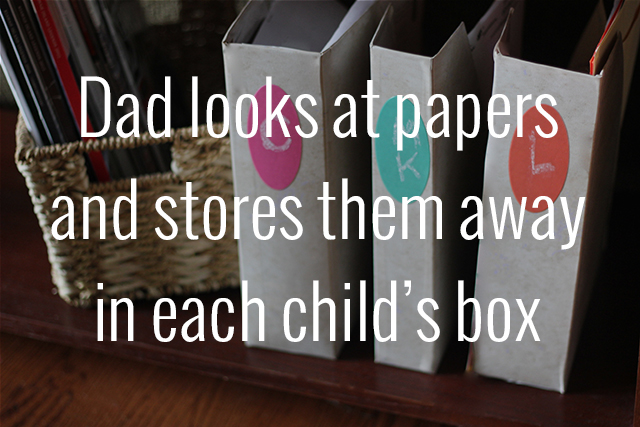
He has a chance now to see them as a stack of one child's work and talk to them about what's going on in their learning. And he's the last step in the chain. When he's done looking at school work, he puts completed work in each child's box.
Children can now return to that one paper from last Tuesday that they really want to see. :) And I don't need to fish it out of whatever pile it might have landed. Or even worse, rummage through the recycling, because I DO love to recycle.
These boxes are cereal boxes covered in neutral contact paper. On the end of each, I attached colorful chalkboard labels to entice everyone into keeping up this process. It's cute! Let's do it!!
And it's full steam ahead, friends. We all have our role to play, but my children are movers in this process and not passive participants. And I love that.
Also, I love my countertops.
xoxo, MJ
"Aren't we weird human beings?" read my text message, "Us and our 'celebrity' crushes on people who are just regular humans like us."
Paige, Approaching Joy Creative

I don't think there's a definition of a fan girl floating around on Merriam Webster's pages, but if there were, I think it might include a high level of admiration for someone you have not met.
I have met Rachel Shingleton. We met in January at Alt Summit in Salt Lake City. Rachel's totally down to earth and easy to talk to, and there is potential that she didn't know I was a big fan girl, but she probably did. Upon meeting her, I told her I couldn't wait to collaborate on something. Sometimes, I kind of get really excited.
As you can see in the image below, I've been a fan for a few years. When I first saw her logo - the name, the colors, the stripe - I thought it was so brilliantly done. I still think so, except now, Rachel has taken her style and color blog to a whole new level.

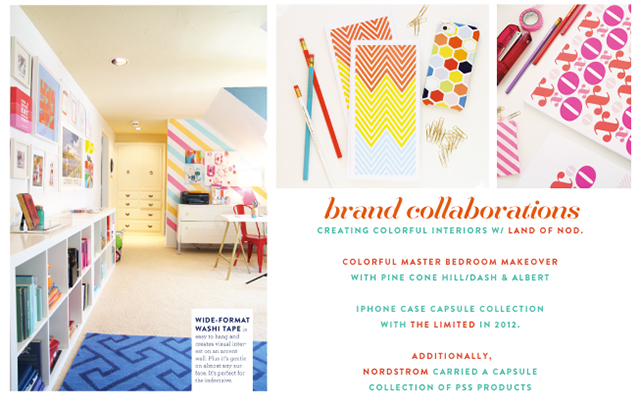
She's received a lot of honors, including the Better Homes & Gardens Top 5 Decorating blogs (and look at the kicking graphic she made for her award). In her shop, she's grown and expanded to retailers like The Limited and Nordstrom's.
 Rachel says that she's never met a color she didn't like. And she does such an amazing job of making those colors work together in energetic, blissful ways.
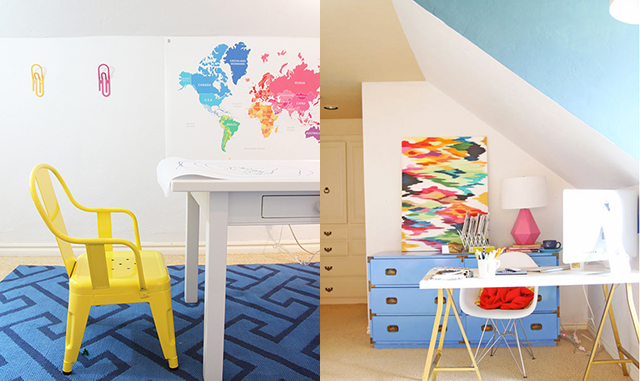
Her home tour with Gabrielle of Design Mom is a must see. The vibrancy of each room just hums. Mixing in bold tones with fresh white all throughout the home, Rachel is a whiz with pattern and texture. She partnered with The Land of Nod to reimagine her office and playroom. It's such a spectacular finished space that beckons creativity to come on out.
I've followed her personal story as well which she tackles head on with her blog. And I'm delighted for Rachel and her family as they welcome their long-awaited second child!
From hair-styling and fashion, to home decor, to cute gifts and great ideas, Rachel always have something fresh to offer.
 Rachel, thanks for your myriad of awesome work.
I'm a fan girl.
xoxo, MJ
We partnered with Tiny Prints to bring you these projects. We were compensated for this post, but all ideas and opinions are our own.
**Ths post is meant to reflect a celebration of life. We honor and remember all those who lost their lives in 9/11. We will never forget.

Kids aren't the only ones who deserve incredible birthday parties. All this week, my Endless Summer Project gals - Alexandra Hedin, Amy of This Heart of Mine, Jennifer of Classic Play, and Melissa of Lulu the Baker, and I have been throwing a glam-tastic party for Ali! She is the weeknight party girl so we had to go big. I mean, this girl is a big deal. Check out her TV spot, highlighting some of the details from the party.
We were inspired by a pink and gold party invitation from Tiny Prints to set the stage for a night of great music, delicious appetizers, cool decor, a cocktail to write home about, and, yes, you need to tune in tomorrow for the amazing cake.
I wanted to create some unique placecards to celebrate Ali. Building off her cherry skewers, these name kabobs make fantastic bling for just about any party.

These place cards are super easy to make, and you can pull them together while the crostini is in the oven and the cake is cooling.
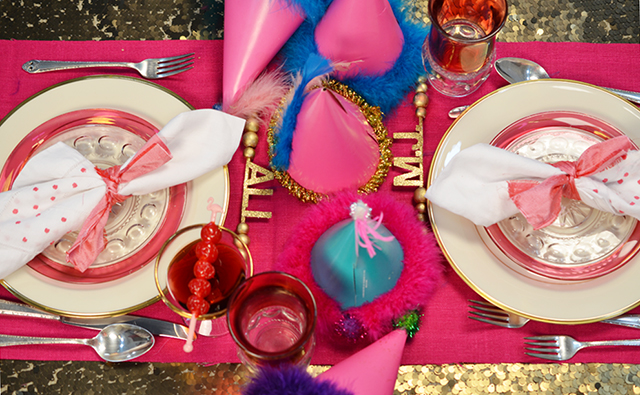
When the party involves a sequined tablecloth, you have to go over the top. So, for the creating, you'll need:

Taking wooden beads from uncoated to gold leafed is more than kind of amazing. Instant sparkle. First paint your beads. I painted mine on the skewers so that I could easily cover all sides.
Next, the letters. I cut mine using a die cutting machine, but store bought letters work just as well! Cut out a thin strip of the paper, fold it in half lengthwise. This is the paper on which the letters will be mounted.
Glue it on to the center of the skewer. Then glue the very bottom of the letters to that piece. The scrapbook paper is heavy enough to allow the letters to stand on their own.

Add beads to either side, on the skewer. With end beads, squirt a small dab of hot glue into the center, to keep the row of beads secure.
These name skewers look great on top of chargers or cocktails! Or as an introduction to dessert like Ali has them. Also, I might make one for my desk at work. Just because.

And Amy is bringing the cake. It's pretty spectacular - champagne cake!
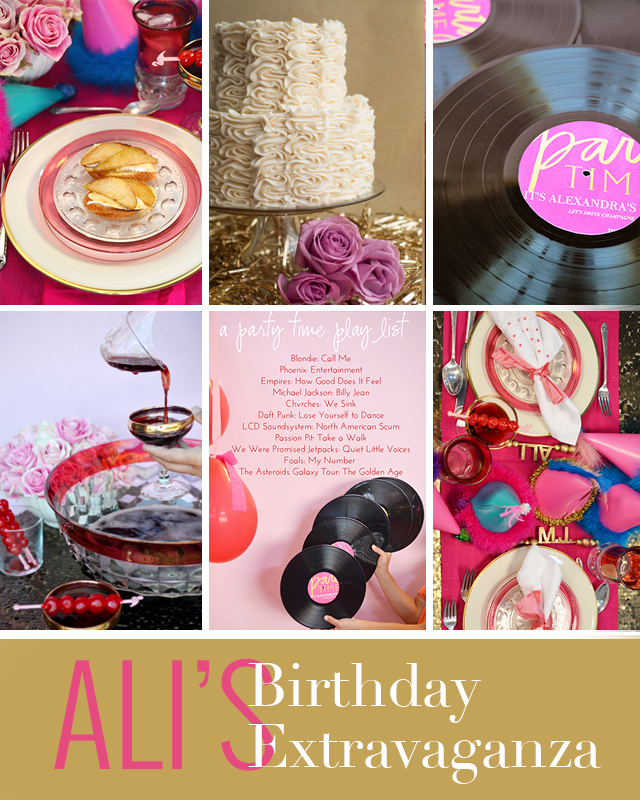
Happy birthday, dear Ali. Happy birthday to you!
xoxo, MJ

 Photography by Brittani Renee Photography
In teaching, I wanted to be clear about my objectives. Write it on the board, "Students will be able to..." Let them know what our end goal was. No need for mysteries or secret reveals. This is what we want to learn.
I've been thinking a lot about this question that Sara Moore posed to me,
What do you hope your children will learn from you?
In the list of 11 questions that she asked, it was the one that took me the longest to answer. The question made me reflect upon my thoughts on sharing my parenting objectives.
The question is as deep as it is simple. The whole cycle of parenting involves the activity of what we want our children to learn from us. Our ideals, our beliefs, our dreams become a part of their upbringing. These things "rub off" in our interactions.
Are there other areas and lessons that I want my children to learn that might not come up so naturally?
My husband and I created a family mission statement late one night when my second daughter was an infant. During one of our innumerable sleepless nights with C, we felt like we were veering off course, or, at least, meandering a bit more in our parenting than we wanted. We wrote out these simple statements to remind ourselves of these goals as we changed diapers and soothed teething cries.
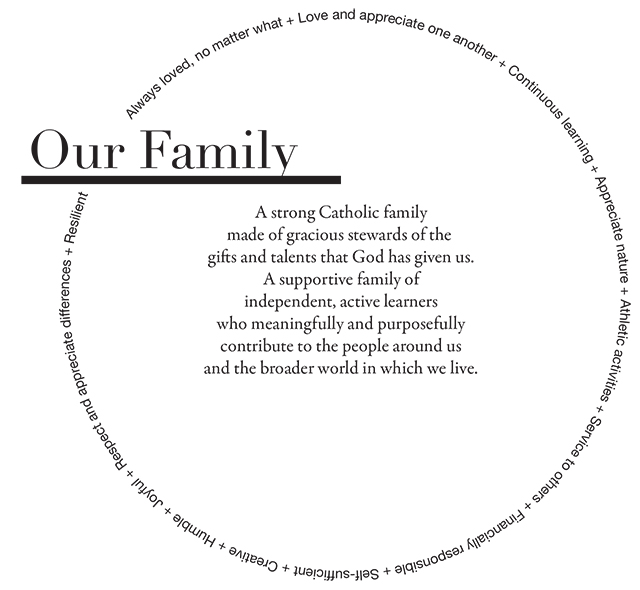
Now two of our three children can read, and they can all express themselves quite clearly. They are perceptive; they are good listeners. I wonder how I am communicating these broader and more important family values. To Sara, in her interview, I said:
I hope my children learn that they are always loved by us, their parents, and by a generous God. I hope they learn to go after their passion and to work consistently to point that passion towards the greater Good. I hope they learn that tenacity and enthusiasm can accomplish almost everything you need. I hope they learn to laugh at themselves (a lot) and help other people do the same.
And now I'm feeling challenged to revisit our original statement or post this new one for my children to read. And to remind me, everyday.
What do you think? How do you let your children know what is most important?
xoxo, MJ
|
This shop is part of a social shopper marketing insight campaign with Pollinate Media Group® and Office Depot, but all my opinions are my own. #pmedia #inspirestudents http://my-disclosur.es/OBsstV |
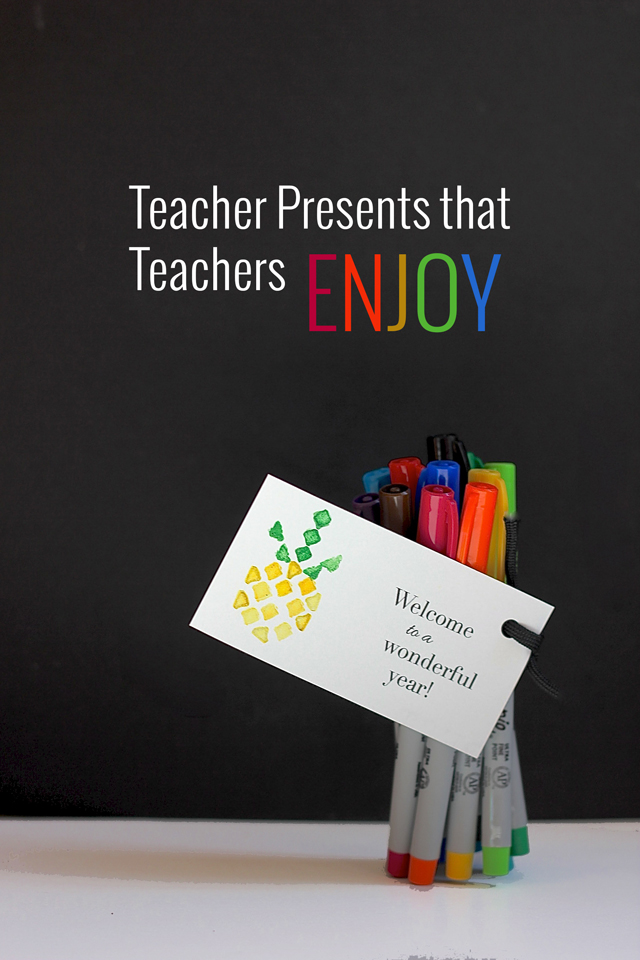
Pineapples are all over the place these days. They're trendy now, and during colonial times, the pineapple symbolized the warmest welcome you could extend to a guest. It has continued to evoke a sense of hospitality and sweet goodness throughout the generations.
Extending welcome is a primary job for a teacher in the first month of the school. Around here, we're already in the third week of school, and the newness is beginning to wear off...which means... it's the perfect time to give your children's teachers a present that they want.

Sharpies! Smelly markers! Window markers! Great pens! The list of fantastic school supplies is a long one. Children aren't the only ones who love these colorful tools. Show the teachers in your life that you look forward to what the next months hold with a Welcome to a Wonderful Year present. You and/or your children can create these gift tags or notecards using pencil erasers and stamping pads.
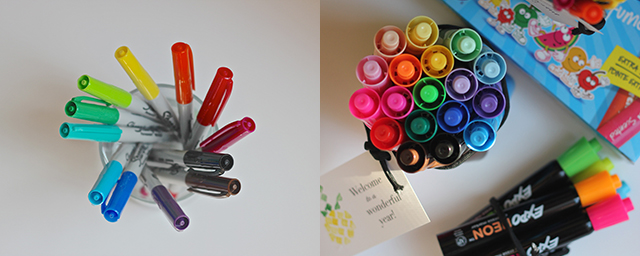
We bought fun school supplies at Office Max. Right now, you can save $5 off your purchase of $20 or more on select Newell Rubbermaid brands which include all of our favorites (PaperMate, Expo Neon Window Markers, Sharpie, Uni-Ball, & Mr. Sketch) And, you can cash in on Office Depot Rewards for shopping at Office Max as they are owned by the same company! It's kind of hard to resist...Head over to your Office Max or Office Depot and take advantage of the deal while supplies last.

You'll need some pencils with fresh erasers, an inkpad, and some paper to make these pineapple prints. Draw simple shapes on your erasers, like the ones shown above. With an X-acto knife, cut around these shapes. We made two sets of these shapes so that one of each could go into the yellow and green.
The pineapple shape is a breeze once you get the hang of it. Using a combination of diamonds and triangles, you can create a charming geometric design.
Or, if you aren't ready to take the project right now, click here to download your own pineapple printables.
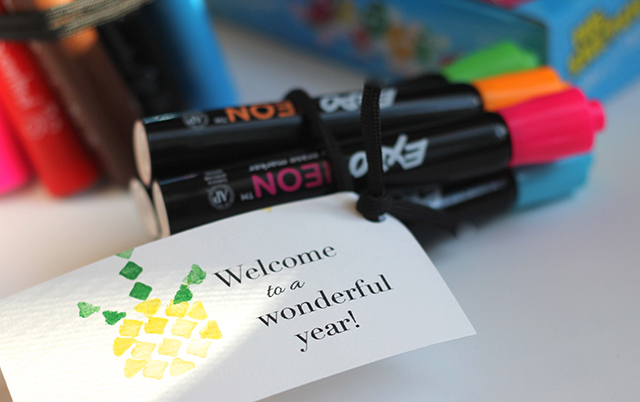
Wrapping up a bundle of these fun supplies with a parachute cord or ribbon and a tag, lets our teachers know that we appreciate them, and we're looking forward to working together!
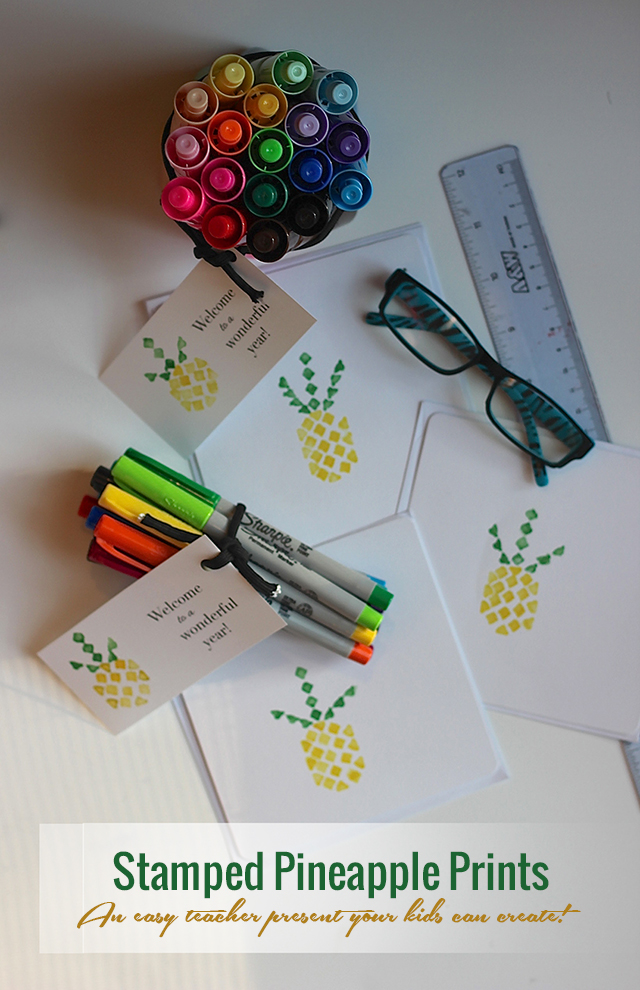
My oldest (9) and I created these together in less than an hour. Holding her back from using all the colorful markers was the hardest part....
Happy making!
XOXO, MJ


I haven't purchased any yet this season, but it's almost time for pumpkins. The crafting, the eating, the cooking, and the carving - so many wonderful projects coming all from one little gourd! I have been falling in love with pumpkin over and over again through a group board that I collaborate on called Pumpkin Recipes, Crafts, and More. Come on over and check it out...
I'm sharing 9 super ideas with pumpkin that will get you into the spirit of fall and delight your taste buds, too...
Mini Pumpkins:
I created these for Gina's Month of Pumpkin. She's a master with pumpkin recipes, and she let me join in the fun with this super easy pumpkin craft. These balls of yarn are topped with small pieces of pipe cleaners and stacked inside a shadow box. They make great additions to a tablescape and a delightful garland, too.

How about two great uses for pumpkins?
Pumpkin Pinata:
A balloon, yes! And a pinata! Perfect. What an awesome way to begin or end a night of trick or treating. You get all the info on how to fill the jack o'lantern over at The Gunny Sack.
Chalkboard Pumpkin Planters:
Also, I'm not over chalkboard (I hope you aren't either), and I love this pumpkin turned potted vase for colorful mums. This is a super easy and approachable (quick) project that can make any front door warm and welcoming for fall. Chelsea shows off how-to over at Making Home Base!
Memorable pumpkin treats...

Easy Pumpkin Krispie Treats:
Rice Krispie treats are always a family favorite around here, and these are too cute as pumpkins. The simplicity is right on for the kids to join in on the creation stage, too. Jen has her creations over on Yummy Healthy Easy. Can you guess what she used for the stem?
Pumpkin Pie French Toast:
Pumpkin pie French toast? A total yes! This recipe is from Erin Chase over at $5 Dinners which means it's also incredibly affordable. We make pumpkin swirl French toast every Halloween, and I love this variation on it. But why save it just for Halloween?
And two classic desserts...

Pumpkin Cookies:
When I think of baking with pumpkin I think of these two recipes. Crissy of Parenting Pretty has gorgeous and uncomplicated Melt in Your Mouth Pumpkin Cookies. The texture and moisture of pumpkin is just perfect for these delicious desserts.
Pumpkin Donuts:
Everything tastes better as a donut. Well, almost everything. But for sure on pumpkin. Rolled in sugar... The Blue Eyed Bakers are genius. Click over and make Petite Pumpkin Spice Donuts.
An unexpected must try...

Pumpkin Pie Spice White Chocolate Caramel Popcorn:
Though I've never eaten this particular flavor combination, I think we'd be fast friends. I'm excited to give it a try. Cooking Classy serves this popcorn in a clever way, too. Go check it out!
And finally for the kids...
Hammer the Pumpkin:
Something to occupy and entertain the young hands in your house is this simple pumpkin activity. Once the gourd has reached a certain ripeness, it's perfect for hammering. Grab a golf tee and a plastic toy hammer.
Okay, it's your turn! What's your favorite way to use pumpkin?
xoxo, MJ
It's the most wonderful time of the year...
Oh, wait. That was written for another season...but I'm hacking it for fall. I will miss summer (you were so lovely this year), but I am ready to welcome autumn with its colors and cozy scents in a warm embrace.
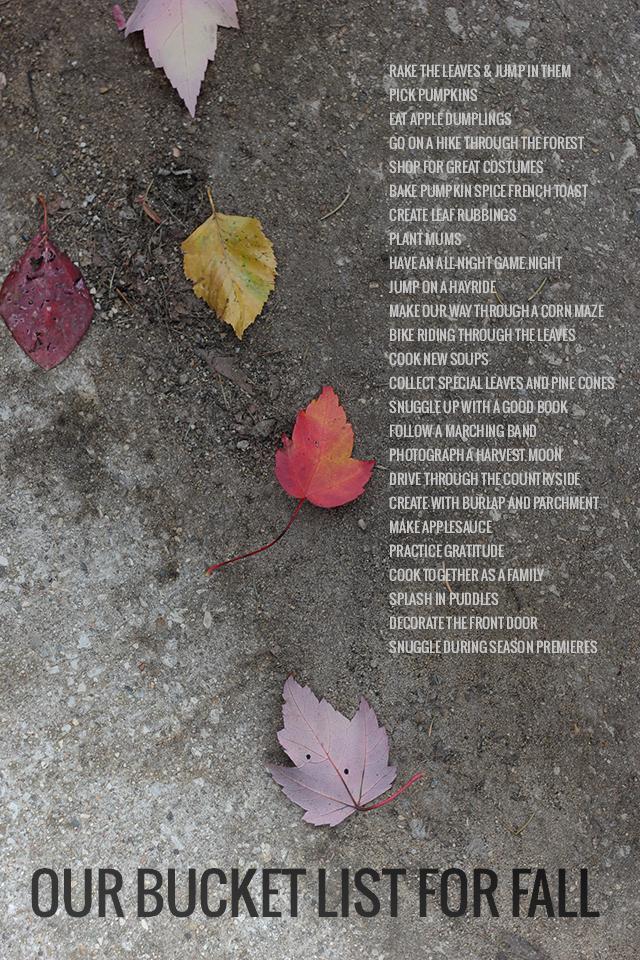
So, happy fall, friends! As a family we made a list of adventures we want to enjoy together this season, similar to the one we created for the summer. This past weekend as we reminsced over our favorite summer memories, we also tallied up all our favorite aspects of fall. It's always good to have something to keep you moving forward! Looking back on our summer list, I am happily surprised by how many of these ideas we were able to do. We treat our bucket lists as great go-to ideas to make the most of the season with no pressure involved.
Here in Indiana, there is so much to do as we transition to a time of harvest and get to the heart of what makes this land so wonderful.
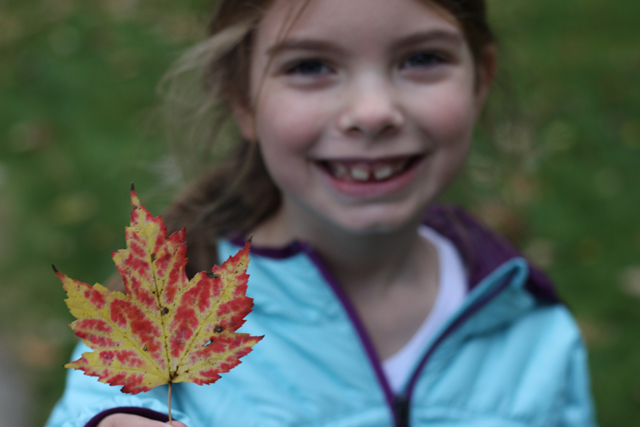
Are you ready for apple dumplings, crisp and colorful leaves, and a whole lot of football? How do you celebrate the change of seasons?
xoxo, MJ
Van Gogh used paints to portray what inspired him... Me? I like photos and words. I invest in this blog not only because I love the art of weaving words and images together to tell a story, but because, in doing so, I find myself looking more deeply for the beauty in life and consequently finding it in more places.

At this moment, I heard the sounds of our birth song begin to fill the room...When You Love Someone.
And I began to cry.
My husband, my friends, my dad, my nurses...all of them smiling...cameras flashing...
One more push.
Oh, this is so hard...
I pushed. I pushed and watched as the tiniest little body came out of me, arms flailing, lungs wailing...and then, they put her in my arms.
...and I knew.
I knew the minute I saw her that she had Down Syndrome and nobody else did. I held her and cried. Cried and panned the room to meet eyes with anyone that would tell me she didn't have it. I held her and looked at her like she wasn't my baby and tried to take it in. And all I can remember of these moments is her face. I will never forget my daughter in my arms, opening her eyes over and over...she locked eyes with mine and stared...bore holes into my soul.
Love me. Love me. I'm not what you expected, but oh, please love me.
That was the most defining moment of my life. That was the beginning of my story.
I've followed Kelle's beautiful journey. I've wept happily, wept sadly with someone I've never met, and I related. A piece of her life is captured in her book, Bloom.
I don't often bare my soul here, but I do feel it's a space where I can. And thanks to brave people like Kelle, I know the power that raw and honest has to reach people in a place they didn't know existed.
Thanks, Kelle.
I'm a fan girl.
xoxo, MJ
I saw very little of my siblings the two weeks leading up to Christmas every year. You see, I'm the youngest of three - my brother is 8 years older, and my sister is ten years older - and they were busy. Busily creating, making, finishing (or sometimes beginning) homemade gifts for my parents or me or my grandparents. My memories, even rhythms, of Christmas include time away from events and shopping to imagine and to cherish loved ones by spending time making special gifts.
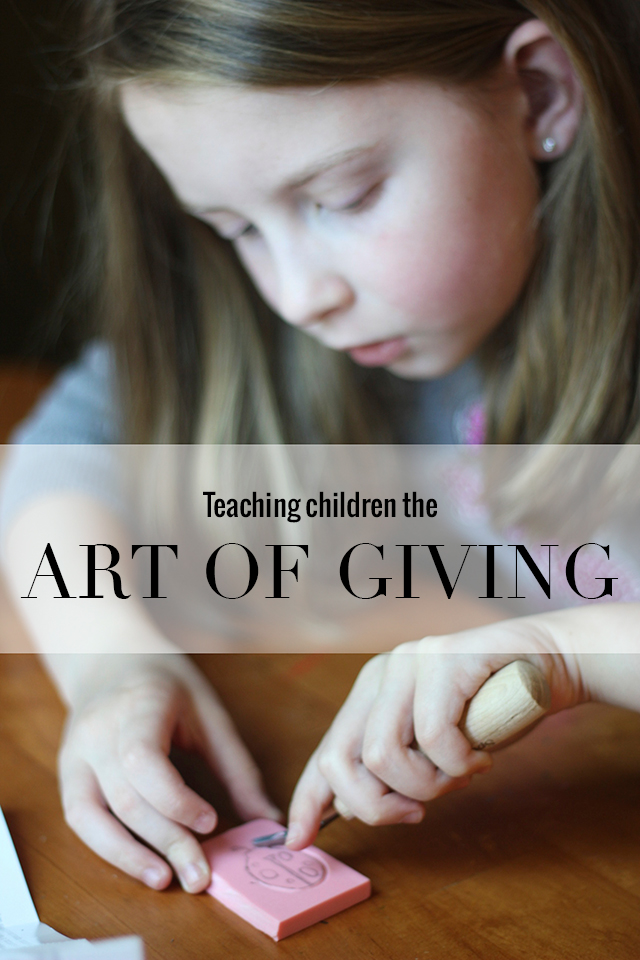
It's just what you did. Or what we did. I grew up thinking that every sibling did this.
I also grew up thinking this is how you use your talents. You create out of love. You create for others.
My sister is a great artist and amazing needleworker. The handmade creations she can put together (in a very short amount of time) are remarkable. She has very few of these pieces in her own home. They have all been given as gifts.
My brother is, too, an artist - sculpting and creating with fabric as well as pencil and paper. As a young child, I would challenge him to create something awesome for me, say, a purple-spotted black giraffe (with nearly 100 individual spots that he sewed by hand), and he'd make time to do it. He's given away all of these time-intensive, labors of love.
As my own creativity grew and developed, I followed suit and gave away my art as well.
It starts simple, right? Our children bring home that coloring sheet crayoned in our favorite shades. It moves to the work from camp or art class, like the pot or pencil holder that was made extra-specially for you.
And somewhere, judgement comes in from either the giver or receiver, and with time limitations and conflicting priorities, the handmade gets left behind.
My oldest daughter at age four, when she began to recognize the quality of her drawings, wanted to keep all of her artwork. She loved each paper so intensely, how could she give it away? She had spent so much time on it... She had thought about each pencil mark and erasure. And it had turned into something that she really loved...
As I told her then (in four-year old language), I'm not advocating for giving away everything that you create. I suppose it's more of a mindset. You see, these talents and artistic abilities and creative ideas are all a gift to us. To think that we are the sole creators or originators of these capabilities would be false or at least a distortion. Our talents have been given to us by a good and gracious God, and the fruits of those talents are meant to be used, dispersed, and spread.
The simple act of giving away today's coloring sheet or tomorrow's popsicle stick creation teaches a broader, stronger lesson on love and how to love. And how to live.
Keep encouraging your children to create and to create for others. Even if something is not made with their own hands, teaching children that thinking about someone else and spending their time giving for other's betterment is such an essential life skill and a budding lesson in love.
Oh, and thanks Brub and Sis for teaching me that this is the way it goes.
xoxo, MJ
"Aren't we weird human beings?" read my text message, "Us and our 'celebrity' crushes on people who are just regular humans like us." It was the second time, in a single day, that my friends and I were gushing over people who inspire us."
Paige, Approaching Joy Creative
I began to catch on to the idea of blogs as a new mom. I scoured the internet looking for ways to soothe my baby and stimulate early learning and fell down a wormhole into the mom blogs of the time. Many were overwhelming to me in terms of content and design.
And then:
Merrillee.
Mer Mag is a site I found myself going back to again and again when I wanted to see how beautiful and creative motherhood could be. Merrillee is a styling guru, an amazing illustrator, and a fun mom. Her site is clean and gorgeous.
Her projects use everyday materials and elevate them to the world of awesome design. She creates a whole imaginary wonderland in cardboard, paper, and tape.
Her ideas are inspiring. No matter your age.
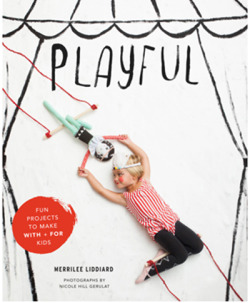 Her book looks incredible (you can preorder now).
Thank you, Merrillee, for reminding me of the joys of creating with and for your children. And for inspiring, through your use of material and shape, incredible projects we all can enjoy.
I'm a Fan Girl.
Who's inspiring you now?
Elise on Approaching Joy
xoxo, MJ
Disclosure: I am a member of the Cricut Blogger Network. I may receive prizes in exchange for my winning projects. Even though I am not being directly compensated for these posts, I am under consideration for a prize with Cricut Design Space Star. All opinions are 100% my own.
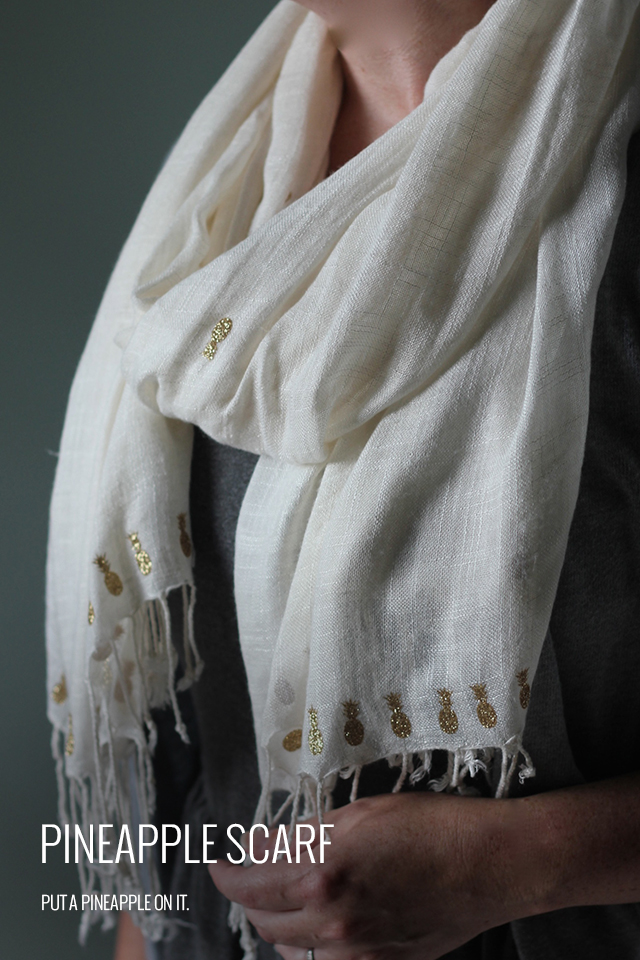
Sometimes I like to push the limits. When I received my Cricut Explore machine for the Cricut Design Space Star, I wanted to see just what this wonder could do. What materials can I use? How big can I go? How intricate?
How small?
I designed tiny pineapples - like half an inch small - and watched as the Explore trimmed out every little fiber and leaf at the top of the fruit. Pretty amazing. Along with my talented and Lucky #13 team, I wanted to create something with gold. Enter the glitzy glamour of Cricut gold glitter iron on material.
Pineapples are on trend, and when you keep them ultra small, they can accent any outfit really well.
To make yours, gather:

Step One: Design your tiny pineapples. I made an .svg file in Illustrator and uploaded them to the Cricut Design space. The program makes the best use of space for you! Switch the materials setting to Iron On, feed in your mat with the material in place, and watch the magic happen.
The precision of this task is pretty amazing.

Step Two: Remove the iron on material from the mat. This process is known as weeding. You may want to use a Cricut tool to help you carefully remove each pineapple. I accomplished this task while watching some TV with my kids. It's really fun to see the shape, with such detail appear from the page.
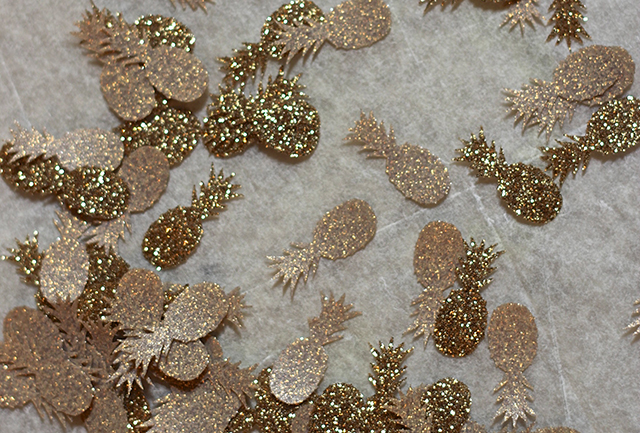
Step Three: Place your pineapples on your scarf in the desired pattern with the glitter side up. I did a line of fruit at each end and then a wide pattern for the rest of the scarf.
Step Four: With your iron on the non-steam setting, place a piece of parchment paper over 3-5 pineapples at a time. The iron on paper in the Cricut line adheres really quickly so you only need to move your iron back and forth over the parchment for 8-10 seconds.
Step Five: Remove the parchment and continue ironing the remaining pineapples.

I love the flash and subtlety of the finished scarf. And I'm already planning my fall wardrobe around it.
Why not put a pineapple on it? xoxo, MJ

My team, Lucky #13, has put together a wide variety of incredible projects. And you need to check out every single one! Find the links below. Vote for and pin your favorite projects!
You can also search for our projects on this and upcoming challenges with #cricutdesignteam13

Lucky 13 team in the Cricut Design Space Star™ team:
Disclosure: I am a member of the Cricut Blogger Network. I may receive prizes in exchange for my winning projects. Even though I am not being directly compensated for these posts, I am under consideration for a prize with Cricut Design Space Star. All opinions are 100% my own.

I've wanted to turn my Pars Caeli cloud into an umbrella design for the longest time, with no tools to make it happen. And then this wild and wonderful Cricut Design Space Star contest comes blowing into my life, and I know exactly what I want my first project to be!
This cloudy umbrella is basically a no-mistake project. Vinyl shapes can be moved and removed without leaving marks or residue. The shapes cling easily to the coated material, and the transparency of the umbrella allows you to see what you're doing the whole way through. I had my first bubble umbrella when I was six, and I've loved them ever since. These clear canvases also pair beautifully with the opaque vinyl.
So now that we've all left our intimidation at the door, here's what you need to make your own:
Step One: Design your pattern. Of course, I wanted clouds. Using Illustrator I created an .svg file. Based on the size of my umbrella, I made the clouds about three inches wide. I was happily surprised with how many clouds I could fit on one sheet. Using the vinyl setting, feed your mat with vinyl into the machine and carefully remove the cut clouds from your mat when complete.

I created another .svg file with the thin lining that rests on the bottom of the clouds. I changed the setting to paper, and fed in gold hammered scrapbook paper. These were fragile so removing them from the mats was a careful process.
Step Two: Next I wanted a GOLD lining for the clouds. I'm joining with a merry group of ten creatives for this Cricut Design Space Star challenge, and we had decided early on that we wanted our theme to be Gold is the New Black. And, do you know what's even better than finding the silver lining on a cloud? Yes, that's right, finding a gold lining.

Step Three: Press the gold paper lining to the bottom of the white vinyl cloud.
Step Four: Press the clouds to the interior of the umbrella. This will protect your design from the wear of the elements. I kept the clouds to the lower portion of the umbrella, with three on each panel, so that I could still see through the bubble. Decide on how much vinyl coverage you want on yours.

We've had a rainy end to the summer, and this umbrella, with its gold lining reminders is the perfect way to stay happy and dry in the downpours.
If you love this idea, head on over to the Cricut Pinterest board, and repin! I am so appreciative of your support and kindness!

My team, Lucky #13, has put together a wide variety of incredible projects. And you need to check out every single one! Find the links below. Vote for and pin your favorite projects!
You can also search for our projects on this and upcoming challenges with #cricutdesignteam13

Lucky 13 team in the Cricut Design Space Star™ team:

This post is sponsored by Bing.
It's always awesome to end with a grand finale, right? Well, Miss Amy of This Heart of Mine has pulled it out for us! Today brings us to the close of our Endless Summer Projects series.
I'm a journal hoarder...err, I mean, I appreciate a beautiful journal or sketchbook. Amy has this great process for showing us how to transfer your photographs to journal covers. The final result is spectacular! What a great gift these would make.
These makers are so good at what they do, and I've been truly blessed to work alongside them yet again. Oh, and we have a few more projects up our sleeves... with sparkle and disco balls and all that jazz. It's not the end of this collaboration by a long stretch!
To catch all of the Endless Summer Projects, catch up with the series here:
What was your favorite project of the summer?
xoxo, MJ
PS. For all of you headed back to school today, like we are, best of luck for an amazing year!

Happy back to school week, friends? Last week was the week of projects, and this week the rubber hits the road as my older two start back. Summer is frenetic with camps and playdates, and I have to admit that I'm yearning for a bit of routine and flow. It's a different balancing act.
As a work from the office and work from home mom (too many hyphens to make it worth the effort), I struggle to make time for everything and everyone. I should have perfected the juggle now that I'm nine years into it, and in some ways, I have. I've learned to go easier on myself, and I've learned how much I have to learn...and how much my children teach me. But I also have moments every single day where I wonder how I will get it all done...and with what kind of quality. I love it, and I struggle with it.
I'm over at Sara Moore's charmed blog today talking with her as part of an ongoing series that I love:
She interviews maker mommas from all over and inquires about all the things you'd really want to know.
I hoodwinked her into sharing a little bit with Pars Caeli readers on this series. Here is Sara and her gorgeous family:
Why did you start this series?
We had recently moved to a small town in Oklahoma away from my family, friends, nanny, and my other momma friends that would keep me sane while I was "juggling" motherhood and my small business. I found myself in a fairly desperate place of needing encouragement and advice on how the heck I was going to make it through every day without any of those people. I know a lot of "mompreneurs" and thought they could help not only me, but others as well. Motherhood (or parenting in general) can be very isolating these days. We have everything we need at our fingertips to have and do it all yet what we really need is each other to lean on for support. It takes a village, right?

What you have learned from the many posts?
I've learned that I'm not alone in my struggle. I've learned that balance is defined by you, not society or someone else. And I've learned countless (and genius!) perspectives on being a working momma. I'm so very thankful to all of my guests and readers who have contributed so much of their heart to this series!
Head on over and check out what I have to say about mommy guilt and what I want my children to learn from me (gulp!)
Also, check out these two that I enjoyed: Amy's interview and Erin's interview.
Here's to a kickin' week, my friends.
xoxo, MJ
Two fun, fun, fun announcements to share with you today, friends! First off, I'm one of the lucky bloggers chosen to compete in the Cricut Design Space Star competition!!! Secondly, Fridays just got a whole lot cooler with a fresh new collaboration with my best buds: Ellen of Minnow & Co., Emily Jeffords, and Paige of Approaching Joy Creative. Welcome to Fan Girl Fridays.
 The lovely people of Cricut reached out to me a few weeks ago and wanted to know if I'd like to join in the Cricut Design Space Star challenge. I'd receive a Cricut Explore machine and have a team of fellow bloggers to work alongside. A free design tool and collaboration??? I was all over that.
So, I'll be asking for your help with some clicks and votes for me and Lucky #13 team. Our first category is fashion and gear, and I'm kind of over the moon excited to show off some new projects that you can create, too! Check in next week to see what came from our theme involving... G O L D.

In the Also Awesome category, I'll be posting every Friday now! Catch projects and posts Tuesday, Wednesday, Thursday, & Friday (gulp!). It's been a while since I've gone four days, but there are no other people in the world I'd rather spend my blog time with than Ellen, Emily, and Paige.
Beginning as a texting convo, we were all sharing our favorite bloggers and makers and artists - the sites that got us into blogging and the projects that moved us to begin. There are some really amazing artists out there, friends, and we are going to be doing a whole lot of appreciating around here. The four of us will be posting Fan Girl on Fridays (with links to one another) to show our love for the people that inspire, that have inspired us for so long. It's time they know they have a Fan Girl or two on their hands! Join in and share your favorites.
This was a tough week in the news, but a beautiful week personally. My hubs has made our anniversary (12 years) into a wonderfully thoughtful week of celebration, and I have some REALLY exciting developments for Pars Caeli that I cannot wait to share with you!!
Until next week, have a bright weekend, friends. And know that I appreciate you.
xoxo, MJ

Celebrating back to school around here means that we're getting a whole host of lunch box notes ready to go. These little love notes have become a treasured part of my communication with the kids while they're away at school. We retell jokes on roadtrips, and my oldest is challenging herself to come up with original jokes all the time.
When they heard that I was going to be doing a back to school project, they asked for a little something special for their lunches. Hence the birth of the lunchbox whiteboard.
This project is a breeze to make (you can even have your kids make it themselves), and it will bring smiles for a long time to come!

Grab an inexpensive, small frame (we bought ours at CVS, and it's 3"x3"). Painting is not necessary, but we wanted chalk paint on the frame so that it could be decorated for special occasions like holidays and birthdays.
Trim a piece of notebook paper to fit in the frame. Assemble.
Write your note, create your joke, or draw your doodle with a dry erase marker.
Top the note with a piece of transparency trimmed to the size of the frame. This helps to keep the note from wiping off while it's in the lunchbag. It also allows your child the opportunity to write a note back to you. My children have already discussed a rating system for my jokes. :)
I recommend keeping the frame in the front pocket of a lunchbag if possible just to keep the food and drinks away from the frame. If that's not an option, consider wiping down your frame and pen as you pack the lunch.

If you're looking for joke ideas, follow me @parscaeli on Twitter or Instagram or Facebook to see a daily joke. We'll begin a fresh school year of giggles next week. And you can always search the archives by following #pc_lunchboxnotes (over 100 in there to get you going).
Aannnd...
I have one more awesome surprise today. We're making chic mouse pads as a part of this series. Head over to Frock Files to see the incredible work of Joy. So good. The watercolor effect and the perfect typography.
Thanks to all who helped out with this awesome week of projects. It's been a blast to see how everyone gets ready to school in their own very cool way.
Are you ready to head back?
xoxo,
MJ
I love so many aspects of collaboration...and right near the top is APPLE PIE DOUGHNUTS! Yes, my friends, today I get to share with you the recipe for apple pie doughnuts, thanks to our Back to School series. The incredible Lyndsay of Coco Cake Land has a charming apple printable and the most incredible recipe for a back to school treat today.
But not only that, Sara of Confetti Sunshine, has a great Back to School sign - gigantic in size - for you to use in your back to school photos! It's free, and you have got to see how adorable her daughter looks in her return photos.
We have another two projects for you tomorrow! I'm joining up with one of my favorites, Joy, to show you two DIYs to complete your week.

This post is sponsored by Bing.
Our summer is almost coming to an end, and we are reliving happy memories! This printable map from Lulu the Baker is the perfect way to capture our epic beach trip and plan for future adventures.
We have dreams of going out West next summer, but my husband and I wonder if the kids are old enough yet to appreciate the sights and experiences. As a child, I often traveled in my uncle's RV with my parents and siblings. I loved being about to sleep, eat, play cards, and see the sights all from our vehicle. I'm fancying doing the same for my kids. Have you made a long road trip with your children?
Melissa's map today would be awesome for a little back-to-school learning, too. A review of the state names and/or capitals? A sharing of where various members of the family were born? And I love her idea of embroidering a special journey on here and framing it.
There's one more week in the incredible Endless Summer Projects series. Be sure to tune in next Wednesday and catch up on all the projects here:
xoxo, MJ

Hi lovelies,
I feel especially spoiled to be able to share two magnificent Back to School projects with you today! Lidy and Rachel did not disappoint on their fresh takes to the season. These two beauties would be awesome first day presents for teachers or special treats for college students and their dorm spaces or...
Because you deserve a little something beautiful this time of year, too. First up, head over to Hello Lidy, and see how she crafted a sequined planter. Glamour meets botanicals. It's a lovely marriage.
And then head over to The Crafted Life and see how Rachel transformed the average pencil into a work of art. Can you imagine these in a bunch/bouquet? Or tucked inside a cute journal? I'm inspired. And I might want to colorblock everything.
This awesome series of Back to School ideas continues tomorrow with an epic recipe. Really. It comes from Lyndsay of Coco Cake Land. Go ahead over there and salivate at the deliciousness. Even more is coming at you tomorrow!! Also, another incredible Endless Summer Project is in store for Wednesday. Ack, so good.
Are you making the last days of summer special? Do share!
xoxo, MJ