Posts tagged kids
Memorial Day Games & Activities

It's about that time to celebrate and relax with the opening weekend of summer: Memorial Day! Whether you're spending the holiday with oodles of family and friends or kicking back for a low-key day at home, I've found some of fabulous activities to enjoy the outdoors and togetherness.

1. Scavenger Hunts are the best! And this one by Play Dr. Mom combines the alphabet and searching, challenging young players to bring items from the outdoors to match up with as many letters as they can find.

2. Looking for a fast DIY for your backyard? Grab a dollar store shower curtain and some painters tape and make a jumbo tic tac toe board. Colorful frisbees make great markers, too! Check out how A Turtle's Life for Me put it all together.

3. Bucket toss is a classic in any arrangement. Pull out the rainbow hues and arrange at a close distance, in a triangle, or far apart to challenge the entire family. Apply numbers to buckets like they've done over on Gets Bored Easily to add another level to the toss game.

4. If your Memorial Day will bring high temps, cool off with some water balloon pinatas like these. Pool noodles make fun bats, too!

5. The poppy is a symbol of remembrance and is often linked to Memorial Day. These lovely flowers were created in a few simple steps - make these together for the holiday! Check out Bar's poppy project over on Handmade Charlotte.

What does your holiday bring? Are you ready to welcome in summer?

xoxo, MJ

Pre-game Smoothie

“This shop is part of a social shopper marketing insight campaign with Pollinate Media Group® and Nestle, but all my opinions are my own. #pmedia  #BreakfastEssentials http://my-disclosur.es/OBsstV

This time of year is getting a little hectic with end-of-the-school-year activities colliding with new summer interests. Our children are wrapping up dance, while starting up soccer, and finishing craft club, while beginning softball. But no matter what time of year it is, we have a pre-game, pre-performance ritual to get ourselves psyched!

A few years ago, my husband introduced a heaping spoon of peanut butter. Gratefully none of us are allergic and we all love it (plus it has some nutritional value), and we were easily convinced that a scoop of peanut butter would set us off on the right foot.

Some of our activities are beginning early these days, and my children are expected to be up and filled with energy right after breakfast.

I decided to take our ritual of mounds of peanut butter and transition it into a morning smoothie. My children love fruit smoothies and chocolate milk so it wasn't a far leap!

These were quick to make and little hands made everything more enjoyable. The recipe is simple using items you likely already have around. Here's what we used to create our Peanut Butter Banana Chocolate Smoothies:

To add a little extra loving, I decided to make some straw notes to wish my favorite athletes all the best. It was a cute surprise to greet them at the breakfast table. M is our slugger in her second year of softball, and C is a big kicker in her second year of soccer.

I used flexible straws and attached our notes with some tape on the back. Be sure to tape right above the bend so that your straw can both reach into the glass and the note is low enough to make the straw functional.

Little L is not yet in organized sports or activities, but that didn't stop him from wanting a smoothie to start off his day!

I picked up the Carnation Breakfast Essentials at Walmart. For a limited time while supplies last, they have a coupon available for your own smoothie making. And if you're looking for more smoothie recipes, check out Carnation's host of ideas or follow them on Facebook.

And parents, of course, need a little extra success, too, so pour yourself a glass of these delicious creations.

Do you have any pre-game rituals that get your kids off on the right foot?

xoxo, MJ


Summer Banner Printable: Endless Summer Projects

I can hardly believe it! It's that time of year again?! Bring on the Endless Summer Projects! Jen, Alexandra, Melissa, Amy, and I have been working for months to put together a fun, creative collection of projects. Well, it wasn't all work...there was a fair amount of laughter, sharing, and good old-fashioned sarcasm thrown around to get us to today.

Over these next 15 Wednesdays, stretching us long into August, we'll be sharing some fabulous ways to spend time with your children this summer and soak up all the sun-kissed joy of summer!

Most of us are not yet into the official summer schedule. We have 19 days left of school (but who's counting, right?), and I'm always looking for memorable ways to celebrate the close of another year. Our typical tradition includes stopping by teacher's classrooms to thank them for a good year and enjoying a lunch out all together, since the last day is typically a half day.

Jen of Classic Play has a great printable banner ready for all of us to celebrate! Imagine the joy of your children breaking through the streamers as they run out for the bus or into the car.

Click on over to Classic Play to get the downloadable pdf and get it ready for your end-of-the-year party. I want to put one on our minivan and maybe one on their bedroom doorframe the morning of the last day.

What are your year-end traditions?

xoxo, MJ

P.S. I'm hosting next Wednesday's project, thanks to our friends at Wayfair. Grab a large canvas and some washi tape...


Summer Anticipation Printable

Anticipation of something amazing is almost as fun as the actual event, right? Well, that's certainly the way we feel around our house. I'm grateful that my children love school, but I also know that we are all ready for a break in projects and homework, a break in the weather, and a return to some of our favorite activities.

We try to mix in learning with our summer relaxation time so that our children realize again that learning is fun and a lifelong pursuit. About this time every year, as the school year winds down, and our plans for summer begin to solidify.

What do you want to learn this summer?

What do we need to make sure we do?

Where should we go?

It's summer daydreaming together, and it's also been a fun way to collect this moment in time for each of my children...as their wishes change so much from year to year and mark this special time in their childhoods.

I also love sharing what I (and my husband) enjoy about summer and what we want to learn and do. It's a great way to pass along our family history and also to open up little eyes to big possibilities.

Start your summer conversation now. I've got a handy printable that you can download and make a part of  your summer memories! Bring it to dinner or leave it at the breakfast table for your children to complete. And enjoy the conversation and the fun activities that result.

Our Endless Summer Projects series begins tomorrow, and it's going to kick off the fun in a really big way. Make sure you hop back to see what we have for you!

xoxo, MJ

Make it together Mother's Day
PC_mothersdaymake_1.jpg

May is a busy month with birthdays, year-end celebrations, sports, and Mother's Day! Sometimes special dinners out and shopping trips don't make the final agenda before Mother's Day. And though I sometimes enjoy the quite solitude when everyone leaves our home, I really love experiencing all of us together in this space - making and creating.

So why not craft together as an activity for Mother's Day? Or have your children to create alongside special grandmothers or aunts for a sweet Mother's Day experience?

PC_mothersmake_2.jpg

This is an incredibly budget-friendly (slightly time intensive) craft that all three of my children enjoyed. Gather together:

  • Paper (we chose rainbow and only used one piece of each color paper to make all the beads here)
  • Scissors or paper cutter
  • Glitter glue (really, any glue is fine, but glitter makes everything better, right?)
  • Pencil or pen (to wrap the paper)
  • String or twine for necklace/bracelet/anklet creations
PC_mothersmake_3.jpg

First step? Cut isosceles (ish) triangles out of your paper. Ours were about an inch at the thick end. Here's the important next step: begin with the thick end and tightly wind the entire triangle around the pencil. We made different shapes by doing this. Some beads were exactly symmetrical, some looked more like cones or party hats, and others looked like a wobbly top.

PC_mothersmake_4.jpg

As you get close to the end of the wrapped paper, squirt a dollop of glitter glue on the front and back of the end tail and graciously smear it all over the end and the rest of the bead. This will help secure the tight wrap and spread the glitter around the whole bead.

Once the bead is secured, carefully remove it from the skewer and let it dry for a few minutes before crafting further.

PC_mothermakes_5.jpg

String your handmade beads for necklaces and bracelets that are one of a kind. You'll have the finished product made from little hands, and the priceless memory of the entire experience as a special Mother's Day treat.

PC_mothermakes_6.jpg

Happy Mama's Day! And happy crafting!

xoxo, MJ

Printable Gift Tags for Teacher Presents

I am a big fan of silly jokes. I am not ashamed giggle at the ridiculous, and it's fair to say that my sense of humor resembles the age group I used to teach, ten-year olds. Since I've been out of the classroom for nearly a decade, my children get the brunt of my humor via lunch box notes.

This week is Teacher Appreciation Week, but any week (or day) is a wonderful opportunity to express our gratitude to teachers for their creative work to open up the world to our children. Having spent a few years studying and working as an educator, I can safely say that (besides parenting), there is no more difficult task than guiding students.

And as a teacher, I loved getting the super thoughtful creations from my students and the super practical gifts from their parents. So why not combine the two?

These jokes make great additions to thoughtful giftcards to local coffee shops or craft and teacher stores. They can personalize a wonderful batch of cookies or a gift basket filled with gardening tools and succulents.

Maybe a big bag of stickers and stamps would be a nice gesture for a new elementary teacher? Or perhaps a box of delectable chocolates topped off with a funny?

Among our favorite gifts to make for teachers are these chalkboard frames. And these printable jokes would make a great card on the top and allow even the most timid of children to express the joy of gratitude to a great teacher.

Print out both pages of fun jokes that you can send along with a simple daisy from your yard or a generous donation of Scholastic books!

You can download page one of basic jokes here and page two with librarian and math teacher humor here.

If you share in the joy of silly childhood jokes, follow Pars Caeli on Instagram or Facebook and get a daily joke sent right to your feed (doodle is complimentary).

How are you showing the love to the teachers in your life?

xoxo, MJ


Endless Summer Projects 2014

Friends! I have some exciting news to share!! Now is the perfect time to get excited about summer...and projects...and vacation...and extra time with our children. That combination of things doesn't always lead to shouts of joy and enthusiasm. But thanks to the fabulousness of four of my pals, we're going to turn the 15 weeks of summer into one big ball of fun.

Get psyched, lovelies, and join Melissa of Lulu the Baker (also BHG style spotter building her dream home), Alexandra of Alexandra Hedin (and those great Seattle TV spots), Jen of Classic Play (love her PBS series), and our new addition, the amazingly talented maker Amy of This Heart of Mine (the DIY-r behind so many Design Mom projects). I've been pinching myself, wondering how I got so lucky to work with these beauties, and I'm delighted that I get to share their minds with you! Treats all around.

Beginning May 12 and running every Wednesday throughout the summer, the five of us will be sharing cool projects to engage you and your children in the joys of summer loving. We're bringing aboard some fabulous sponsors and more than our fair share of suprises along the way.

Our first five weeks will star our Mini Makers, with activities that will get all hands on deck with some cool results. Throughout June and July will take the laughs outside for unique projects that will give you time to soak up some sun (SPF, please), and into August, we're making travel and vacationing something that brings on happy memories!


None of other than Jen Cooper of Classic Play designed our kicking ice cream cone logo. And guess what? She made it into these super cute baggies and temporary tattoos.

And as a special teaser to the Endless Summer Projects, she's showing us how to do the same today. If we're hanging out on Instagram later, you'll see my kiddos sporting some wicked cone tats.

Parents, what are you looking forward to about summer and, perhaps, a little extra time with your children?

xoxo, MJ

Mini Cooks: A complete menu

What's the sweetest way to end a lovely series? With dessert, of course.

Sheri has baked up a classic treat that she's honed to perfection - cupcake cones! I've never made these, and it's been on my mom-to-do list for a while. And I wouldn't want anyone but Sheri to give me the complete scoop (pun intended) on how to make these work - and look so good!

I loved this note of wisdom and encouragement from Sheri's post today:

It’s all about working together to create something special, and if {using a mix} is going to help you get there, then go for it. Sometimes you just want to cut right to the fun part, and especially with young children or kids who are not enthusiastic cooks, a mix is just the ticket.

The Mini Cooks series has been such fun to create together with Joy and Sheri. These ladies have such talent and creativity! They not only inspire me, but they naturally push me to be better.

And the best part of the whole experience for me was that my family came along for the ride! We made meals and snacks together and tried new flavors and dishes. If Spring Break is coming up, consider pinning the series and take some time to enjoy cooking together!

A fun surprise is in store for tomorrow. Pars Caeli turns TWO, and I have a present...

See you for the party - pajamas and slippers are encouraged. :)

xoxo, MJ

New to “Mini Cooks”? You can catch up here:

MJ’s “Recipe for Success”
Joy’s “Egg in a Basket”
Sheri’s “Granola Bars”
MJ’s “Vegan Smoothie”
Joy’s “Enchilada Lasagna

Mini Cooks: Enchilada Lasagna
Minicooks_red.png

It's time for another beautiful installment of Mini Cooks with my friend, Joy of

Frock Files

. She's cooked up an easy, hands on meal cheerfully titled Enchilada Lasagna. And it's perfect for our family and probably yours, too.

I am a huge pasta fan, favoring of course fresh pasta above all, but still a fan of ramen and even Spaghettios (oh, gees, I just admitted that). And yet I am raising three amazing children who have absolutely no interest in noodles or pasta. Joy's recipe today takes some of the flavors we adore and adds in tortillas - you've got to check it out.

It's what we're having for dinner. I wish it could look this pretty.

Thank you all for the amazing support of this collaboration! We've had a ton of fun planning and prepping it all for you and your families. Do you have an awesome recipe to share? Tag it with #minicooks so we can pin it to the

Mini Cook Pinterest

board.

Catch all of the recipes and tips on these posts!

5 ideas for getting started with Mini Cooks

Egg in a Basket

Snack Granola Bars

Lunchtime Vegan Smoothies

xoxo, MJ

Paper Daffodil Wreath
PC_daffodilwreath_writing.jpg

It's time for another fun project in collaboartion with our incredibly talented friends over at Classic Play. Today we're making paper daffodils with the kids for some pretty fantastical results.

This wreath is so simple to make from supplies you have around your house. Grab some paper (we used misprinted letterhead) in white and yellow, cotton swabs, food coloring, and some scissors. Bring your children into the process and let them feel the sense of accomplishment form their paper flowers.

We decided to dye our cotton swabs yellow using diluted yellow food coloring first. First, trim off one swabbed end, and dip and dunk them into the yellow dye. This step is not necessary (you can paint or color these with a permanent marker), but the process itslef added to the fun. My son, 4, became our specialist in creating the centers of the flowers.

make paper daffodils with the kids

We dunked ours a few rounds for fun. Take those out of the dye and place them to the side while you craft the petals. The process for creating these paper flowers is super similar to that of folding a paper snowflake. You want to create from a square piece of paper so fold over a right triangle and trim the excess to form.

You'll work from a square piece of paper (so from the first image, trim off the extra paper at the bottom.) Fold the large triangle in half. And then fold it in half again. Your triangle should look something like the one on the right below. Hold it with the end that is connected to the main fold.

PC_daffodils_folding.jpg
PC_daffodil_folding_2.jpg

Next cut out your petal shape, making sure to only cut along the two open sides. You'll cut a C curve along the top of the triangle. Creativity is encouraged here; some of our daffodils had pointed petals and some very round ones. Unfold your flower to discover!

Next up, create inner yellow circle. Shape it into a cone and secure with glue or tape.

tutorial for making paper daffodils

Using a sharp pencil or the colored cotton swabs, poke a small hole in the center of your white flower. Push the cone tip through the hole in the white flower and insert the yellow swab into the center of the yellow cone. Secure all the flower parts together with invisible tape around the stick (and behind the petals) of the cotton swab.

PC_daffodils_3.jpg

We decided that with all these “fresh” flowers we needed to make something bigger. With the help of a simple styrofoam wreath, we pushed the blunt end of each swab into the circle form. With the handiwork of my children, we were able to fill about half of the wreath, and I wanted a really full final product so I kept on creating for an hour after they lost interest.

PC_daffodils_writing.jpg

These everlasting flowers are charming on their own or strung as a banner. And this process was just as fun as the finished wreath. We're all very proud of our new door decoaration.

Happy crafting!

xoxo, MJ

Mini Cooks: Lunchtime Vegan Smoothie

Wednesdays are always such fun around these parts with the addition of our Mini Cooks series. In our fourth week here, Joy, Sheri, and I are teaming up for lunch. And I'm delighted to share with you our version of this awesome recipe that has loads of vitamin A and vitamin C to make you feel really good about what you're adding to your children's lunches.

Surprisingly, my three perceptive children have not picked up on the fact that I make smoothies every time I test out a new recipe on them. It's my fall back plan for good nutrition if the main meal ends up going south on us. I also love adding them to our lunches at home for an easy way to add extra goodness and interest to our sometimes boring lunches.

We've made smoothies from whatever we have around our house including juices, yogurts, sherbets, berries, bananas, and whatever fruits are in season or on sale in the frozen foods. This blend is extra good for us with the addition of some apple cider vinegar and soy.

I enlisted my mini-est of cooks for this recipe. He's always excited to cook and bake with me, he loves smoothies, and he's head over heels for orange.

Here's what you need, alter depending on your favorite flavors (but don't skimp on the maple syrup):

  • Juice of 4-5 oranges
  • 1 frozen banana
  • 2-3 cups of peaches (frozen or fresh)
  • 1 tsp of apple cider vinegar
  • 2 tsp of maple syrup
  • 1 small container of vanilla yogurt (soy)

This recipe is perfect for young helpers. They can smell the maple syrup, oranges, and vinegar. They can take in the beautiful colors of the fruits. (If you're like us, without a juicer) they can squeeze the juice and pulp right from the oranges. L felt pretty powerful squishing the orange peels and seeing orange juice happen right before his eyes.


We threw all of our ingredients into the blender. L is able to handle the hand mixer and toaster, but the blender just makes too much noise for his liking so I grated and liquified while he got distracted with one of his favorite household chores.

This is where I just had to go with his interest and let him play. Eventually he realized that the dishes were dirtier than he really wanted to deal with, and he was ready to taste test our smoothie.

His reaction? Two thumbs up, and "awesome." I'll take that.

He was excited to make it for his sisters' return from school, proud of his accomplishment. And I felt good that we were all enjoying a healthy addition to lunch and snack.

Do your mini cooks enjoy smoothies? Give them a try and don't forget to add a colorful straw! :) See more great recipes suitable for your mini cook on our Pinterest board.

xoxo, MJ

P.S. More fabulous posts for the children in your lives:

5 ideas for getting started with Mini Cooks

Egg in a Basket

Snack Granola Bars

Parent Helper: Audio books for kids

Friends, I have been waiting to share this new nugget of goodness that has transformed our witching hour around here. You know what I mean by witching hour, yes? I think it hits everyone's house at slightly different times, but ours hits almost exactly from 4-5 PM every day. At this point, the kids have had their snacks, finished homework, and are not quite motivated enough to find something to entertain themselves (or one another). And so usually, they'd turn to me to play or to suggest a way for them to enjoy the next hour, and by that point, I'm frantically trying to wrap up work, get dinner on the table, and handle any other household chores that have been waiting on me. The combination of parent and child patience levels at their lowest is a recipe for disaster.

In our last visit to the library, we spent some time in the audio book section, or the "read-alongs" as my kids call them. My youngest, L, at four, checks out quite a few of these because it's an easy way for me to have him attentive to books even when I can't be the one reading along with him. He loves the musical backgrounds and bonus songs that some of the books feature. His big sisters were reminiscing about their own experience of these picture books with audio and lamenting that they don't have the fun of these any more.

Seeing that I had a teachable moment right in my hands, I walked with them to the audio books for kids section. Right away, they recognized titles that they had read and some that were on their wish lists. C, our newly confident reader, was happily surprised to find Mr. Popper's Penguins, one of her older sister's books that she'd been eyeing for a while. She hasn't quite had the gumption to pick it up on her own, but knowing that she could be read to and follow along broke down her fear.

Through their elementary school, M and C are required to read or be read to a certain number of minutes per week. I have seen C's confidence grow as she listens along to the British narrator of the story tackle the complicated words and phrases with her. She's able to sink into the story a bit more and use her imagination to make the scenes come to life. This is not a substitute for her independent reading time but a nice addition to her learning.

L memorizes his books through the great use of pattern, repetition, and song that professionals can provide.

M loves the opportunity to put in headphones and be given permission to tune out to dive into a book. Since I have no audio learners (save my husband) in the house, this exercise has been a helpful way for them to expand their learning styles, too.

Last week at 4:15, a moment I typically dread, I looked around to see all three of my children engaged in audio books - content, learning, and completely occupied. It was like a mini-retreat for me and dinner prep and dishes became an enjoyable experience. And we all came to dinner calmer.

Have you tried audio books with your children? Do you utilize them for your own reading? Check out Paige's recommendations for some great audio books.

xoxo, MJ

P.S. Thanks to Ileana for this helpful suggestion: "I used audiobooks all throughout my daughters childhoods. The youngest would drift off to sleep with a "story tape" after we finished with bedtime reading. She is now addicted and still listens to audiobooks as a young woman. I credit the good vocabulary of my children with this habit. I wanted to pass on these two resources of great audiobooks, one the D'Aulaires Book of Greek Myths read by Paul Newman, Sidney Poitier, Kathleen Turner and others. The other is a collection of tales and fables for children by Jim Weiss (he has a very soothing voice)." 


Mini Cooks: A healthy snack
Minicooks_red.png

It's time for another great recipe to enjoy with your Mini Cooks! Big thanks to Joy and Sheri for this awesome series. Today Sheri takes on snacks!

We keep our snacks, sorted sweet or savory, in our pantry on the low shelves and on the bottom shelf of the fridge so that the kids can help themselves as they'd like. I am all about independence and knowing when you feel hungry. I also want my children to make good choices.

Honestly, I have a love/hate relationship with snacks and my kids. Sometimes snacks can supplement our meals so well and other times they devolve into another dose of sugar. I'm always on the hunt for a healthy snack that will appeal to them. I think Sheri heard my silent plea to the world and created these yummy granola bars with her son, Noah.

I've never made granola, and I'm ready to dig in.

I love their circular nature, and they're sized just right for little hands (and stomachs). Hop on over to see adorableness meet healthy. Thanks Sheri and Noah!

Guess what? We have a great collaborative Pinterest board for Mini Cooks that you should check out for new ideas on fun recipes and tips for cooking with children.

Catch up on the series with the intro of “5 ideas for getting started with Mini Cooks” and don't miss Joy’s yummy breakfast of “Egg in a Basket”

xoxo, MJ

Paperclip Shamrocks

I'm more than a little bit Irish, and I'm ready to celebrate with lots of green and good cheer when St. Patrick's Day hits us in a few days. The kids and I decided that we needed to add a few lucky touches to our home in honor of the special day.

And guess what inspired me? Excess. What do we have a ton of? Yes, you guessed it paper clips! Let's use these to make our wire sculptures. Grab your pile of paper clips, a green permanent marker (Sharpies are awesome for this), and some lightweight wire.

Spread the inner loop of the paperclip out to one side. Your clip will now resemble a spread V or a checkmark.

Spread the two ends until they meet each other in a petal-like formation. Continue this process with the two other clips.

Grab light wire and wind it back and forth at the connecting point in the center of your shamrock. Use the excess wire to function as your shamrock stem.

Color the clip with your marker, painting both sides and the wire as much as possible.

Wind the stem wire around a pencil for a St. Patrick's Day topper. Tie the shamrock around a green ribbon and put it atop a special package. Stick in your lapel for a festive touch to your outfit! We planted ours with the lucky jade plant to wish our guests the luck of the Irish!

Happy St. Patty's, friends!

xoxo, MJ

Squeeze in Time for Play

How can you can tell which games you or your family love the most? As I discovered, they are the least photogenic. I adore board games; marathon monopoly weekends are a favorite part of my childhood memories. As a tween, my room was right next to the game closet (formerly known as the linen closet that was taken over by puzzles and family games). And Saturday evenings were meant for a tough match of Win, Lose, or Draw or a casual hand of pinochle with my parents.


Playing games as a family is not only fun and a sweet stress reliever, it allows families to get to know each other on new levels. Watching teamwork develop and competition rise and fall... even the teasing and antics all become a part of who we are as sisters, mothers, brothers.


I'm sharing our top board games for kids 10 & Under over on my Squeeze Time spot at Classic Play! Have I mentioned how much I love contributing to such a vibrant community? Thanks for having me back, Jen. Come check out our picks and argue with me over the quintessential board game...


Have a bright weekend, friends!


xoxo, MJ
Mini Cooks: Time for breakfast

Breakfast is our all-time favorite around here. We could have pancakes in the morning, cereal and toast for lunch, and dine over a stack of French toast with a side of eggs. Our diets would lack balance but, hey, we'd be happy for quite a while! Breakfast is also such a wonderful meal to invite kids to cook! Think of all the Hollywood portrayals of the red-faced, smiley children, thoughtfully carrying the tray of morning treats for Mom and Dad to enjoy in bed.

Well, that hasn't quite happened around here, but we do make it a practice to cook breakfast together on the weekends. Sundays are the best time to gather around the kitchen island and grab a mixing spoon. We bring the griddle out for small eyes to watch as bubbles appear in the circles of batter. We snack on chocolate chips (one for every year of your life and extras for every person in the family who loves you!) as we take in the rich smells of the bacon crisping and popping.

I think it's important for my children to understand the process of food preparation. The act of stirring to smoothness, ladeling an even portion, waiting and watching are all part of the amazing observation of life, and I find becoming a part of this work has made them more interested in food and independence more generally.

Joy has a fun and easy breakfast meal with eggs (and gorgeous photography) that I can't wait to try with my kids. Guess what's for dinner tonight? More on Egg in a Basket.

And if you're wondering how to make your kitchen a great space for your mini cook, check out last week's ideas on inviting them into the kitchen!

Have you made an egg in the basket before?

xoxo, MJ


Pinners to follow: Learning activities & crafts

Oh, Pinterest, how I love thee. I use my account as the cutest filing cabinet ever to store my ideas for all areas of life. But sometimes the seas of Pinterland are too much, and I need a compass to find my way to just the right place. I'm launching a fun new mini-series to help us find the best of the best in areas that interest.

First up on the list: Pinners to follow for learning activities and crafts

Late February, amidst the sub-zero temps and gray sludge, is my favorite time to plan out summer learning for my three kiddos. I think I need the mental transport to warm and sunny moments. We also have our own Mommy and Daddy school in the summers, but not only that, I also love to throw in learning whenever I can.

Pinterest is a fabulous resource for teachers and parents to connect joy to education. But where to begin? Check out these three pinners and some of my favorite boards.

Melissa of ImaginationSoup.net

Melissa is a Pinterest expert. In addition to her keen knowledge of the platform, she is a dedicated teacher, writer/blogger, and an involved mom. Her boards have specific information on learning apps, literacy activities, and fabulous gifts for kids.

My favorite pins are her book list picks for very specific audiences, including Halloween books, great series, baseball reads, comic and graphic novels, and "Can't put them down" guides.

Emily of Second Story Window

Emily fancies the celebrations and joy of life with children, and she's a gal after my own heart. She's also a teacher and momma who creates educational materials over on her site.

My favorite pins are her 21 "little" boards. If you are looking to engage with your toddler to preschooler, there is a virtual plethora of goodies to be found in these well-categorized boards. She is also a collaborative soul so check her mega boards like the Kid Blogger Network Activities and Crafts and the New Teachers boards in particular.

Allison of No Time for Flash Cards

Allison is dedicated to the enjoyment of learning (bring it!). She focuses on early learning and play, and every time I visit her site, I'm inspired to get down on the floor and create something with my kids.

My favorite boards are her subject specific ones covering science, math, and children's book related crafts. Also check out her board just for boys that has so much good messiness and learning to offer.


Do you have favorite pinners to suggest? I'm always looking for the best finds.

And if we're not pinning buds yet, find me over there at MJ | Pars Caeli.

xoxo, MJ


Mini Cooks: A recipe for success

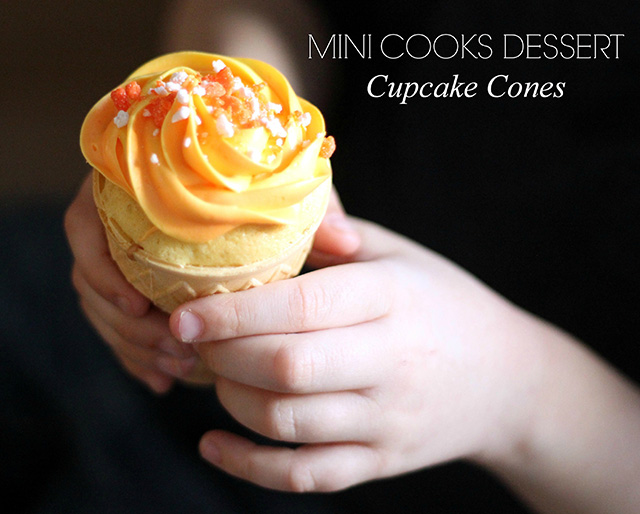
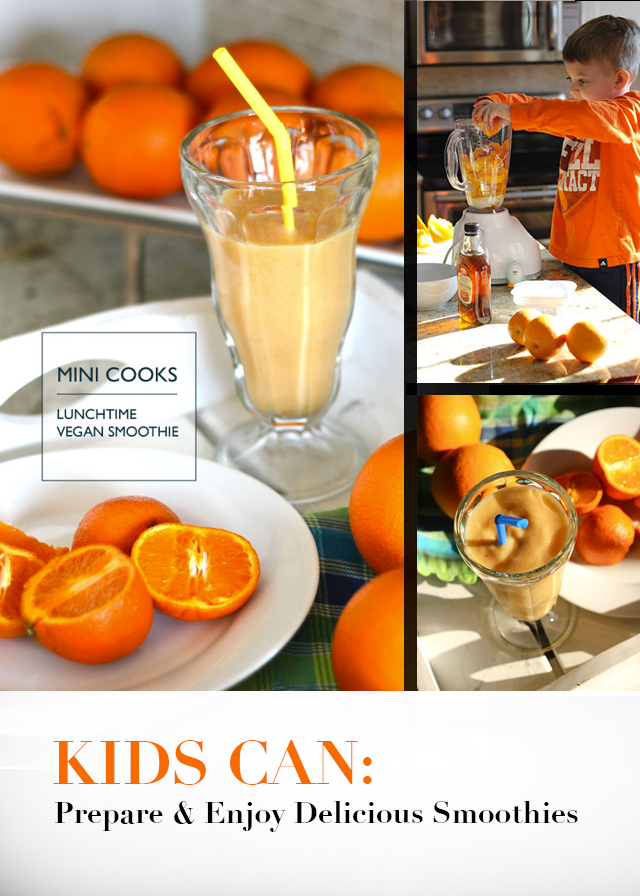
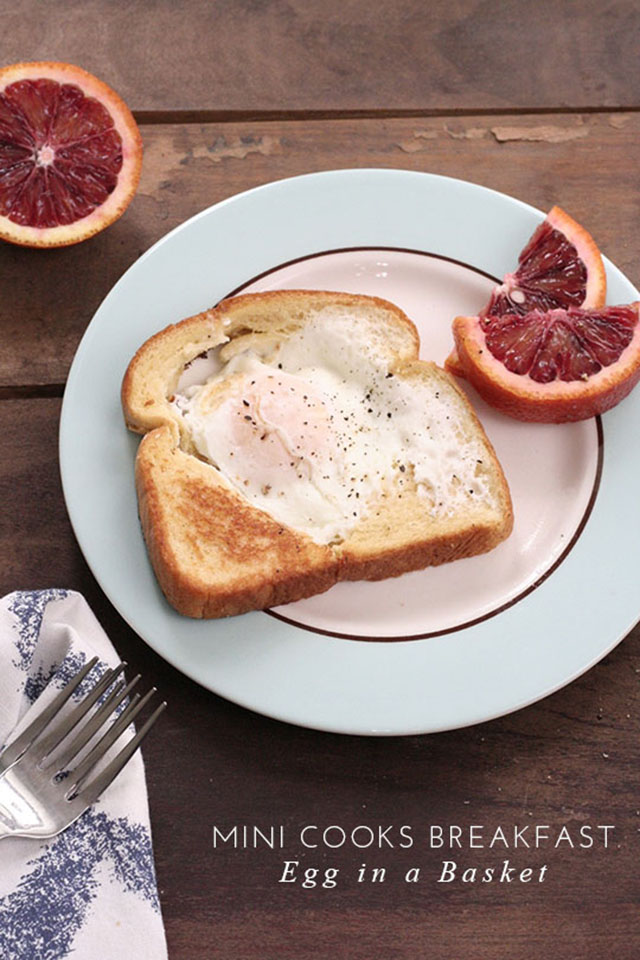
Every Wednesday for the next six weeks join in for a fresh collaborative series called Mini Cooks. I'm teaming up with Sheri of Donuts, Dresses, and Dirt and Joy of Frock Files to explore the culinary world through the lens of children! We'll be offering you simple recipes and cooking adventures that you can do with your children, nieces/nephews, neighbors, and more.

We've been cooking up (pun intended) a fabulous series to give you practical recipes as well as helpful ways that children in your kitchen can get involved, learn important skills, and grow to love the foods they create. I'm delighted to kick us off with five ideas on how to enjoy time in the kitchen with your mini cooks!


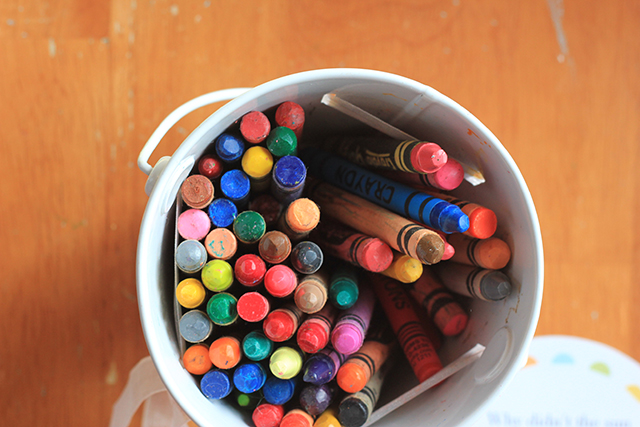
Cooking is more comfortable when the tools of the trade fit your size. Take a look at your drawer or canister of kitchen gadgets and see what might work best for little hands. Utensils need not be used as they were originally intended... a brightly colored measuring spoon can work to mix ingredients and playful plastic cups can be a great substitute for larger adult measuring cups. Or maybe make a splurge for a magenta spatula or little egg whisk to let your littles know that they were thought of, too, in the process of food preparation.

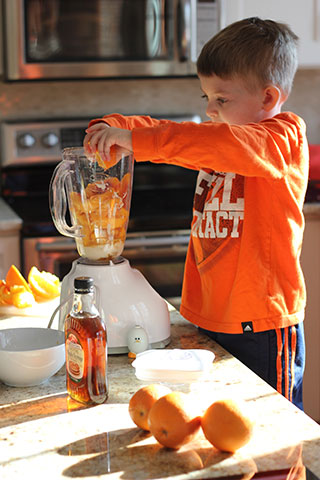
Be sure they have a safe and secure way to reach countertops or consider taking the cooking process down to their height at a kitchen table or play table.

Dress up is always fun so consider if mini aprons and chef hats might be your thing!

Perhaps the aspect that keeps our children out of the kitchen more than any other is safety. Ovens, ranges, knives, and processors present very real concerns. Our job as the big chefs, if you will, is to make sure the space is set up for success and that we monitor mini cooks in the kitchen at all times.

First, be sure to alert children of possible dangers and help them understand safety zones. Model good locations to stand when cooking by the range, opening the oven door, or flipping on the griddle. Where are hot spots? What is breakable?

Remember to teach clean habits during the prep and clean up processes.

Of course, certain processes are not child appropriate, and mini cooks need to understand this, too. Children can still be engaged while adults take on the more risky elements.

This one I love. When my children are really involved and enjoying our food prep, it's a direct result of the pre-planning I did to make it a success. Having all of the pots, pans, bowls and tools washed and ready to use; thinking through the preparation process and what ages can handle what skills; talking with my children about what recipes they want to try.

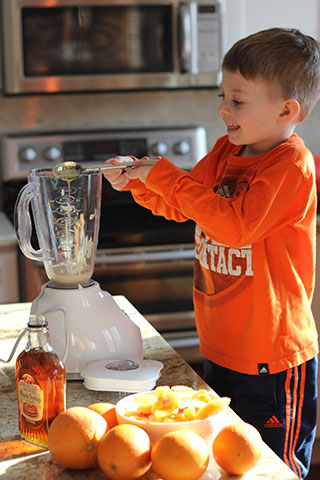
In our house, it's a rite of passage to be able to use the hand-held mixer. And from the point that someone can stand on their own, my children know that they are welcome to hold the measuring cup over the bowl. My oldest, M, now 9 is excited to have the cutting board and dicing responsibilities now. Think early and often invitations to participate!

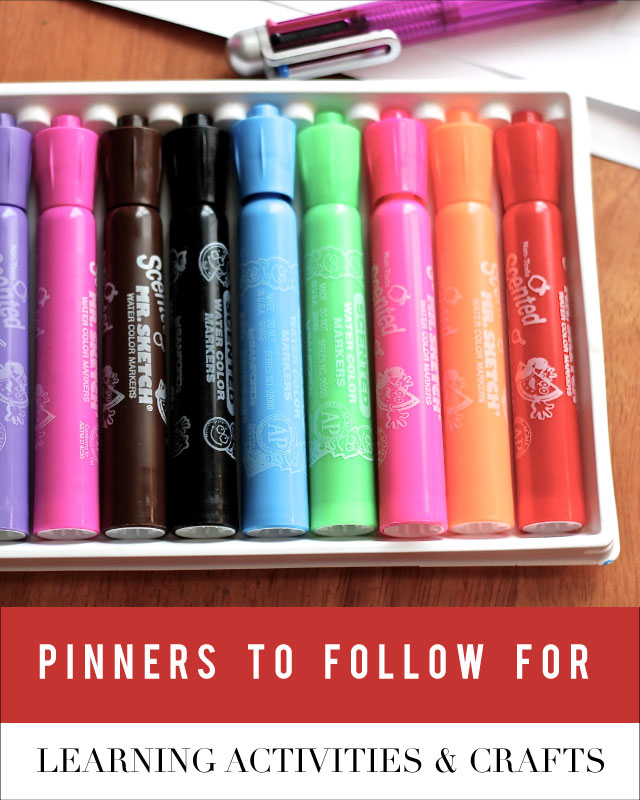
Forgive this former teacher, but I cannot pass up the amazing teachable moments found in the kitchen. From the history of recipes to the geography of the people who created them to the mathematics of measurement. From nutrition and agricultural learning to business and art lessons, the kitchen can become the most fertile learning ground in your house. Let it be!

Every child has her or his own limit on the messy they are willing to do. My younger daughter, C,  embraces and wears all things sloppy as she bakes. My son wants his hands clean as soon as they get wet. And neither perspective is good or bad. Try to expose your children to both sides. Engage in the messiness of goopy recipes that require hands on and use the tongs and scoops that can keep hands clean.

And remember that floors, sinks, counters, ovens, and even ponytails can be cleaned so that your mini cook can feel good making the necessary messes for his or her masterpiece!

Join us next Wednesday as Joy brings us a simple breakfast treat to entice your mini cooks into the kitchen.

Big thanks to Joy and Sheri for your incredible creative touch!

xoxo, MJ

The best kind of heart attack

Happy Valentine's Day, lovelies!! Have I told you lately that I love you? Today is the day to do it. And I do! Thank you for all your love, commenting, faithful reading, and support. How are you spending your day and/or weekend to celebrate? We have small plans to go out to a movie together and enjoy a heart-shaped pizza, but I'm mostly looking forward to the warmth of the fire and snuggles on the couch as we tune into the Olympics.

Valentine's day with all the color and emotion is one of my faves! I can't help it; what can I say? I always wanted to work for Hallmark as a child.

The great people of Cricut sent me (and many other talented folks) a gift of crafting goodies including stacks of hearts in all shapes, sizes, and colors and encouraged us to give someone we love - a heart attack. This is only the best kind, of course... so I decided my daughters needed some extra lovin' in their lunchboxes. AND, I can't resist an opportunity to make a pop up heart.

Grab your crafting wire, spin it around your finger to create a coil, and washi tape it to the lunchbox. Ta da - a surprise I love you pops out as you open your lunch!

These hearts came pre-cut and ready to string for the perfect drawbridge banner!

And who says your mesh pouch can't double as a banner hanger to send some extra hugs and kisses?

That intricate cut Valentine? All thanks to the fabulous Cricut Explore. Thanks for making me look like a rockstar mom!!

Why not go over the top a little today? Or reach out to everyone you love? Let's LOVE BIG.

Happy Valentine's Day!

xoxo, MJ


Valentine (no sew) t-shirt bag
Every now and again, I add features or links to posts from companies that sponsor the blog. When I do this, I'll let you know right at the top of the post. Sponsor companies are ones that I select and shop myself. Products are theirs, but opinions are mine. Today's valentines were selected by me and provided by Minted.
PC_valentine.jpg

Happy (almost) Valentine's Day, friends! We are in full-on Valentine prep around here with classroom parties galore. The great folks at Minted offered us classroom valentines of our choice (and, oh, the choices!), and I'm pretty sure these are the nicest valentines we've ever sent. They came personalized with my daughter's names, too, so we've had fun adding special touches to the envelopes (hello ring pops) since the hard work was already done!

Since our cards are stepping it up this year, we decided to take our valentine container up to the next level, too. Did you decorate shoe boxes to collect your valentines as a kid? Or make a heart complete with doilies and ribbon to hold your cards? I did, and I loved the creation of the container almost as much as the cutesy notes themselves.

Well, times have not changed, but instead of gluing my box or envelope, my kids and I crafted some sassy t-shirt bags to tote our love notes. These bags are super easy, upcycled, and take less time than construction paper and glue (no...really). I have a sewing machine that loves dark corners of my basement, and I wasn't ready to change its mind for this project so I found this idea and made it valentine.

PC_valentine_1.jpg

(And also, I love that my daughters were most excited to send their teachers cards!)

STEP ONE:

Dig to the bottom of the drawer, or for us the bag of giveaway clothes. We found a pink and a red t-shirt that were too small to wear but in awesome shape, ready to be remade. *Just a note, if you're making a bag suitable for kids, use a kids t-shirt so that the bag won't be too large for their size.

STEP TWO:

We wanted a blank canvas so we turned the shirt inside out. Trim off the tag as well as the sleeves (with a little extra for the handles). Next trim a rounded or squared shape from the neckline to create the handles of your bag.

PC_valentine_3.jpg

STEP THREE:

We made our bag with three holes in the bottom and therefore we cut three slits at the bottom of the shirt, about equi-distant from one another.

STEP FOUR:

With the sleeves that you trimmed, cut 1/2 inch strips the entire length of the sleeve width. Pull on the strip to make it curl on the edges (neat-o trick).

STEP FIVE:

Grab one of the strips, pin it with a safety pin on the end and feed it through the seam allowance at the bottom of the shirt. Thread it through two sections of the shirt, pull the cord, and tie a knot. Continue to do this with the two other strips and the remaining seam sections. Tie all ends into one large knot at the bottom of the bag.

PC_valentine_4.jpg

STEP SIX:

Grab your freezer paper and cut a heart stencil. Apply paint evenly with the brush or sponge of your choice. We chose a metallic paint to add some shimmer to the bag and stamped simple hearts on the front and back.

PC_valentine_6.jpg

That's all there is to it! Our first shirt took us 20 minutes with painting included, and we whipped up the second in under 10.

PC_valentine_11.jpg

My 9-yo could craft these on her own, and they'd make great party favor bags for a sleepover or to go bags from a crafternoon.

PC_valentine_7.jpg
PC_valetine8.jpg

Maybe gift wrap for a galentine's day present?Or make one for yourself to show that you love Love Day!

PC_valentine_10.png

Happy Valentine's, dear readers. You all are the sweetest!

xoxo, MJ