Posts in DIY 2
Make It: Washi Tape Frames

Hi there, lovelies. It's wonderful to have you back here again. I missed you at the end of last week, but I promise I've been working some magic behind the scenes to move Pars Caeli to a new level of fabulous.

I had a wonderful birthday - thanks for all the wishes - that was topped off by a fantastic performance of Wicked. Though I'd heard the music and read the book, it was my first time seeing the musical, and I loved it!! Many other special, special moments continued throughout the weekend and into Mother's Day.

PC_mothersday.jpg

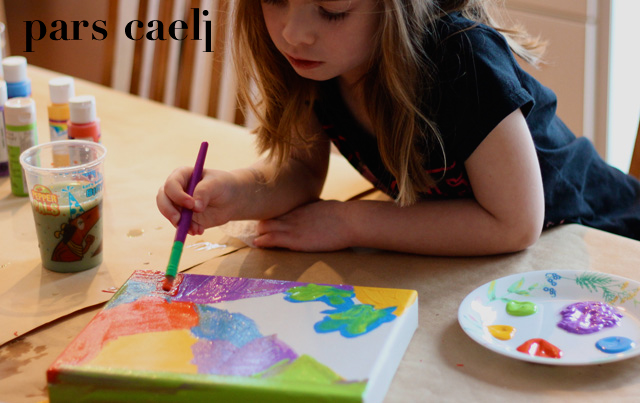
I have definitely grown into motherhood and grown from motherhood. Lately as they are now 3, 5, and 8, I find myself staring at my kiddos, amazed at the people they are becoming. Where did these lovely souls come from, and how did I get so lucky to share in life with them? I'm not sure, but I am most definitely humbled and grateful.

And on that note, I have an easy DIY I want to share with you. I made these cheeky notecards with vinyl letters last week that I'm stuffing in packages headed out to some of my favorite bloggers who joined in For the Love of Blogging series.

One of my favorite parts to these bundles are some sacred words.

These inspirational quotes come directly from the writers themselves.

I wanted to create something special for these writers, photographers, artists, and stylists. And as any crafter knows, washi tape is the most forgiving medium around so I was able to adjust and rework the prints as I wanted.

PC_washitapeframe_.jpg

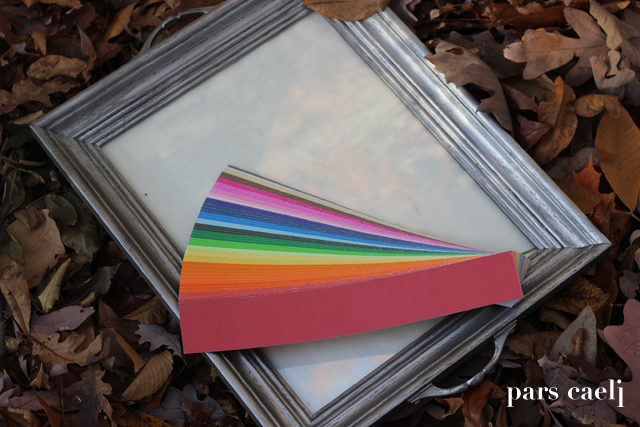
Here's what you need: cardboard, fun paper, glue, washi tape, and a bulldog clip for hanging.

I treasure the words these bloggers shared with me. And I hope they treasure their own words in the same way. Sometimes we discount our own wisdom, don't we? I think with these prints around, it will be a lot harder to do!!

PC_washtape2.jpg

STEP 1: Design your print. Load paper. Print.

STEP 2: Trim print and cardboard to the same size. These are 5x7 but make them in any size you'd like.

STEP 3: Glue paper to cardboard. I used rubber cement just because I love it.

PC_washitape_6.jpg

STEP 4: Add washi accents. Make sure that you use the washi tape around the edge to combine the cover the cardboard/paper seam.

STEP 5: Add a washi either right next to the framed edge or a bit closer into the center for more of a matted look.

STEP 6: Attach a bulldog clip for hanging!

PC_washitape_5.jpg
PC_washitape_3.jpg
IMG_1725.JPG

Have you ever framed your own words?

xoxo, MJ

P.S. A brand new Celebrate the Normal is headed your way on Wednesday; don't forget to tag your photos. And, I'll be joining in Anne's Love Yourself in a special Tuesday post tomorrow. Hint: The temptations of Photoshop.

Make It: Vinyl Letter Cards

Hiya, friends!! How are you? I'm still in a bit of a fog from an active weekend of sports, spring cleaning, and one of my very favorite places... Lake Michigan. The Lake is a fabulous source of renewal for me amidst this land-locked farmland (which I also love).

Friday night left me a few moments to craft and create, and today I'm sharing a super easy DIY with you! I picked up some vinyl letters from Michael's during a great sale - and in one of my fave fonts, Helvetica - and I thought they'd be perfect for the packages headed out to the great ladies of the For the Love of Blogging series.

PC_vinyllettercards.jpg

I kept the text simple to accentuate the fun of thick, vinyl letters.

PC_vinyl2.jpg
IMG_1826.JPG
IMG_1827.JPG
IMG_1828.JPG

Super easy, full of wit. Just my style.

I can't wait to send these on their way! .

Join me back tomorrow for a very special Tuesday post, inspired by the awesome Ann and her fabulous new series.

Let's get our game faces on for a week of big, big joy.

xoxo, MJ

P.S. A little later this week, I'll be showing you what else is in the mail for these wise women!!

A DIY for Lent
PC_PaintingforLent.jpg

Amidst the super cute, heart-shaped posts and the irresistably pinnable pink and red vignettes floating around the interwebs, I'd like to offer a DIY to break you into... Lent. For those of you who may be confused, this year Lent (the season leading up to Easter) began yesterday with Ash Wednesday and will continue for the next forty days. It's a time of reflection and growth, where we reserve our Alleluias and songs of praise, and focus inward on the change within ourselves. So why not have a DIY to accompany it?

Tell me you've seen this technique on Pinterest... The one where you use a canvas painting and adhere text, like vinyl lettering over top of it, paint over the entire surface to then remove the vinyl letters and reveal the great quote constructed from the colors and strokes of the painting underneath? Yes? No?

So that one got me thinking... how about a little Lenten project?

PC_paintingforLent_1.jpg

Here's what you need (or what we used): 8 x 10 canvas, assortment of your favorite paint colors plus black, brushes, vinyl letters.

PC_paintingforLent_2.jpg

My daughters were d-lighted to be involved with this one. I asked each girl to paint one half (diagonally for interest) in five of their favorite colors. As we brushed on the brilliant and quiet tones, we talked about our blessings, many of which the girls represented in their pictures. After the paint was definitely (ack, so much patience required) dry, we added the vinyl lettering, careful to place each one squarely in place.

PC_paintingforLent_3.jpg

Before adding a black layer over the entire top surface, I used a pen to press down the letter edges to be sure no sneaky paint would leak underneath. Here's our creation, full of color and blessings.

PC_paintingforLent_4.jpg

Time to cover up the Alleluias and keep them in waiting until Easter. Check out the cool texture that's revealed.

PC_paintingforLent_5.jpg

And then it's all covered.

PC_paintingforLent_6.jpg

So.. in another 39 days, I can give you the grand reveal.

PC_paintingforLent_7.jpg

Wait, wha? Seriously? A DIY cliffhanger. Here's what we'll have on our table throughout Lent, reminding us of all that we've been given and reminding us to let our goodness shine through the darkness.

The final product will be reposted here on Easter. Happy Lent!

xoxo, MJ

Love Mug Toppers
PC_lovemug2.png

The boxes of valentines have been purchased and the myriad of heart pictures, stamping, cards, and cut outs have begun around our house.

I've been a romantic nearly my whole life, decorating my little girl room with piles of pink and red construction paper heart chains. As I grew older and my romance fell upon beaus, I'd create oodles of cupid-speared hearts written in curlicues and glitter and write out love poetry to adorn my walls and windows.

These days my adorations fall upon 3 little people and a great guy, and I find myself drawn to the simple, daily ways to say I love you always and forever (and I support every effort to fill the house with heart-shaped everythings).

We've been having a ton of snow around here lately, and everyone, save me, loves to be out in the snow and in the sled so I have galiantly taken on the role of Hot Chocolate Barista. My people claim that I am THE best hot chocolate maker. Ever. I'm not sharing my secret recipe, but I am sharing something to make Valentine hot cocoa, coffee, or tea extra sweet.

I've had this container of bamboo forks ever since I hosted a Hunger Games bookclub party with friends, and I've been awaiting Cupid's prompting to use them.

Here's what you need to make some for the lovelies in your life:

 + Brownie mix (and necessary ingredients)

 + Heart mold baking tray

 + Bamboo forks (I dyed mine red for the holiday with food coloring. Just squirt the food coloring right onto the skewer and spread.)

 + Notes/String for special messages

PC_lovemug3.png

These are basically brownie bites so make the brownies more on the cake than fudge side. Bake the bites a little less than half the total time for a full sheet of brownies. Keep an eye on them as these times vary.

PC_lovemug.png

Once the brownies are cool, carefully spear Cupid's arrow through the middle and wipe the end clean. Add special notes with string or twine or leave them as is for a yummy addition to any hot drink.

PC_lovemug1.png

Happy Valentine's, dear friends. Who's ready to cut up some paper doilies with me?

xoxo, MJ

Prepping for Advent: Make a Jesse Tree
PC_jesse1.jpg

Friends, have you noticed? Christmas is just around the corner. This Sunday marks the first Sunday in Advent. It's the first of four Sundays that lead us right into Christ's birth.

I've seen so many adorable Advent calendars (that begin on Dec. 1) like this one, and I want to share a different kind of countdown we use in our house. I made these for my parish with about 100 other families last year, and it's a super fun family craft to make and keep for years to come.

Have you heard of a Jesse Tree? It's a way to get the kids involved in the countdown to Christmas while learning more about the family tree of Jesus. Through each ornament, from creation through the Old Testament. Usually a Jesse Tree would be made from branches with ornaments hung from the branches. We made ours in the form of a banner that can be easily stored from year to year.

We used our family hands to create the tree. With our family of five, we had each person trace their right and left forearm and hand. We became the branches from which the (velcroed) ornaments hang. I adore that I will have those little hands forever captured as the tiniest of branches.

PC_jesse2.jpg

Wanna make one? Here's what you need:

  • 1 yard of purple felt (it's a traditional Advent color)
  • 1 yard of brown felt for the limbs and trunk
  • Printed or drawn symbol ornaments
  • Velcro to attach
  • Dowel and ribbon/twine to hang.
  • Fabric glue or hot glue

Lay out your felt and trace forearms and hands. Cut out and arrange limbs on purple felt. Cut out a rectangular trunk to fill out the bottom of the tree. Glue down. Print and cut symbols. Laminate and add adhesive velcro (only one side is needed to stick to the felt) to the backs. Wrap the top two inches of the purple felt around the wooden dowel and glue down the edge. Knot off twine or ribbon from the dowel to hang. Viola! Keep your waiting ornaments in an envelope near your prayer booklet until they're ready to be used.

Currently our ornaments are paper. My oldest daughter has expressed a desire to recreate the images so I'm looking forward to capturing her artwork this year or next and making these circles a little bit more time-resistant.

PC_jesse3.jpg

All of these supplies are incredibly easy and affordable for bulk buying if you want to make a lot of Jesse trees at once with your Church or school group.

The Diocese of Erie has a lot of helpful Advent resources, and our ornaments and the booklet I created came from their writings. Find the complete set of reflections plus small and large versions of the ornaments here. All of the illustrations by Carolyn Pikoulas and text by Anne-Marie Welsh for Faith magazine, published by the Diocese of Erie.

Ann Voskcamp and Nancy Rodden also have a great free printable book that includes full color illustrations of each symbol and examples of very cute felt ornaments can be found over at a Shower of Roses.

Here's the copy of the booklet I created for our Church and our home. We keep it on the dinner table and add an ornament every evening (when we also add a piece to the Nativity scene and light the Advent wreath - we're all about evening traditions). The booklet takes you through what symbol to add for the day and even bring the Scripture in so that you only have to go to one place for the reading and reflection. I promise the this ritual won't add more than 2 minutes to your dinner time, and you might be surprised by how quickly this activity helps (you and) your children get a handle on the major stories of the Bible.

PC_jesse4.jpg

How do you count down the days? Do you have a special calendar or tradition to take you through Advent?

XOXO, MJ

Make It Monday: Herringbone Tray
PC_makeitmondaytray4.jpg

Happy Monday, friends!! How was the weekend? We hung around and raked leaves, watched some football, and handled some crafting, too. As y'all know, I'm a great adorer of autumn (yo, Instagram friends are you tired of my leaf photos yet?), and I've been looking for ways to get my indoor spaces decked in color, too, as the leaves now begin to shed their brilliance and Halloween is coming right around the corner.

I don't do spooky or the darkness of Halloween, but I was inspired by the shapes and lines of Landee See, Landee Do's holiday post. And I thought it'd be fun to transform a great tray that I've had for a while and DIY it up.

PC_Makeitmonday.jpg

Here's what I used. This great tray was a DIY present from a dear friend for our wedding. Chris converted a large frame into tray through handles and paint. I added some great colored cardstock in complimentary Halloween shades of orange, black, white, and gray. And pulled out the paper cutter and some glue!

PC_makeitmondaytray.jpg

Herringbone has been on the brain lately as I see fall fashions appearing in stores and catalogs. It's a simple geometric pattern that my daughters loved putting together with me.

PC_makeitmondaytray1.jpg
PC_makeitmondaytray3.jpg

I love the great graphic quality, and it's the perfect perch for the growing mounds of mini pumpkins and gourds we're accumulating.

I'm also planning on mounding it up with candy (way more than pictured here) for our adorable Trick or Treaters next week!

PC_makeitmondaytray5.jpg

How do you deck your house for Halloween? 

XOXO, MJ

Rainbow Circle Garland

I'm delighted to show you a simple, quick, low budget project that you (or your kids or grandma or neighbors) can craft in minutes and enjoy for weeks to come.

Last week I joined some other great bloggers to put together baggies of crafts for the Happy Craft Cart that St. Jude's Research Hospital offers its patients.

Hoping for something festive and fun, I thought rainbows. How about a Rainbow Circle Garland?!

PC_rainbowcircles.jpg

All you need:

  • Colorful paper
  • Twine/string/yarn
  • Glue (I used rubber cement but glitter glue would make it sparkle!)
  • Circle craft punch (not necessary but very efficient)
PC_rainbowcirclesupplies.jpg

Step One: Decide how long you want your garland or strand (if you want to hang them from a door frame or above a window). Cut twine.

Step Two: Punch out circles. Each circle cluster is a triad so you'll need three times as many circles as you want to glue on.

PC_rainbowcircles2.jpg

Step Three: Pick three of your circles. Fold them in half. Glue the back halves of each circle. Press two of the circle halves together, sandwiching the twine in between them. Glue the final circle to the other halves. *To make sure you get a rainbow effect, keep switching the combination of three colors.

PC_rainbowcircles3.jpg

Step Four: Find a spot that needs some cheer. Hang over a headboard, around a curtain rod, from a door frame, or lay across a table to surround yourself in rainbows.

PC_rainbowcircles4.jpg

Garlands spread festivity, don't you think?

PC_rainbowcircles5.jpg
PC_rainbowcircles_6.jpg

What are you making this week?

XOXO, MJ

DIY for Daddy's Day
PC_daddysday_3.jpg

We have birthday and Father's Day celebrations ahead, and we're excited! How are honoring the dads in your life? We keep things pretty simple for Mother's and Father's Day, and we're looking forward to celebrating my hubby with a drive-in movie and some grill time.

I feel so blessed to be married to a man who has embraced-with both arms wide open-all that is fatherhood. He pushes me to be a better mother because of the great parent that he is...supportive, challenging, cuddly, and fun all rolled into one. The kiddies and I decided to craft up something for the Best Daddy, something simple to offer him a high five for all that he does. My hubby is an amazing cook, and he can spin circles around me in the kitchen.

Our DIY is a Helping Hand towel for Dad. We used three supplies: three good quality kitchen towels (I chose a neutral shade to go with my kitchen), white fabric paint (color chosen to make the prints similar in tone to the towel), and a foam brush.

PC_daddysday_1.jpg

Simple, simple...coat your child's hand in paint. Lay it on thick. It will tickle. :) Help them spread their fingers and place their hands straight down. Hold 1-2-3, and pull straight up.

Follow the instructions on the paint for setting.  Allow 72 hours before washing, and hover over the painted surface with a hot iron to finalize.

PC_daddysday_2.jpg

We chose textured towels for their absorbency so I needed to go back into to fill fibers not covered by the initial print. The kids loved getting gooey, and they've all had plenty of experience making handprints, so it was a start to finish 15-minute craft. Yahoo!! The wrinkles that don't photograph so well will work themselves out after the first wash and our darling handprints will remain. I love peeking at them from across the room and seeing the preciousness of childhood waving back at me.

Happy Father's Day...to my hubby, to my awesome, fun-loving Dad, to my brother, to my father-in-law and to all you amazing, wonderful men who complete the great story of parenthood. We adore you.

Have a bright weekend, friends. Can't wait to show you what's in store for next week. Happy summer!

XOXO,

MJ

PS. One of my blogging goals was reaching yesterday! Gabrielle at Design Mom published my response to one of her Design Mom Asks. Design Mom was the first blog that I followed, and I've been faithful for years. So, when she opened up the chance to respond to a GREAT BIG question, I gulped down that bait. I'm embarrassed to tell you how long I spent on my answer, but then again, when you see the question, perhaps you'll agree that the topic is one we should probably all mull over. Cheers! Check it out

DIY Teacher Chalkboard Frames

Today's the last day of school for us. It's been a wonderful year, especially for

M

who had an amazing first grade teacher. No matter what new technology comes into play, nothing will ever compare to a high quality, energetic, knowledgeable, and creative teacher. We've been really blessed.

The small gifts and gestures we make as the year comes to a close do not compare to the real earnings these great individuals should take home. However, we want to do our part to let these amazing educators know the lasting impact their gifts, freely given, have made on our children.

My kiddos wanted to be a part of the gratitude this year, and we went DIY shopping together at Michaels for a project that would be appropriate for them to create and enjoyable for their teachers to receive. I think this one hits the mark.

We picked up a stack of unfinished frames from Michaels that retailed for $1.90 each! Using Martha Stewart's Chalkboard Paint and a foam brush, we added three coats of paint over a two-day period. I looked through our photos from the year to select ones that reflected moments with each teacher.

Press print, trim, and add great chalk touches from your child.

I added a note on the back letting teachers know that these are fully functional chalkboards so each can feel welcome to redecorate when they're ready.

Here's M's snack for today. It's a bittersweet day of mom melancholy for sure.

Thanks for stopping over, friends! See you back here tomorrow when we'll be sharing in some more goodness.

XOXO,

MJ

PS. If you've been following along here at Pars Caeli, you know I love, adore, surround myself with chalkboards (see chalkboard notes and chalkboard message bowls).

Outdoor placemat DIY

When warm weather hits the Midwest, you'll find me eating every meal I can outside. I have no problem with the little challenges of outdoor eating (bugs, extreme heat, lawnmower noise), and I'm hoping my kiddos will catch the love for dining in the great outdoors.

We purchased a dining set for our deck many years ago, and the circular shape is a great fit for our fam of five. Finding cute, durable tablecloths for said table, not as great a fit.

So, rather than purchase another all-weather, old-timey looking tablecloth, I decided to create some durable placemats from a bright, striped oblong number I found at Walmart (for a happy $3). These summer stripes had me at orange. Seriously, just like Wilbur the pig, so radiant.

I made these in 30 minutes, and I'm ready to make another six out of the remaining fabric. Oh, and those happy potted succulents, see

how to make those here

!

My favorite was hearing

M

tell

C

, "Mommy made these for us." Yes, I did. So spill away, little ones! There's more watermelon and popsicles where those drips came from.

Are you an outdoor diner, too? Any tips to share on how to enjoy a great meal in the elements?

Happy crafting.

XOXO,

MJ

DIY Chalkboard Bowls

Happiness is a bowl of ice cream.

When we registered for our dishes (which are still in use ten years later), we selected some ample, deep cereal bowls. Lately, I've been looking for something a bit smaller and frankly more fun for our summer ice cream scoops.

And you know that I love all things chalkboard so I combined the love with the want for these simple charmers.

It's super simple to transform your favorite ceramic piece into chalkboard goodness. 

I bought three classic bowls from TJ Maxx for $1.50 each, and I ordered the chalkboard porcelain paint from Blick Art Materials for $4.99. All very reasonable.

To make, simply paint the shape that you want on the piece and let the first coat dry for one hour. You can see what one coat looks like in the photo below.

Add a second coat and let the whole thing dry for 24 hours. 

 Bake in your own oven at 300 degrees for 35 minutes. And voila! You have cute chalkboard bowls (or plates or cakestands or platters - whatever you can think up).

Here's the best part...

These bowls and the chalkboard elements are all dishwasher safe!

The kiddos are excited to write their names in the circles or their favorite flavors of ice cream or silly faces. So many fun possibilities. I promise to update this post with better-lit photos (these don't do the cuteness factor justice) when I can get these in some great natural light. I just couldn't resist sharing them with you on this Wednesday!

Thanks for stopping over! I wish you'd stay for some ice cream. I'll put your name on a bowl.

I'm pretty sure we'll be making more of these for some teacher presents coming up for the end of the year. Hope you'll give them a try, too.

XOXO, MJ