Posts tagged pillows
Using Pillows to Transition a Room
This post is a part of the Wayfair Homemakers network. I was compensated for this post, but the selections and opinions are my own.


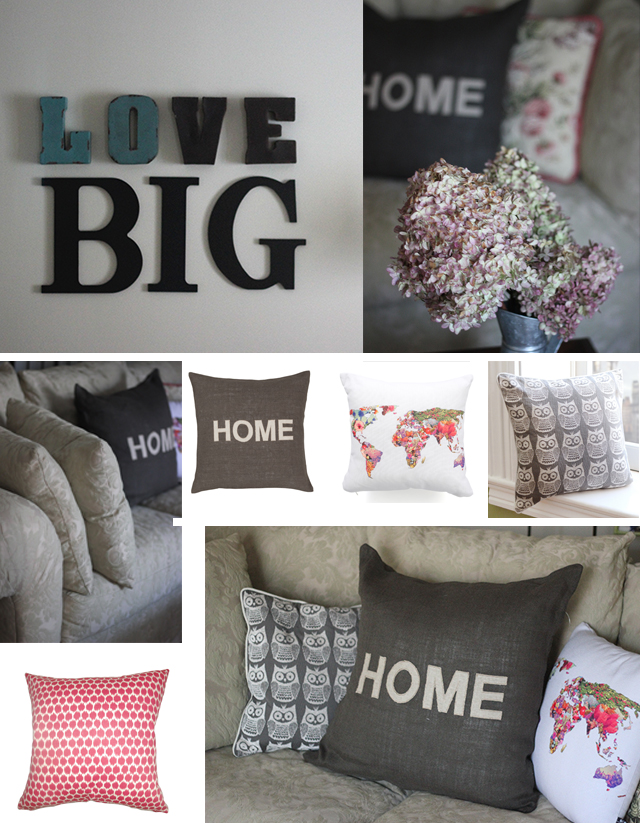
1. Home Pillow 2. Map Pillow 3. Owl Pillow 4. Pink Spots Pillow

When we first moved into our house thirteen years ago, we purchased the most comfortable couches we could find for our living room. The full couch and loveseat are so overstuffed that they fill the room almost on their own. I selected the most neutral tone I could find so that the couches would work with whatever we wanted.

I love these couches. I also hate them. And I'm ready for something with more style and equal comfort.

Our living room is now our art room, and I have big ideas for built-ins, striped walls, and modern furnishings. Right now, though, I have none of those, nor the budget to to make them happen so I'm making incremental steps to transition the room from tired and traditional to something creative and unique.

Pillows are an easy way to transition a room from season to season and now they helping me build my vision for this space with brighter tones and a little humor and playfulness. My friends at Wayfair have a great deal for you, too, if you're ready to start planning your remodel or redesign. The three we have had added a new sense of energy and are setting up the palette for our Christmas tree this year, too. Can't wait to show you that one!

WAYFAIR IS HAVING A PILLOWS & POUFS SALE!

They almost never run coupon codes, but the Wayfair Homemakers get to share this exclusive code!  The code is good for 15% off and is good from now until November 24th. The code is: WFPTP15

Let's spice up our homes, a little bit at a time.

Have a bright weekend, friends!

xoxo, MJ


DIY: Turn your child's art into fabulous home decor

It's Thursday and usually we'd have bookclub today to talk about Happiness. Meet me back here next Thursday and we'll catch up. on what we've missed. Instead I have two great days of DIYs to round off the week, wonderful readers!! After I get done with this monster workload, I'm looking forward to creating and crafting...and I'm inspired by Claire's awesome idea!! Check out more from Claire here.

>>>>>>>>>>>>

Hi again from Ireland! Today I'd like to show you a great way to showcase the art masterpieces (that are whipped up by the tiny hands in your life) with the help of some printable fabric sheets. I'm sure that like me, you have a whole folder of lovely artwork by a variety of mini-Picassos which shouldn't be hidden away, so this project will show you how to make one into a cushion so you can display their brilliance in a practical way.

Here is the original rainbow painting by Niamh, aged 3, which I scanned into my computer.

I asked her to paint it for the room in my beach house which is decorated with rainbows such as this one, which I took at Iguassu Falls in Brazil.

Next step is to print it on to fabric (non-shiny) side of a printable sheet such as these from EQ Printables which you can get

here

. I get great results just using my normal inkjet printer.

Let it dry for about 15 minutes and then peel off the plastic backing before soaking the sheet in room-temperature water for about 10 minutes to set the picture and then gently rinse the fabric painting.

The next step is to lay it flat to dry and you can use this time to choose how you will use your new fabric masterpiece. Purses, memory quilts, appliqué onto tshirts, bags, the possibilities are endless. I decided to make a cushion, so I measured the pillow insert I had chosen and then selected a matching fabric, which is a bright rainbow coloured polkadot.

If you are very proficient with a sewing machine then now is your moment to shine with zips, buttons and bows. I decided on the simplest option which was to cut four strips of matching fabric to sew to the sides of the picture, two shorter strips at the top of the picture. I think if you use a random patterned fabric this is much easier, as you then you aren't trying to match up patterns with the four sides!

Then sew two longer strips to the sides to make a square, or as close to a square as you can get! It doesn't matter at this stage anyway, as the real square will take shape when you attach it to the backing material.

You can then sew this completed cushion front to a backing material, right sides together and finish it however you want. Zips are good, and simpler than you think; however, I used a simple foldover finish by making one side of the backing square longer and folding it over, sewing the extra piece inside the backing to hold the cushion insert.

And there you go... kid's artwork beautifully decorating your room.

Here's another which demonstrates a 4-year old's explanation for how the dinosaurs became extinct!

This would be great for a children's bedroom, or a brilliant present for a doting grandparent. You could get the mini-artist to draw a picture of them and their grandparents, or them and their Daddy for fathers' day or with their Mummy for mother's day. I've also been making kid's travel art kits recently and one of their pictures would be perfect to sew on to the front to personalise them.

Now to choose the next picture from the folder to immortalise in home décor!

Thanks for checking out my rainbow cushion.     Claire

{MJ here. Uhm, can I get a rainbow room and a beach house, too? I promise to put cute kiddo pillows all over it!)