Craft Date: Burlap Placemats

Hi cuties,
Happy week to you. It's the last full one for September, and it's time to get your fall on. So far we have three oversized pumpkins on the stoop, a wreath on the door, and 3 large bags of apples hanging out in our kitchen. We're just beginning to crack open the wonder of autumn.

My pal, Renee, and I decided to get crafty last week, and we were choosing among some ideas we'd seen around the interwebs. Choices: yarn words, burlap placmemats, or concrete planters
With all the supplies ready at hand, we opted for.... drumroll please... the burlap placemats.

Renee was our shopper and purchased all that we needed (though it wasn't much) from the local craft store. Wanna do this craft date with a buddy of yours? Here are the simple ingredients:
- 3 yards of burlap - we made 10 placemats out of this amount with plenty spare.
- Paint - we had a variety of colors but opted for the black since it made the biggest statement against the brown texture
- Scissors
- Sharpies or stencils
- Fray stop or clear nail polish
- Patient friend (not required but makes it much more fun)
First we measured the size of a standard placemat and decided to cut ours to 14" x 18".
Renee has a beautiful home and even more beautiful children (three under the age of 4), and I'd like to take just a moment to thank her for hosting me and for putting up with my very crooked cutting of burlap.
We worked at her dining room table, and I laid out the fabric to get the best cuts. Inevitably the burlap would stretch and pull in one direction or another, and nice straight edges were no where to be found.
But! Never fret. Burlap is forgiving, and for this project we wanted to create a fringe... so we had a little wiggle room (and some repairing trims to do).

Burlap cut to size... To create the fringe on the placemats, pull one string on each edge until you achieve the desired length you'd like.

Next step adding the design. We both wanted words. Renee went with the names of her family members (except for baby E who might not yet appreciate burlap). I went with words of thanksgiving.
These dried really quickly, and we added some fray stop to the border. Simply turn the placemat over and trace along the entire perimeter.
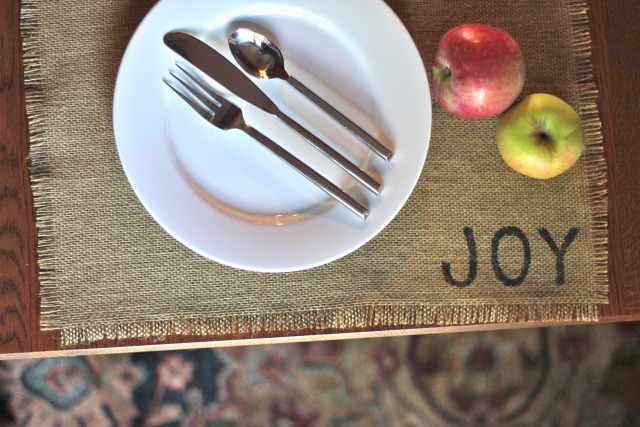
We've been enjoying our new placemats since last week, and the kids have been intrigued with their words at each meal. I love the bit of texture and some homespun goodness all tied together with a fun friend project.
Renee and I had so much fun we're making Craft Date a quarterly gathering. We're currently sketching out the winter project (got any ideas you wanna toss our way?)!

Also the idea of a Craft Date sparked a collaboration with Kim over at Design + Life + Kids. We'll be doing a project next Tuesday for Craft Date... one from the idea files last week... those amazing milk carton concrete pots. If you're dying to make some too, send me a message!!
Have a project on your mind and need a pal to get you motivated to create? Leave an idea in the comments or send me an email at parscaeli@gmail.com, and we just might be able to set up a craft date, near or far.
Because it's just more fun to do it together.
xoxo, MJ
PS. Renee, you're the best.